 FREE 1 to 3-Day Delivery on Orders $149+ Details
How to Install JLT Blow Through Air Box Intake (15-17 GT w/ Paxton or Vortech Supercharger) on your Ford Mustang
Installation Time
60 minutes
Tools Required
- 8mm Socket
- 10mm Socket
- Socket Wrench
- Socket Extension

Shop Parts in this Guide
BEFORE
1. It is a good idea to unplug the MAF sensor wiring harness and set it out of the way to avoid bumping it or possible damaging it. Pull up on the red tab, and then squeeze the release clip below the red clip while pulling away from the MAF housing. The MAF sensor wiring harness can now be set out of the way. Refer to the image below.

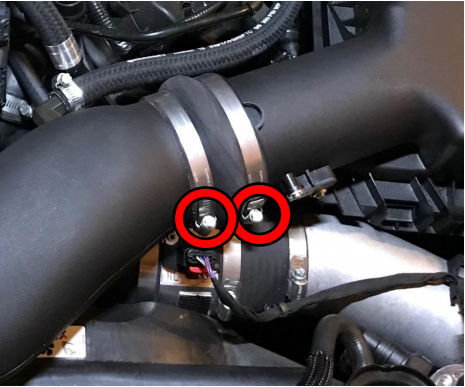
2. Loosen the 8mm bolts on the clamps securing the coupler between the air box and the blower inlet tube. Refer to image below.
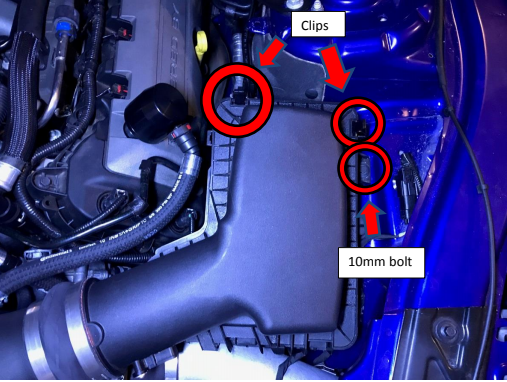
3. Remove the 10mm bolt securing the air box to vehicle. Unclip the upper airbox retaining clips. Lift up on the rear of the airbox lid and slide it towards front of vehicle to separate the airbox lid from air box. Refer to image below.
4. You can now separate the airbox lid from the silicone coupler. Be careful the clamp securing the airbox lid to coupler does not fall into engine bay.
5. The coupler can now be removed from the blower inlet tube.
6. The airfilter can now be removed. Pull the air box out. It is easiest removed by pulling up on the rear of box and rotating it over the the front. Watch for any wiring that might get caught on air box while removing.
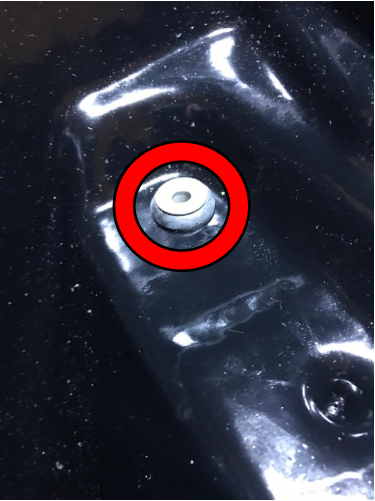
7. Remove the insert and rubber grommet that the 10mm airbox retaining bolt went through. Refer to image below.
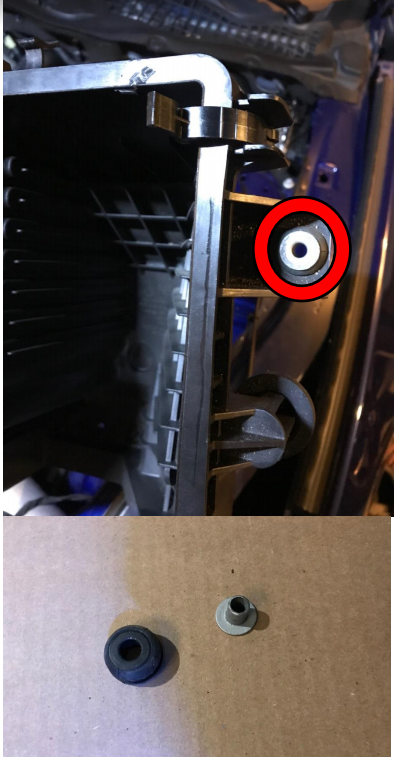
8. Install the insert and grommet in the JLT air box/shield in the same orientation as it was removed from the stock airbox.
9. Place the JLT airbox/shield in the vehicle rotating it into place in a similar fashion as the stock airbox was removed. The front of the box/shield going in first and the rear
rotating down into place. Check for clearance on surrounding components. Some
trimming of the box/shield may be necessary to clear cold side piping coming from intercooler going to intake manifold. Install the 10mm retaining bolt.

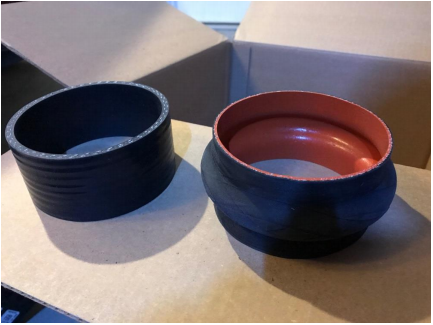
10. It is now time to install the coupler on the blower intake tube. You can use the coupler provided with the JLT kit (left in image) or reuse the coupler from the supercharger kit (right in image).
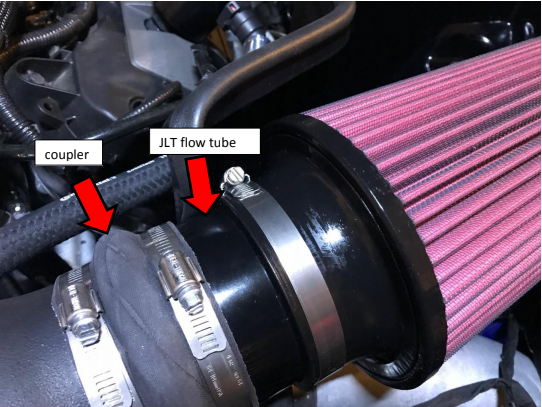
11. I chose to reuse the Paxton coupler as it allowed for a small amount of movement. This decision was based on the idea of having a small amount of angle movement at 10mm bolt the coupler which would help with the tight fit of components. Place one of the clamps on the blower side and one on the air filter side of coupler. Install the flow tube to the air filter side of coupler. Install the air filter to flow tube. Tighten all clamps.
12. Plug back in the MAF harness and push down the red clip.
13. Check all clamps for tightness.
14. Slowing lower the hood checking for clearance. It may be necessary to trim the
insulation on the hood for proper clearance.
15. The installation is now complete. Start car and listen/feel for any leaks.
16. Test drive.
Installation Instructions provided by AmericanMuscle Customer
