 FREE 1 to 3-Day Delivery on Orders $149+ Details
How to Install KONI STR.T Shock & Strut Kit (05-10 All) on your Ford Mustang
Installation Time
2 hours
Tools Required
- Jack & Jack Stand
- Torque Wrench
- 1/2 and 3/8 drive ratchet
- 7mm box end wrench
- 10mm socket
- 18mm deep socket
- 18mm box end wrench
- 18mm socket
- 15mm deep socket
- 15mm socket
- Adjustable wrench
- Needle nose pliers
- Loctite Blue
- White paint pen or sharpie
- Coil Spring Compressor (can be rented)
Rear Shock Absorber Removal and Installation (Rear)
1. With the vehicle on level ground still on the wheels crawl underneath and mark the shock you are not removing at the bottom of the dust boot relative to the shock (this will help later).
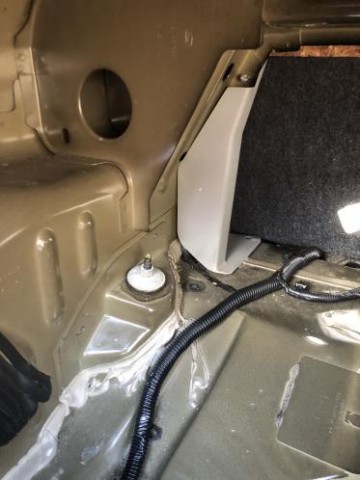
2. Open trunk and position carpet out of the way to gain access to the upper retaining nut.
3. Elevate the vehicle and support it on jack stands.
4. Remove both wheels.
5. Using a 15 mm box end wrench and a 7mm box end wrench in order to hold the shock from spinning.
Remove and discard of the upper retaining nut.
6. Using a 10mm socket remove the bolt holding the brake hose to the frame.
7. Using a 15 mm socket remove both stabilizer bar bolts and roll the stabilizer bar out of the way to gain access to the shocks.
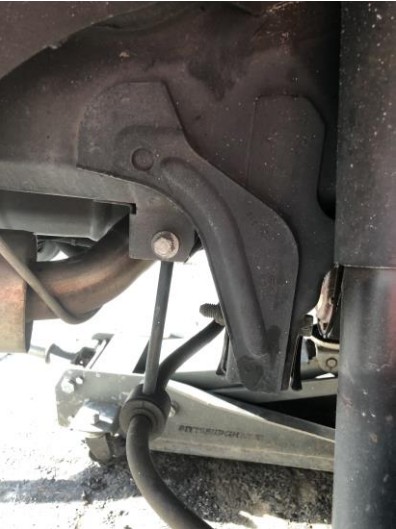
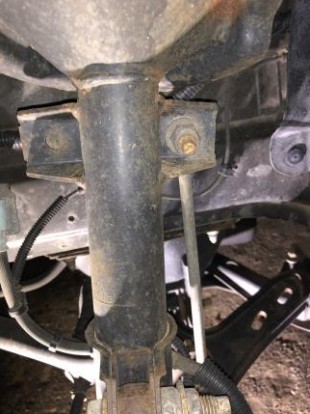
8) Using a 15 mm socket and wrench remove the lower bolt holding the shock to the axle.
9) At this point your shock should come lose, note it may need to be twisted out of the upper mount as the bushing may be stock.
10) It is a good rule of thumb when replacing shocks to also inspect and replace as necessary your bump.
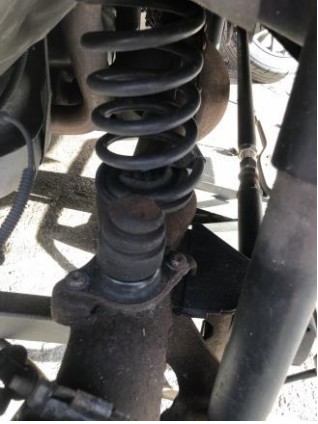
Stop and coil spring
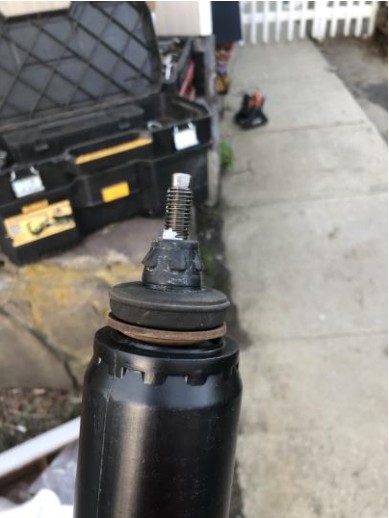
11. Put your new bushing and retaining ring on shock as shown.
12. Insert shock into upper mount, I found it is easiest to get a few threads started on the upper nut in order to keep the shock from falling out.
13. Using a jack raise the axle in order to get the lower bolt through the shock and started on the flag nut.
14. Ford calls for the shock to be torqued at curb height which is why a mark was made on the shock that was not removed, using a jack position the rear axle so that you are lined up with your mark thus simulating curb height.
15. Apply a bead of lock-tite to lower shock bolt and torque to 85 lb-ft using 15 mm deep socket.
16. Tighten upper strut mount nut to 30 lb-ft.
17. Reinstall brake hose bracket.
18. As you will need to get a curb height it is necessary to reassemble your stabilizer bar. But since it is coming right back off just snug them up *note that when you are finished with the other side these will need to be torqued to 85 lb-ft.
19. Reinstall wheels *note that after you have completed the other side you will need to torque the lug nuts to 98 lb-ft.
20. Lower car.
21. Repeat process for other side.
Front Strut Replacement
1. Raise the vehicles wheels and support using jack stands.
2. Start by using a 10mm socket to remove the bolt holding the brake hose to the frame as well as the strut.
3. Using needle nose pliers remove the plastic rivet holding the abs wire to the strut.
4. Using an 18mm open end wrench or pass through wrench set and a 10mm socket to hold the stud from spinning remove the upper sway bar link nut and disconnect from the strut *Note that it was easier to just remove the entire sway bar link rather than having to fight with it in the way. Now would also be a good time to replace old or worn sway bar links.
5. Using an 18 mm socket remove both lower strut bolts. Remember that the brake/hub assembly will not be supported at this point so either have a second set of hands to support it which in my case I was able to or tie it off to the sway bar using some wire tie or a wire coat hanger.
6. Using a 15mm deep socket remove the four bolts holding the upper strut mount in place. Be ready to steady the shock out as to not damage your brake hose or abs wire.
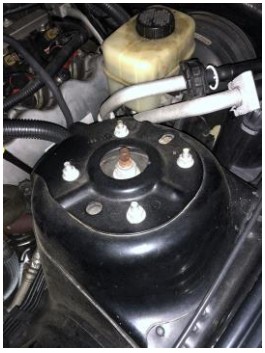
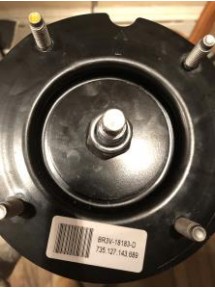
7. Now will be a good time to replace/inspect your strut mount, bump stop, spring and bellow (not pictured).
8. If you plan to reuse any of those parts you will now need the coil spring compressor using the instructions provided compress the spring in order to remove the not holding the strut mount to the assembly. That will be done using a 22mm box end wrench and a 10mm deep socket to hold the stud from spinning.
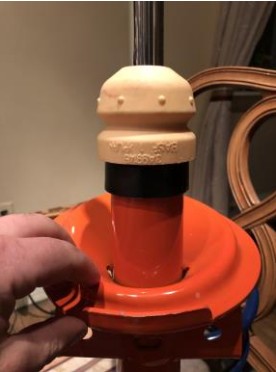
9. Configure bump stop as shown.
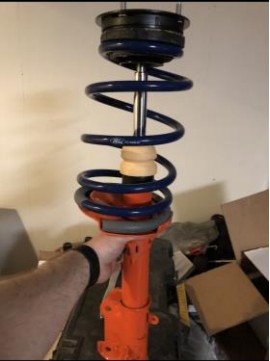
10. Compress the spring using the tool and tighten the strut mount nut to 46 lb-ft.
11. Note that the arrow on the strut mount will need to be facing outwards as shown.
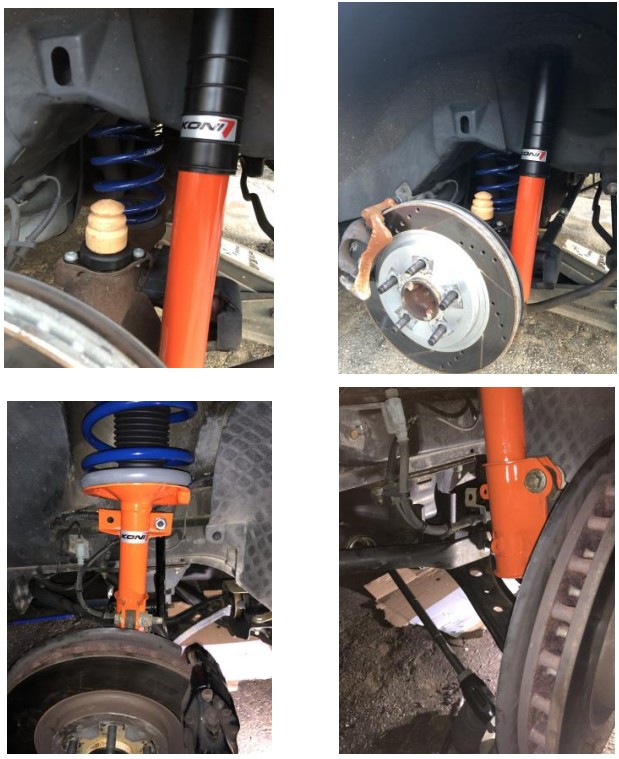
12. Starting at the top reinstall the strut assembly.
13. Using a bead of loctite on each stud secure the upper strut mount nuts to 26 lb-ft with the 15mm deep socket and torque wrench.
14. Apply a bead of loctite to both lower strut mount bolts and torque to 148 lb-ft using an 18mm socket and torque wrench.
15. Reinstall and apply a bead of loctite to both studs on the sway bar link and torque nut to 85 lb feet.
16. Reinstall the bolt holding the brake hose to the frame as well as the strut.
17. Reinstall plastic rivet holding abs wire to strut.
18. Repeat process for other side.
19. Reinstall wheels and hand tighten lug nuts.
20. Remove jack stands and lower vehicle.
21. Torque lug nuts to 98 lb-ft.
Sit back, relax and enjoy the way your ride now feels!
*Note that after doing any sort of suspension work, it is recommended to get an alignment in order to protect your tire investment.
Installation Instructions Written by AmericanMuscle Customer Daniel T. 07/17/2019
