 FREE 1 to 3-Day Delivery on Orders $149+ Details
How to Install Krona Performance B.A.M.F. Cat-Back Exhaust on your Mustang
Installation Time
2 hours
Tools Required
- 13mm wrench
- 13mm deep socket
- 13mm standard socket
- Large pliers /channel locks or exhaust hanger removal tool
- Long 3/8 extension
- 3/8 drive socket
- Spray lubricant
- 15mm deep socket
- 15mm wrench
- Common Sense

www.KronaPerformance.com
2015+ Ford Mustang Ecoboost Cat back B.A.M.F. Installation Guide
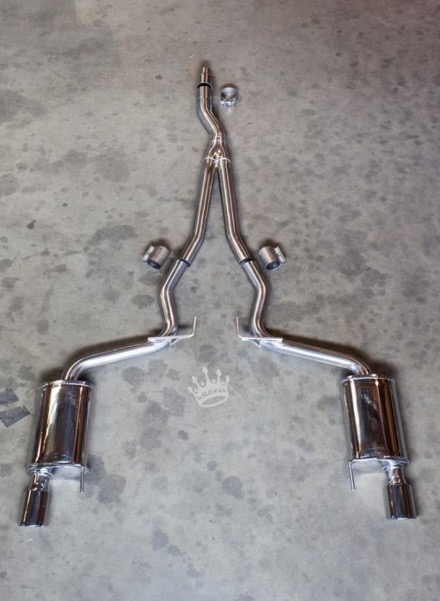
Included components:
X1 Krona 3” to 2.25” downpipe adapter
X1 Clampco 3” v-band clamp
X1 Krona 3” to 2.50” mid pipe assembly
X2 2.50” compression clamps
X1 2.50” Left hand muffler assembly
X1 2.50” Right hand muffler assembly
Disassembly and Removal
1. Place the vehicle in a secure location and allow the vehicle to cool. Support the vehicle high enough off the ground that you can work easily under the car (please be very diligent when supporting the vehicle, you will not be able to enjoy your new exhaust system if the car falls on your head). It is best to start the removal of the factory system from the rear of your vehicle working your way forward.
2. The next step is to prepare to remove the rear mufflers from the factory exhaust hangers. Depending on how much space you have available to remove and install this system, it might be necessary to the cut stock system to remove it in two pieces (this is not recommended). If you are using a lift it is very simply to remove the entire system with the help of another person.
3. With the rear mufflers supported, take your long extension and loosen and remove the 13mm bolts holding the factory exhaust hangers on each side to the body of the vehicle. On the hanger there should be one bolt on the inside and outside. Once loosed leave the factory hangers on the mufflers until completely removed from the vehicle. . Spray some lubricant on the rubber portions as you will need to remove these and reinstall on your new B.A.M.F Krona system.

4. Next you may remove the factory rear exhaust hangers holding the system to the rear suspension just above the differential cover(x1 13mm bolt each side). These hangers can remain on the system until it is removed from the vehicle. Spray some lubricant on the rubber portions as you will need to remove these and reinstall on your new Krona system.
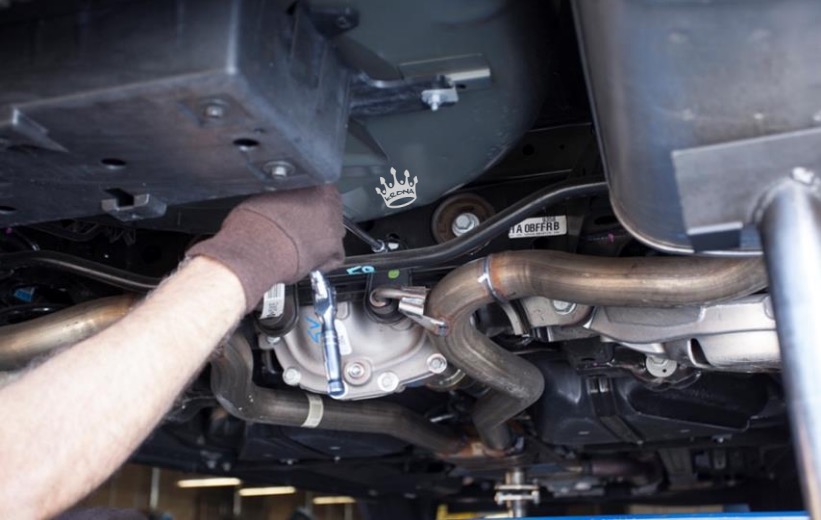
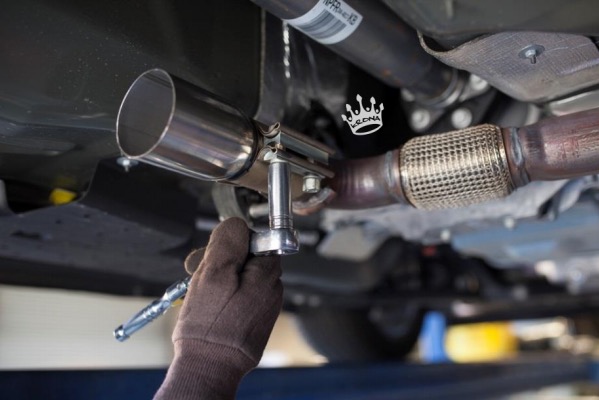
5. Place a support under the factory center resonator and now loosen the factory band clamp (x2 15mm bolts) attaching the downpipe to the mid pipe/resonator.
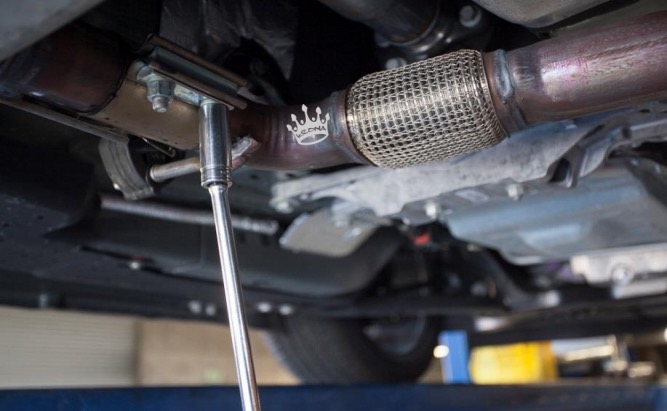
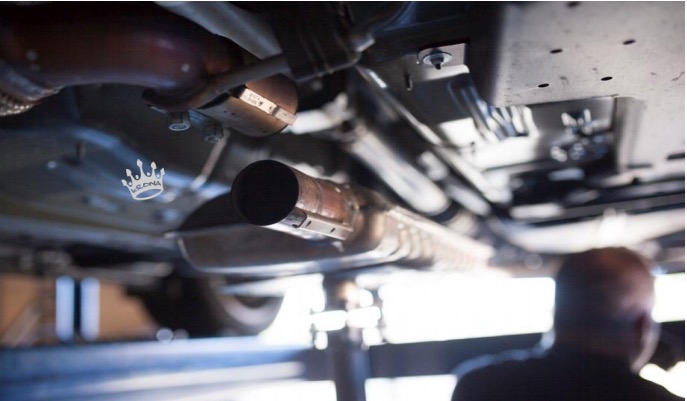
6. All attachment points are not loose and the system is ready to be removed. Carefully guide the stock system out from underneath the vehicle. This is easily done with help from another set of hands.
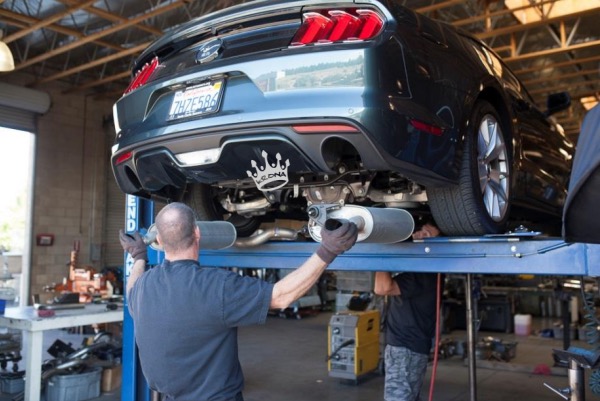
Installing Your B.A.M.F Krona Cat back exhaust system
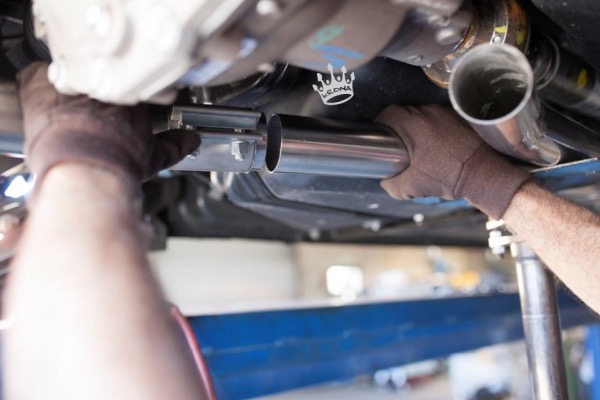
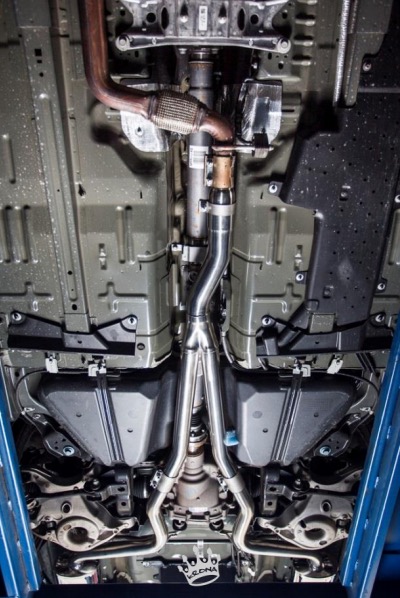
1. With your factory system out of the way you are now ready to begin the installation of your new system. Slide the krona adapter section into the factory band clamp on the rear of the downpipe. Snug the adapter in place at this time but do not tighten as you will need to make final adjustments once the system is completely installed.
2. Slide the supplied 3” band clamp over the adapter section and then install the 3” to dual 2.5” krona mid pipe. Do not tighten the 3” clamp as it this time just ensure it is on your exhaust assembly.
3. Once you have removed the factory system carefully remove the exhaust hangers. Ensure you do one side at a time; if you get the hangers mixed up you will have fitment issues. Install the hangers back in there factory locations beginning with the rear muffler mounts. Note to leaving the bolts loose to help in final alignment of the Krona system.
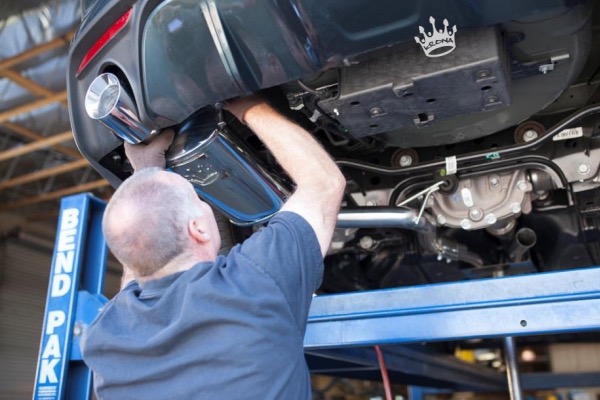
4. Install your Krona muffler sections one side at a time by sliding the metal hangers into the factory rubber hangers from the back forward. Then install the upstream hangers onto the Krona system prior to bolting them to the chassis. It is best to also leave these loose once bolted in as it will provide enough rotation to help with final alignment. This is also an excellent time to slide the 2.5” supplied compression clamp over the mid pipe section and orient as shown.
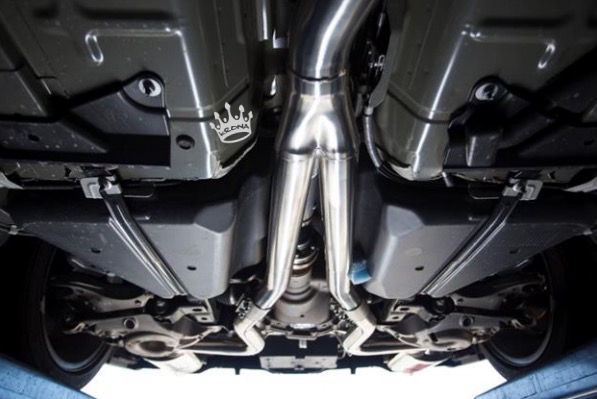
5. Slide your mid pipe back to allow for roughly a ½” gap between the connecting pipe sections. The clamp may be installed but do not tighten down at this time.
6. With both sides installed equally adjust the distance between the connections using the clamps. Do tighten at this time.
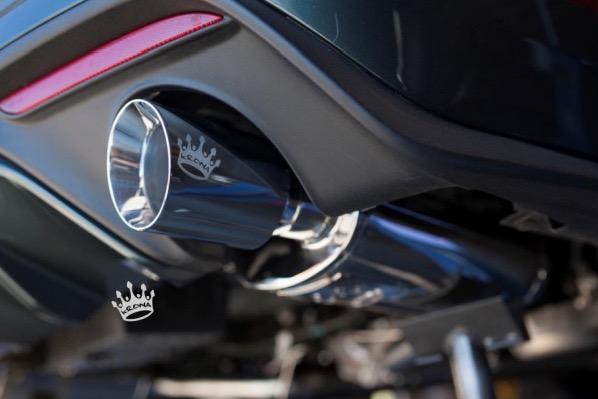
7. Now that the system is now loosely installed on the vehicle you may start from the rear and work your way forward by tightening down all bolts and pipe connections. The tip section alignment/orientation is primarily dictated by the positioning of mid pipe to muffler pipe sections. Ideal fitment would leave equal spacing on all sides of the tip section.
You should have a minimum of a ¼” gap between the exhaust and body to allow for thermal expansion as the system heat cycles.
8. When tightening down all bolts and clamps working your way forward it is important to also ensure all piping in parallel to the ground. This indicates proper fitment has been achieved.
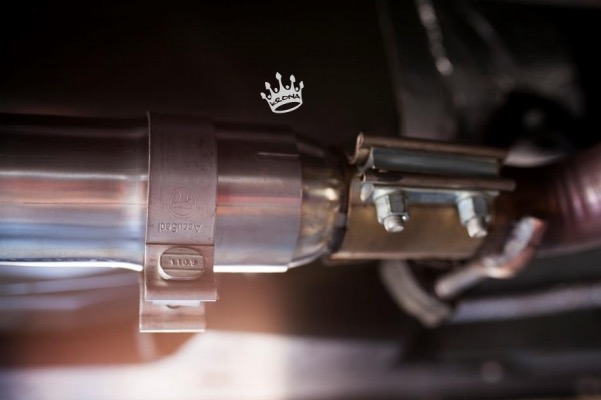
9. Tighten down the 2.5” compression clamps and then the 3” band clamp on the mid pipe section. See below for proper clamp orientation.
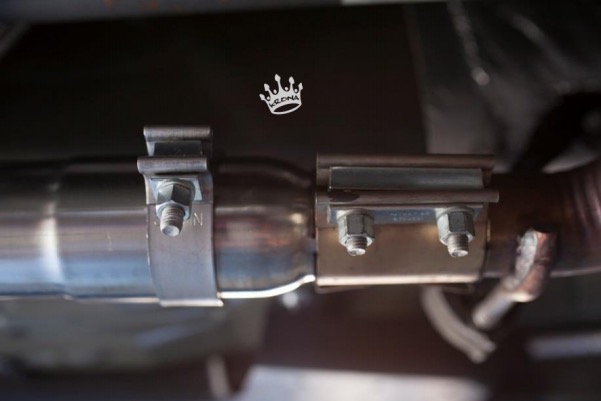
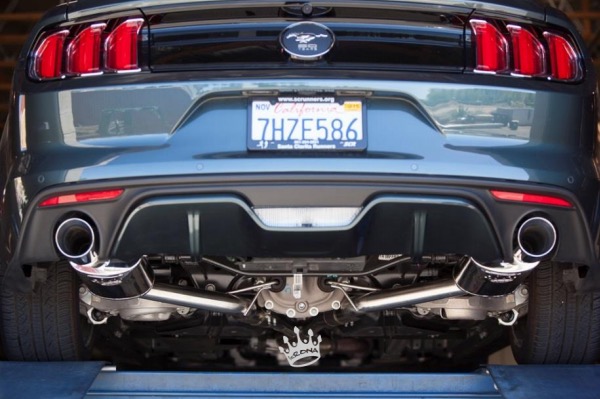
10. Double check all your connections, bolts and tip section placement. Final assembly should look as shown below.
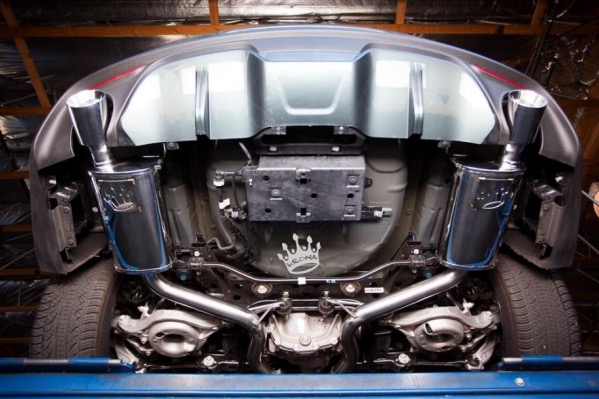
It is almost time to go try this bad boy out!
Final Check-Off List
1. Double check that all connections are tight.
2. Ensure your O2 sensors are installed and the wiring is reconnected.
3. IMPORTANT: Wipe the system clean of all dirt, finger prints or debris using a glass cleaner, simple green or similar. Once the exhaust gets hot, any remaining dirt particles will be burned onto the finish and become permanent.
4. Start your car and check for leaks…..and to hear your new B.A.M.F. Krona Exhaust system!
5. Now go let everyone within a 30 mile radius know that you just installed the best exhaust system on the market!
Note: It is completely normal for the exhaust to smell initially and for the first couple drives. This will slowly dissipate as the system heat cycles several times.
Upon breaking the system in and the thermal expansion and contraction of the metal it may be necessary to retighten the turbo studs and exhaust band clamps.
If you have any questions or comments please feel free to send us an email: [email protected]
