FREE 1 to 3-Day Delivery on Orders $149+ Details
How to Install Maximum Motorsports 1987-1993 Master Cylinder Manual Brake Installation Kit (87-93 5.0L) on your Ford Mustang

Shop Parts in this Guide
Read all instructions before beginning work. Following instructions in the proper sequence will ensure the best and easiest installation.
Thank you for purchasing the Maximum Motorsports Master Cylinder Adapter Kit. The MMBAK-5.1 kit is required when using the stock 1987-93 Mustang master cylinder with the MMBAK-10 Manual Brake Pedal Kit. The MMBAK-5.1 kit allows the master cylinder to be positioned further rearwards while retaining the vehicle’s stock brake line routing.
NOTE: The master cylinder must be installed before proceeding with the following installation steps.
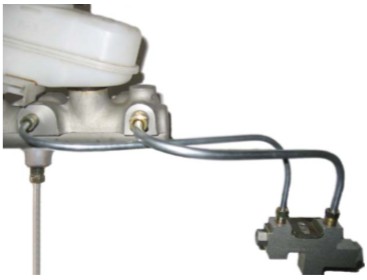
1. If still connected, remove the two brake hard lines that connect to the top of the stock proportioning valve, located on the driver side strut tower.
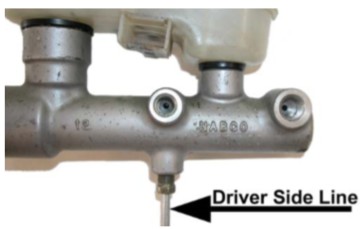
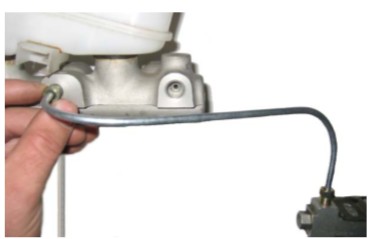
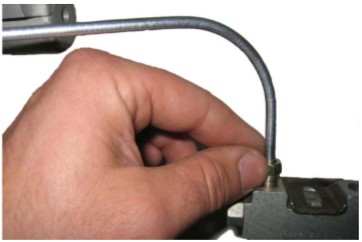
2. Gently bend the driver side front brake hard line towards the rear of the vehicle until it can be inserted into the rear, bottom port of the stock master cylinder.
NOTE: The driver side front brake hard line was the line previously connected to the rear, bottom port of the stock master cylinder.
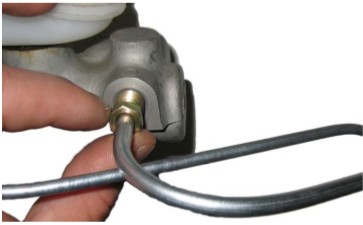
3. Insert the driver side front brake hard line into the rear, bottom port of the stock master cylinder and tighten to 12-16 ft-lbs.
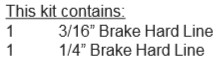
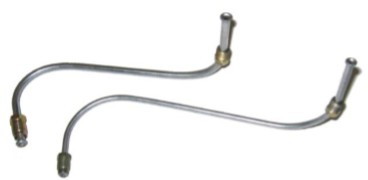
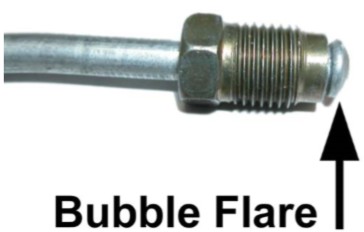
4. Thread the M10-1.0 bubble flare end of the supplied 3/16" brake hard line into the rear, side port of the stock master cylinder. Position the free end of the brake hard line above the stock proportioning valve.
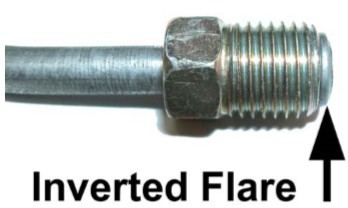
NOTE: The metric “bubble flare” can be differentiated from the standard “inverted flare” by a flare that extends past the threaded end of the fitting.
5. Thread the free end of the brake hard line installed in Step 4 into the rear port of the stock proportioning valve.
NOTE: Due to vehicle production tolerances, some of the supplied brake hard lines may need to be slightly adjusted for final fitment.
6. Thread the M12-1.0 bubble flare end of the supplied ¼” brake hard line into the forward port of the stock master cylinder. Position the free end of the brake hard line above the stock proportioning valve.
7. Thread the opposite end of the brake hard line installed in Step 6 into the forward port of the stock proportioning valve.
NOTE: Due to vehicle production tolerances, some of the supplied brake hard lines may need to be slightly adjusted for final fitment.
8. Tighten the ends of the brake hard line that connect the forward port of the master cylinder to the forward port of the stock proportioning valve to 12-16 ft-lbs.
9. Tighten the ends of the brake hard line that connect the rear, side port of the stock master cylinder to the rear port of the proportioning valve to 12-16 ft-lbs.
10. Bleed the brakes in the order shown below and check all fittings for leaks.
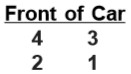
NOTE: If you are unfamiliar with brake bleeding techniques, consult a service manual for further information on bleeding air from the brake system.
NOTE: New master cylinders should always be bench bled before installation.