 FREE 1 to 3-Day Delivery on Orders $149+ Details
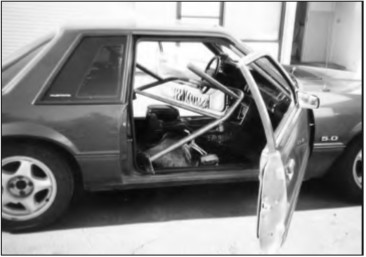
How to Install Maximum Motorsports 6-Point Drag Race Roll Bar w/ Fixed Harness Mount (79-93 Coupe, Hatchback) on your Ford Mustang

Shop Parts in this Guide
Read all instructions before beginning work. Following instructions in the proper sequence will ensure the best and easiest installation.
The latest-version, high-quality COLOR instructions are available online at www.maximummotorsports.com. Check the bottom of your installation instructions for the date and compare it to the copy available online.
Do you want to die? If not, pay attention to this:
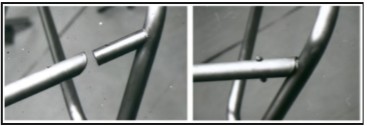
The rear braces must be welded to the main hoop. That step is not optional. The rear spuds are not structural; they are there only to align the rear braces to the main hoop for easy welding. If the rear braces are not welded to the hoop and the car rolls over, you will probably be killed because the spuds will break off the hoop and allow the roll bar to collapse. Follow the instructions and properly weld the rear braces to the main hoop. Check the MM Facebook page and website for a graphic example of how good the MM roll bars are when properly installed.
With MM’s innovative design, the rear braces bolt to the main hoop, which holds them in the correct position so they can be welded while outside of the car. This unique design reduces shipping charges, and saves you the time and effort of stripping the interior of your car to protect it from welding sparks.
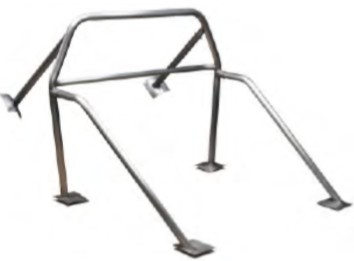
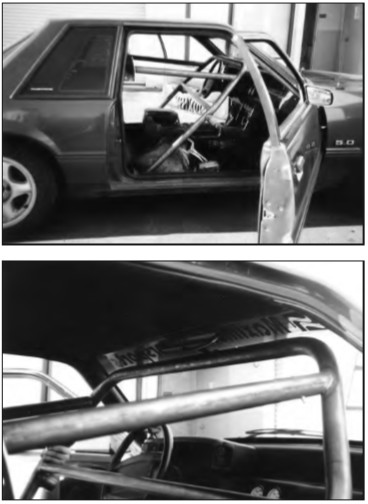
The Maximum Motorsports 6-point Drag Race Roll Bar is designed to meet the NHRA rules with proper installation. It is made from 1-3/4” x 0.134” wall DOM tubing (which actually exceeds the NHRA requirements of 0.118” ERW tubing). The harness brace is 1-1/2” x 0.134” wall DOM (NHRA minimum requirement is 1-1/4” ERW). Mounting pads and reinforcing plates are all 6” x 6” x 1/8”. The version with swingout door bars allows easy access for daily drivers.
Note that the NHRA DOES allow the door bars to bolt to the main hoop. We recommend that you have your own copy of the latest NHRA rules. Call them at (626) 914-4761.
NOTE: Due to the required welding for an NHRA installation, the MM roll bars are shipped uncoated. For best results, we suggest that you complete the installation, then remove the roll bar for either painting or powdercoating, and then reinstall. That way you will avoid wear and tear on your finish while drilling holes.
This Kit Contains

NOTE: Some kits may include additional hardware not required for the installation of your particular roll bar.
Interior Removal/Preparation
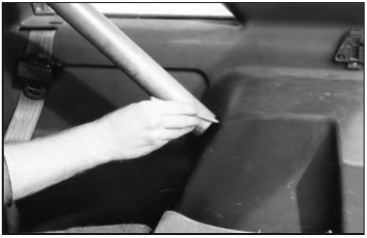
1. Remove the front seats, rear seats, the two mounting bolts for each seatbelt (on the rocker panel and the B-pillar), the rocker trim panel, and the kick panel trim forward of the doors. Coupes: Remove the plastic trim surrounding the rear quarter windows and the insulation behind this panel. Hatchback: Remove only the driver-side trim surrounding the rear quarter windows and the insulation behind it.
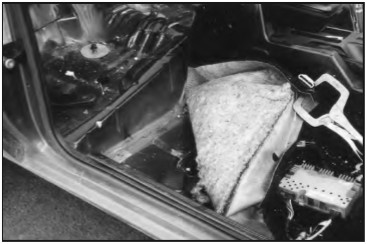
2. Pull up the rear, outer corners of the carpet and pull them toward the center console.
NOTE: Use some type of clamp or tape to hold the carpet to the seatbelts.
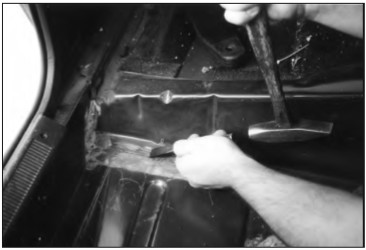
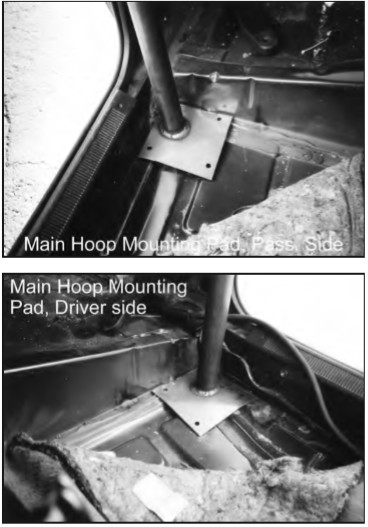
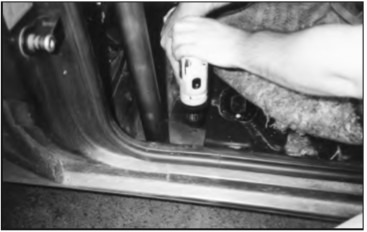
3. Remove excess body seam sealer in the corner where the main hoop mounting pads will rest on the floor pan.
NOTE: Use a hammer and sharp chisel to remove seam sealer.
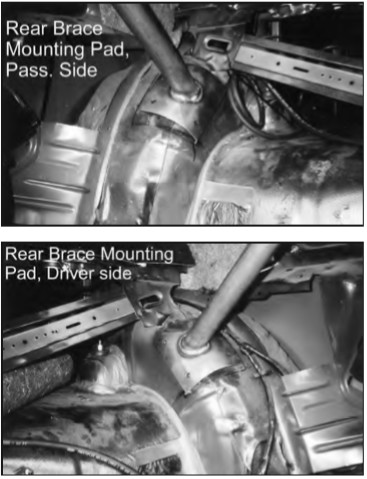
4. Remove the sound deadening on the rear inner wheel well where the rear brace mounting pads will rest.
Brace Installation
5. Coupe: Bolt both rear braces to the main hoop. Use the 2 1/4” bolts and Nylock nuts. Hatchback: Bolt the driver-side rear brace to the main hoop. Use a 2-1/4” bolt and Nylock nut.
NOTE: Be sure to attach the driver- and passengerside braces to their respective sides. (Passenger side shown.)
Main Hoop Installation
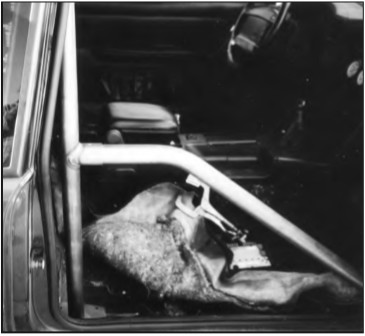
6. Place the main hoop on the ground on the passenger side of the car in the correct orientation. (Coupe is shown.)
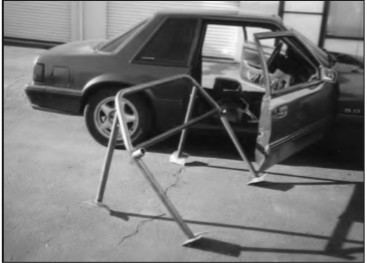
7. Tip the hoop forward.
8. Carefully place the driver side of the roll bar into the passenger seat area. Use a 2-1/4” bolt and Nylock nut. Coupe: Bolt both rear braces to the main hoop. Use the 2 1/4” bolts and Nylock nuts. Hatchback: Bolt the driver-side rear brace to the main hoop.
NOTE: Be sure to attach the driver- and passengerside braces to their respective sides (passenger side shown).
NOTE: Be very careful not to hit and damage the interior and body of the car with the mounting pads when maneuvering the roll bar into place.
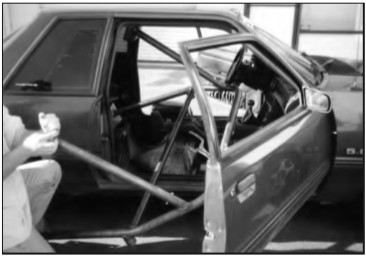
9. Maneuver the driver side of the main hoop up and over the center console, keeping the rearmounting pad behind the center console.
10. Move the driver-side mounting pads into the left rear seat area as you swing the passenger side of the hoop into the car.
11. Tilt the main hoop upward and rearward to clear the steering wheel.
NOTE: Tilt the mirror upward and remove the dome light and sun visors.
12. Pull the main hoop forward so the mounting pads are about 8–10” forward of the rear seat bulkhead.
13. Keeping the main hoop mounting pads in about the same forward position, tilt the main hoop rearward so the rear brace mounting pads move toward the rear wheel well housings.
14. Slide the main hoop rearward so all mounting pads are in the correct position. The main hoop mounting pads should be centered side to side and flush with the rear seat bulkhead. Hatchback: The main hoop with the driver-side rear brace will set in the car as a tripod.
Door Bar Mounting Holes
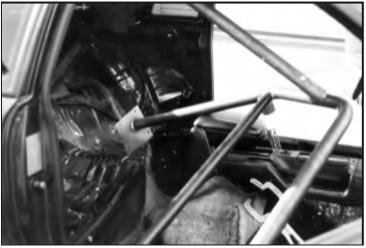
15. Pull up the carpet along the rocker panel and forward of the doors for the installation of the door bars. Remove sound deadening from the mounting area.
16. Slide the door bars into their mounting sockets on the main hoop, making sure they are fully seated. Swing-out door bars: Insert the door bar tube into the floor socket, then insert the door bar in between the tabs on the main hoop. Put the quick-pins into place.
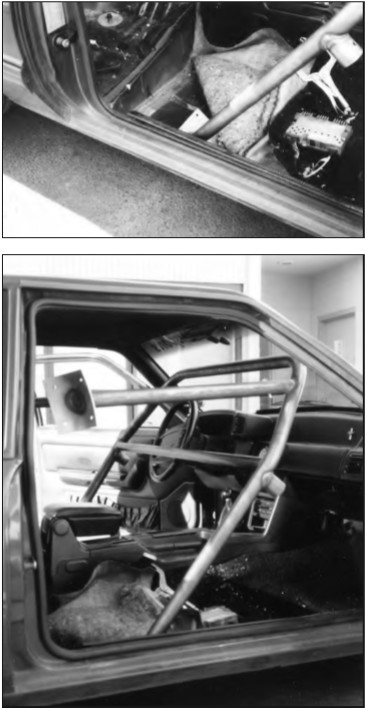
17. The door bar mounting pads should be flush with the rocker panel. Swing-out door bars: The edge of the mounting plate that the socket tube is closest to is the edge to place next to the rocker panel.
18. Close the doors and check for arm-rest clearance. The door bars may press lightly against the armrests.
NOTE: To gain more arm-rest clearance, the door bars can be angled inward slightly at the front, but this may decrease the available room for the seat and passengers.
NOTE: If the door bars contact the arm-rest, you can heat up the arm-rest with a heat gun and close the door. The arm-rest will mold to match the shape of the door bar. You may have to repeat this procedure several times. Be careful not to apply too much heat.
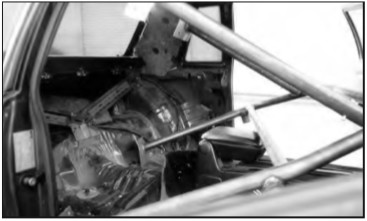
19. Making sure that all mounting pads are in their correct positions, mark and drill the holes for the main hoop, except for the holes on the downward-bent portions of the mounting plates. Check the bottom side of the car before drilling (fuel lines may need to be moved slightly).
20. Place the backup plate in position and put three bolts in place, but do not tighten them yet. 21. Coupe: Mark and drill the holes for the rear braces. Hatchback: Mark and drill the holes for the driver-side rear brace only. The passengerside holes will be marked and drilled in Step 35.
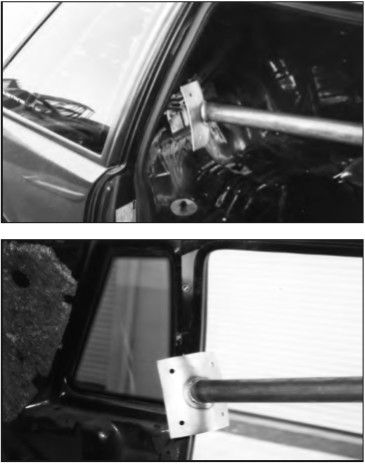
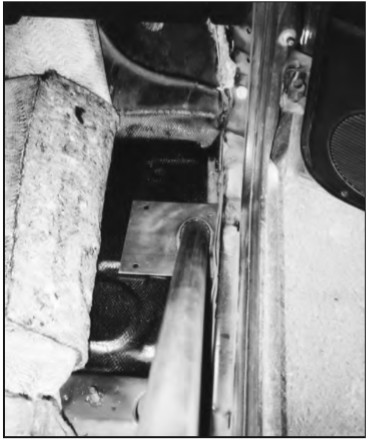
22. Place the backup plate in the rear wheel well and mark the location for the two outboard holes and drill.
23. Using the two holes you’ve just drilled, bolt the backup plates for the rear braces in place. Mark and drill the remaining two inboard holes.
24. Put all bolts in place for the rear mounting pads, but do not fully tighten.
25. Tighten the three bolts at each mounting plate of the main hoop, then mark and drill the fourth hole (on the bent portion of the mounting plate) through the backup plates.
26. Install and tighten the remaining bolts for both main hoop mounting plates.
27. Tighten the bolts for the rear braces. Swing-out door bars: Skip Steps 28 and 29. Instead, insert the quick pins to secure the door bars to the main hoop.
28. Mark the door bars at the main hoop socket for their mounting bolts. Remove and drill 3/8” holes for the attachment bolts.

29. Place the door bars into position and insert the 2 ½” bolts at the main hoop.
30. Mark and drill the holes for the door bar mounting pads.
31. Position the backup plates and insert bolts. Tighten.
32. Hatchback: Place the PVC tube template onto the passenger-side rear brace insert. Slide the PVC down to the plastic panel to determine where to trim the plastic for the rear brace (see photos). On later-model cars this location is at the bottom of a speaker hole.
33. Remove the door bars.
34. Remove the main hoop from the car.
Plastic Quarter Panel Modifications
35. Hatchbacks: Remove the driver-side rear brace. Install the passenger-side rear brace. Remove the passenger-side rear quarter plastic panel. Install the driver-side rear quarter plastic panel. Place the roll bar back into the car (repeat steps 6-17, as applicable) and mark and drill passenger-side rear brace mounting holes as detailed in Steps 22-27. Now use the PVC template on the driver side to locate where the plastic panel needs to be trimmed. Mark the plastic. Remove the roll bar from the car.
36. Hatchback: Remove both rear plastic panels from the car. Trim the plastic using your markings. Cut out the holes: a large holesaw in a drill or a sharp knife work well. On earlier-model cars the plastic panels will also need to be sliced from the hole down to the edge. This allows installation of the panel after the rear braces have been welded to the main hoop. On later-model cars the mounting pads of the rear braces can be inserted through the speaker holes.
Do you want to die? If not, pay attention to this:
The rear braces must be welded to the main hoop. That step is not optional. The rear spuds are not structural; they are there only to align the rear braces to the main hoop for easy welding. If the rear braces are not welded to the hoop and the car rolls over, you will probably be killed because the spuds will break off the hoop and allow the roll bar to collapse. Follow the instructions and properly weld the rear braces to the main hoop. Check the MM Facebook page and website for a graphic example of how good the MM roll bars are when properly installed.
Welding the Rear Supports
37. With the roll bar out of your car, have a qualified welder use either the MIG or TIG welding process to weld the rear braces to the main hoop.
The stubs that the rear braces bolt to are there only to properly locate the rear braces. They are not structural. Take care to have the rear braces welded to the main hoop itself, and not just to the locating stubs.
Take care to keep welding warpage to a minimum to ensure the roll bar fits back into the car properly. Welding must be free of any slag and/ or porosity. The NHRA prohibits any grinding of welds.
NOTE: If desired, remove the bolts from the rear supports and plug weld the holes shut once the supports have been welded to the main hoop.
38. We recommend painting or powdercoating the roll bar and its components to protect them from rust. Do NOT grind on any of the welds when prepping the roll bar for paint.
Final Installation
39. Reattach the seat belts to the B-pillars.
40. Coupe: Reinstall the plastic panels surrounding the rear quarter windows.
41. Place the roll bar back into the car (Steps 6-17).
42. Hatchback: Position the rear plastic onto the rear braces before bolting the roll bar in place.
43. Tighten the bolts for the main hoop in an even pattern.
44. Tighten the bolts for the rear braces in an even pattern.
45. Attach the door bars to the main hoop. Bolt-in door bars: Insert the door bar into the mounting socket on the main hoop. Install the 2-1/2”-long bolts, but do not tighten yet. Swing-out door bars: Insert the quick pins at the main hoop before tightening the floor mounting pad bolts. If the door bar is misaligned at the main hoop after tightening all mounting pad bolts, remove the quick pins, open the door bar, and lift up or push down on it in the appropriate direction to move the floor socket to a better position.
46. Hold the backup plates in position and tighten the bolts that attach the door bar to the floor in an even pattern.
47. Tighten the bolts holding the door bars to the main hoop.
48. Trim the carpet to accommodate the main hoop and the door bars.
49. Reinstall the carpet, seats, etc.
