 FREE 1 to 3-Day Delivery on Orders $149+ Details
How to Install BMR Adjustable Rear Sway Bar End Links (15-20 All) on your Ford Mustang
Installation Time
1 hours
Tools Required
- 17mm wrench
- 18mm wrench
- 6mm hex head
- Lift or Jack and jack stands
Installation Instructions:
- Start by safely jacking up the rear of the vehicle
- Remove the two rear wheels
- Remove the rear sway bar links by loosening the 17mm nuts (you will need to use the 6 mm hex head to hold the stud still)
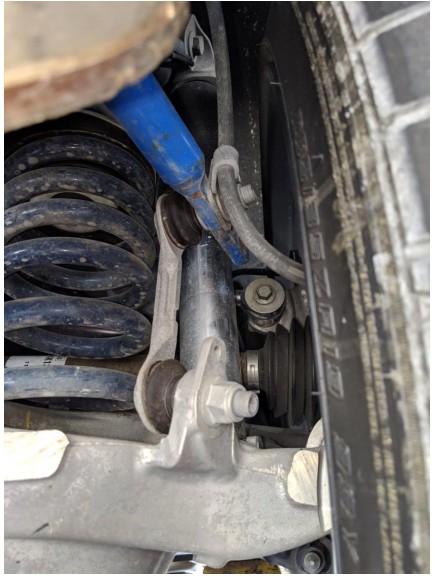
- Now that you removed the old links start by installing the new BMR link (from the back side just like the one removed)
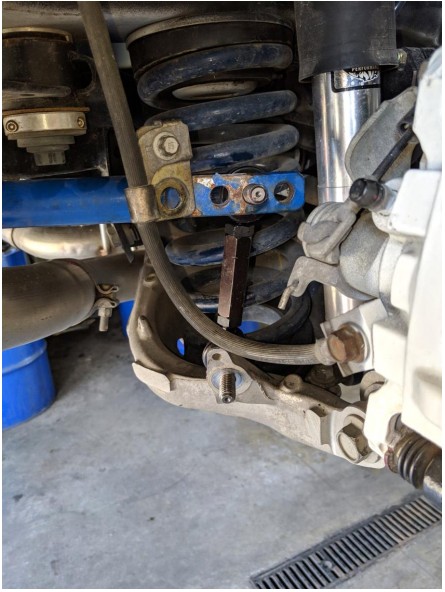
- Install the provided washer and nut
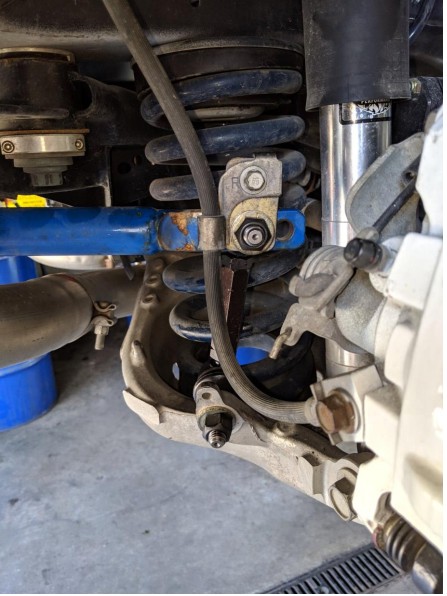
- Tighten the nut down using an 18mm wrench or socket on the nut and a 17mm wrench on the notched backside of the link
- Adjust sway bar link to the desired length
- Repeat process on another side
- Re-install rear wheels and enjoy
Installation Instructions Written by AmericanMuscle Customer Bradley Davidson 8/14/2019
