 FREE 1 to 3-Day Delivery on Orders $149+ Details
How to Install Maximum Motorsports MM Front Swaybar Bracket Reinforcement Kit (79-93 All) on your Ford Mustang

Shop Parts in this Guide
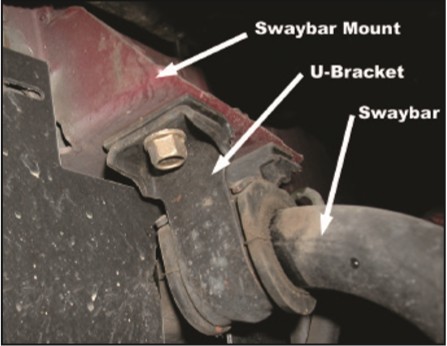
The 1979-93 Mustang front swaybar mount is spot welded into place. Because it hangs off the frame rails, it is prone to flexing and commonly develops cracks. The MM Front Swaybar Bracket Reinforcement braces the factory swaybar mount to prevent flexing and stop cracks from developing.
Read all instructions before beginning work. Following instructions in the proper sequence will ensure the best and easiest installation. If you are unsure you can do the installation then seek the help of a professional mechanic.
1. Degrease the swaybars mounts and frame rail. A water based solvent such as Simple Green is recommended. Oily residue left behind from non-water based solvent will cause hazardous fumes when welding and poor paint adhesion .
2. Jack up the front of the car and securely place it on jack stands.
3. Disconnect the ground cable from the battery first, then the positive cable. Welding near batteries is dangerous, so remove the battery from the engine compartment.
4. Remove the U-Bracket from the swaybar mount on both the driver and passenger sides. It is unnecessary to remove the U-brackets from the swaybar or undo the swaybar end links.
5. Rest the loose swaybar on jack stands.
6. Inspect the swaybar mount for existing cracks and weld the cracks as necessary.
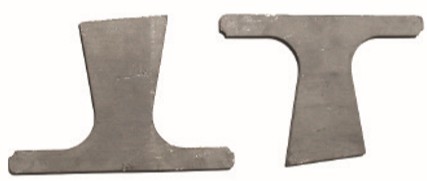
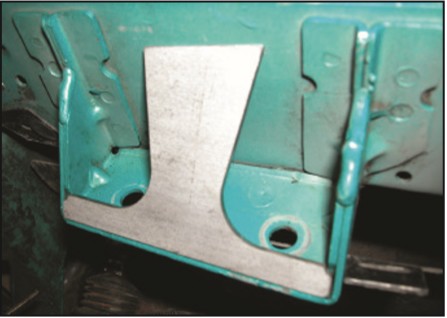
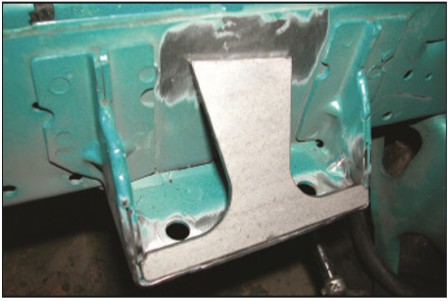
7. Place the MM Front Swaybar Bracket Reinforcement (MM Reinforcement) onto the swaybar mount as shown below. The top edge of the MM Reinforcement should fit flush against the frame rail. The MM Reinforcement is not symmetrical.
NOTE: The MM Reinforcement is the same piece on the drivers and passengers side.
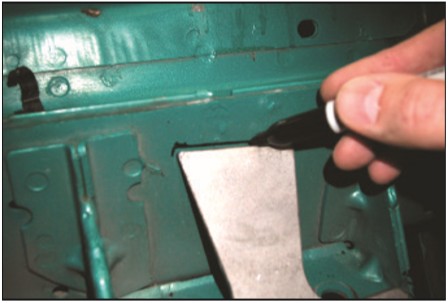
8. Mark with a Sharpie pen or grease pencil all areas where the MM Reinforcement contacts the frame rail.
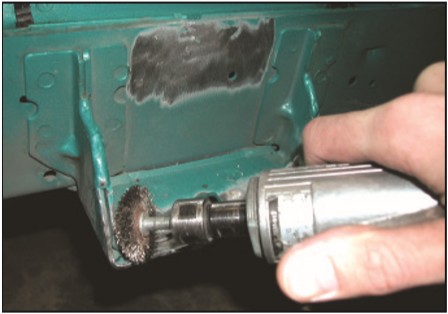
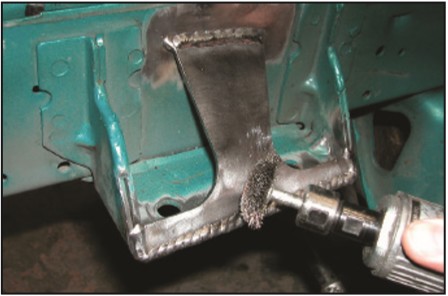
9. Remove the MM Reinforcement. Wire wheel or sand, to bare metal, all areas to be welded.
10. Reinstall the MM Reinforcement.
11. Weld all areas where the MM Reinforcement contacts the OEM sheet metal. Use a MIG or TIG welder. If using a MIG welder, be sure to protect the engine with a welding blanket. If you are unsure of your welding skills, have a professional welder perform this operation. It is recommended to prime the backside of the MM Reinforcement, preferably with weldable primer.
12. Clean all welded areas to be sure they are free of slag and burned paint. A wire brush or a piece of sandpaper works well.
13. Repeat steps 6 through 12 for the opposite side.
14. Prime and paint all bare metal.
15. Re-mount the swaybar U-brackets to OEM Swaybar mount.
16. Reinstall the battery and connect cables to the appropriate terminals.
17. Safely lower your car to the ground. Installation is complete.
This Kit includes the following:
2 MM Front Swaybar Bracket Reinforcements

