FREE 1 to 3-Day Delivery on Orders $149+ Details
How to Install Maximum Motorsports Roll Bar Support Brackets (05-14 All) on your Ford Mustang
Installation Time
2 hours
Tools Required
- T-47 Torx Bit
- Standard assortment of hand tools
- 8mm socket or wrench
- 13mm socket or wrench
- 15mm socket or wrench
- Torque wrench
- Pliers

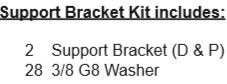
Shop Parts in this Guide
Read all instructions before beginning work. Following instructions in the proper sequence will ensure the best and easiest installation.
The latest version, high quality COLOR instructions are available online at www.maximummotorsports.com Check the bottom of your installation instructions for the date and compare it to the copy available online.
Interior Removal/Preparation
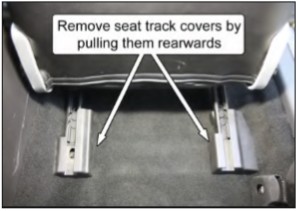
1. If currently installed, remove the front seats. Slide the seats forward to remove the two seat track covers.
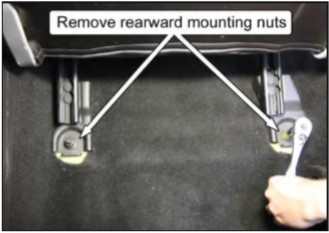
2. Next, remove the two rear hex nuts using a 15mm socket.
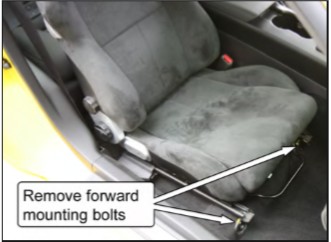
3. Slide the seats all the way back to remove the two front hex bolts using a 13mm socket.
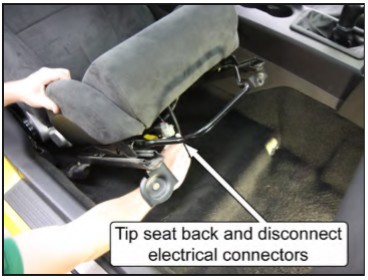
4. Tip the seat back, to disconnect the wiring harness connectors for the air bag module and seat. Carefully pull the seats out of the car and place aside.
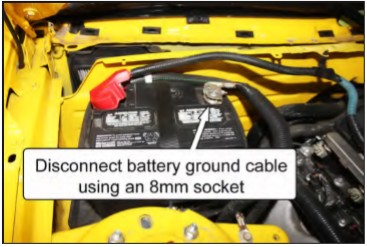
5. Disconnect the battery ground cable by using an 8mm socket.
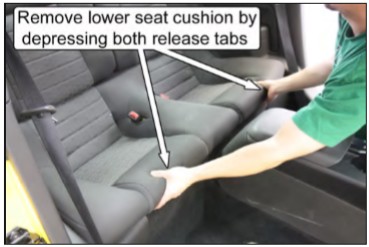
6. Remove the rear seat cushion. Push rearward on the two seat cushion release tabs while lifting up at the front to remove the rear cushion assembly.
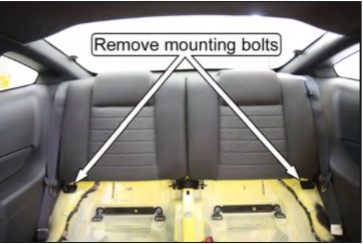
7. Remove the rear seat backrests. Using a 13mm socket, unscrew the hex bolt on the lower, outboard corner of each backrest.
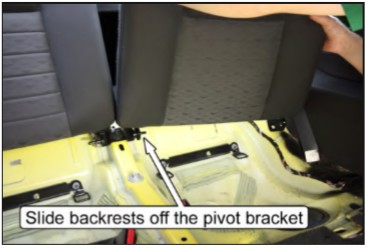
8. Pull the release strap to pivot the backrests down and slide the backrests off of the center pivot bracket to remove them from the car.
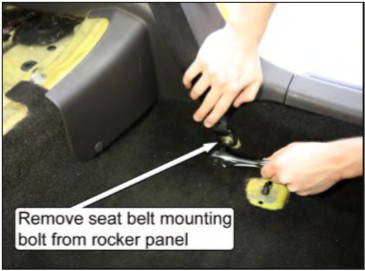
9. Remove the T-47 Torx bolts holding the safety belts to the rocker panels.
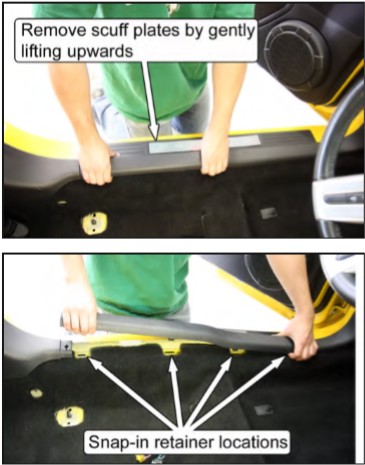
10. Remove the door scuff plates. Pull up at the ends and middle of the plates to disengage the three (4) snap-in retainers.
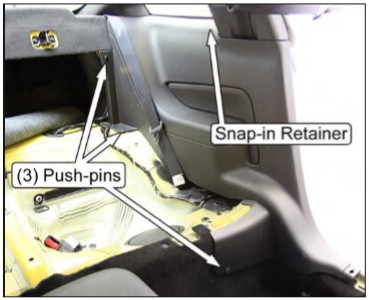
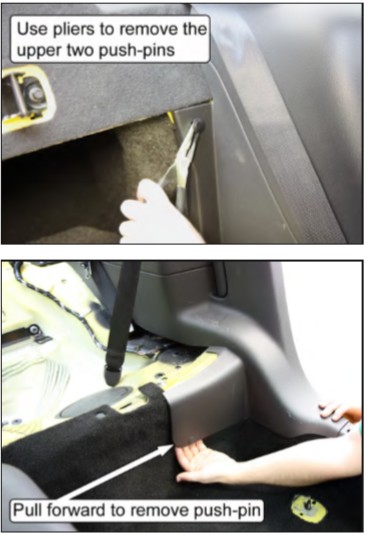
11. Remove the rear quarter panels. There are three (3) push-pin retainers on each panel; one is located at the front of the seat bulkhead and two are at the rear seat backrest. Carefully pull the rear half of the panels inwards to disengage the snap-in retainers located below the quarter window, and then pull the panels forward.
NOTE: Take care to avoid tearing the sound-deadening mat located beneath the panels.
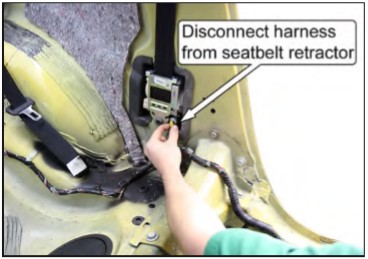
12. Relocate the wiring harness in the area adjacent to each B-pillar. Unfasten the harness retaining clips from the vehicle and pull the harness inboard to clear the factory support brackets. If necessary, more slack can be achieved by disconnecting the harness where it plugs into each of the seatbelt retractors.
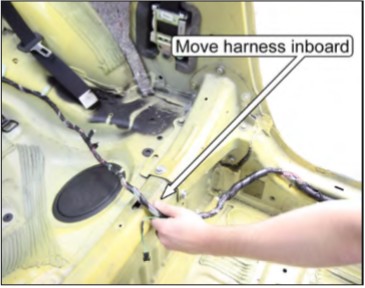
NOTE: There is a release clip that must be disengaged on the inboard face of the seatbelt retractor electrical connector on some vehicles. Use a small screwdriver to pop the release clip up, away from the connector.
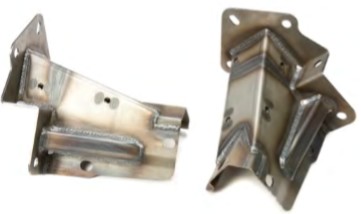
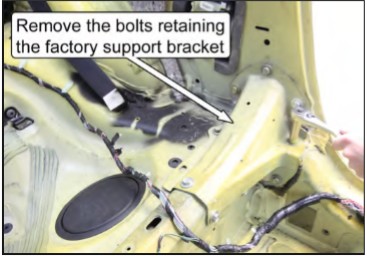
13. Unbolt and remove the two factory support brackets that connect the B-pillar to the rear seat bulkhead. Each bracket has seven 13mm hex head sized bolts and two 15mm hex head sized bolts.
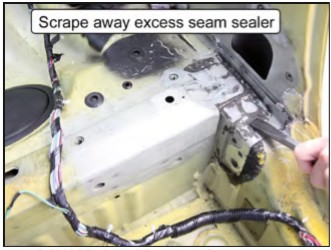
14. Scrape away any excess seam sealer around the factory support bracket mounting area.
MM Support Bracket Installation
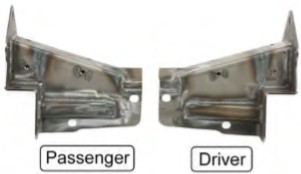
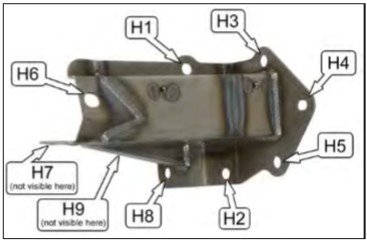
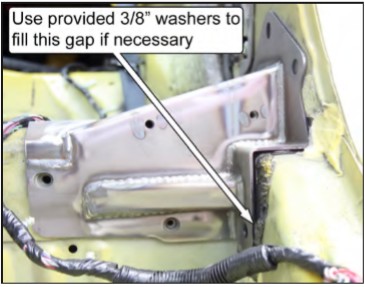
There will be gaps due to vehicle production tolerances between the MM Support Bracket and the vehicle. These gaps must be minimized to 1/8” or less around the B-pillar mounting holes. Extra washers are provided to accomplish this task. Use the following steps to correctly position the driver and passenger side brackets. Below is a picture identifying the individual holes:
15. Starting on the driver side, set the MM Support Bracket into position. The bracket should be resting against the b-pillar and the front of the rear seat bulkhead.
16. Check the gap between the bracket and the vehicle at Hole 2 (H2). Use the provided 3/8” G8 washers to close the gap to 1/8” or less. When satisfied, insert one of the factory mounting bolts into the hole to prevent the washers from being dislodged.
NOTE: Small gaps are acceptable, as the vehicle and the MM Support Bracket will conform to each other as the mounting bolts are tightened.
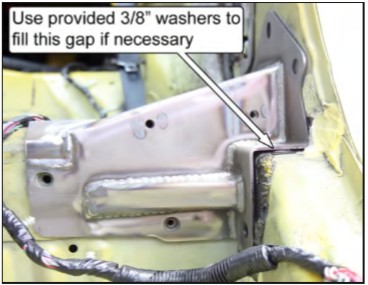
17. Check the gap between the bracket and the vehicle at H8. Use the provided 3/8” G8 washers to close the gap to 1/8” or less. When satisfied, insert one of the factory mounting bolts into the hole to prevent the washers from being dislodged.
NOTE: It may be helpful to tape the washers to the end of a small screwdriver to aid in sliding them into position.
18. Install the remaining mounting bolts into the Support Bracket and tighten them by hand. Take note that H6 and H7 use the larger, 15mm hex head bolts.
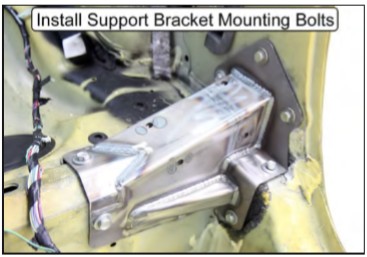
19. Using a wrench, tighten, but do not torque, all of the bolts in numerical order from H1 to H9 so that the bracket can be properly seated against the vehicle.
20. Following the same numerical order, torque the 13mm hex size bolts to 17lb-ft (23Nm) and the 15mm hex size bolts to 48lb-ft (65Nm).
21. Repeat Steps 15-20 for the passenger side bracket.