FREE 1 to 3-Day Delivery on Orders $149+ Details
How to Install Maximum Motorsports Strut Tower Brace - Black (79-85 All) on your Ford Mustang

Shop Parts in this Guide
Read all instructions before beginning work. Following instructions in the proper sequence will ensure the best and easiest installation.
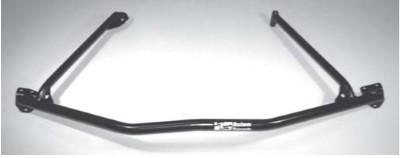
The MM strut tower brace attaches to each strut tower and to existing holes in the firewall pinchweld.
1. Disconnect the battery ground cable.
2. Make sure the air conditioning hose is routed over the top of the passenger side air intake snorkel.
3. Locate the hole in the pinchweld on the driver’s side of the firewall. It’s about 12 inches inboard of the left front fender. Unbolt the vacuum manifold located directly above the hole. Move it upwards slightly to give easier access to the hole. You may need to temporarily disconnect one or more of the vacuum hoses while installing the strut brace. In some instances, you may need to move a brake line away from the hole. You can do this by gently bending the line by hand, being careful not to kink it.
4. Place the MM strut tower brace into position. The passenger’s side firewall brace may require the relocation of some components on the firewall. The driver’s side firewall brace will go underneath the plastic vacuum manifold. Keeping the front part of the strut brace low will help in getting the two firewall braces into position.
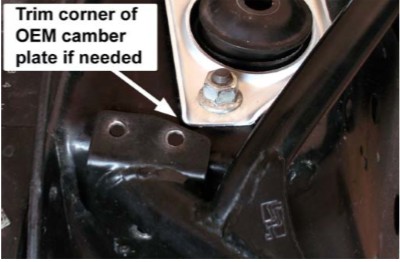
NOTE: With OEM camber plates, there may be a slight inteference between the plate and the mounting pad of the Strut Tower Brace. Trim the edge of the camber plate as required for your vehicle.
5. Place the long 7/16" bolt, with washer, down through the mounting tube of the driver’s side firewall brace and on through the hole in the pinchweld. The bolt is a tight fit in the hole and may need to be threaded through. Install the nut and washer on the bolt, but do not tighten completely.
6. Place the short 7/16" bolt, with the small “AN” style washer, down through the hole of the passenger’s side firewall brace. Because of various production tolerances, you may need to push the end of the brace slightly to the right or left for the bolt to thread through the hole in the pinchweld. Install the nut and washer on the bolt, but do not tighten completely yet.
7. Snug the two firewall bolts while checking the alignment of the brackets at the strut tower.
8. Centerpunch the location of the holes in each mounting bracket onto the strut towers. Drill a small pilot hole first, followed by one 5/16" hole. Use sharp drill bits and lubrication while drilling. Deburr the hole edges.
9. Jack up the front of the car and place on stands. That will provide access to the underside of the strut towers.
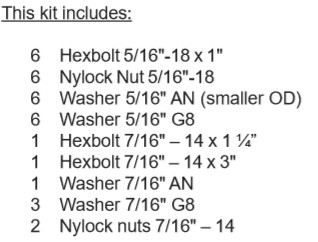
10. Insert the six 5/16" bolts with “AN” style washers through the strut brace and the strut towers. Place all six of the grade 8 washers and locking nuts on the bolts. Tighten securely.
11. Tighten the two 7/16" bolts at the pinchweld.
12. Reinstall items you initially removed, such as the vacuum manifold, etc. You may need to reposition or slightly modify some of the components to clear the strut brace. Make sure that none of the electrical wires or connectors near the starter solenoid touch the strut brace or mounting hardware. Reconnect the battery.