 FREE 1 to 3-Day Delivery on Orders $149+ Details
How to Install MBRP Street Cat-Back Exhaust - T304 Stainless Steel on your Mustang
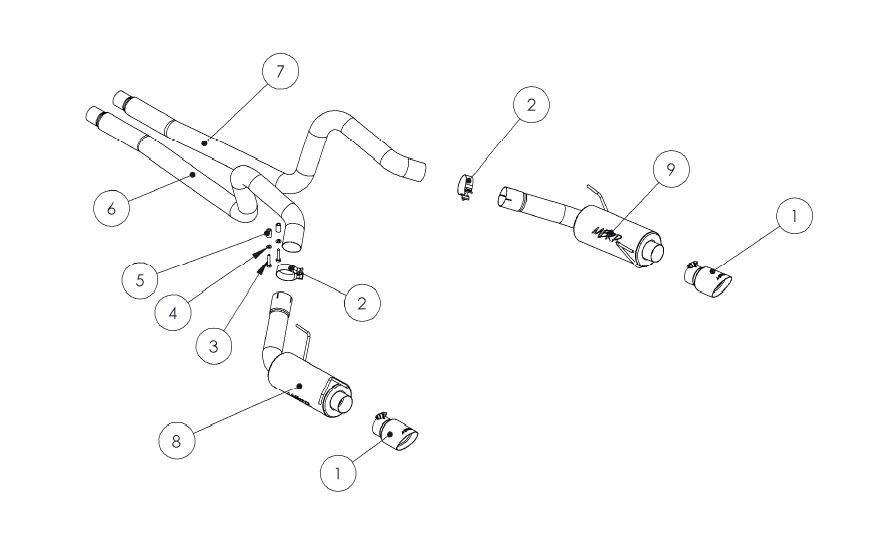
1. DRIVER SIDE EXTENSION PIPE
2. PASSENGER SIDE EXTENSION PIPE
3. DRIVER SIDE MUFFER
4. PASSENGER SIDE MUFFLER
5. TIP [2 PCS]
6. 3" CLAMP [2 PCS]
7. M10x50 BOLT [2 PCS]
8. M10 WASHER [2 PCS]
9. SPACER [2 PCS]
PLEASE READ BEFORE STARTING INSTALLATION
While MBRP Inc. has made every effort to ensure that all components of this system are of superior quality and properly packaged, it is the installer's responsibility to ensure the following before removal of the factory exhaust:
• that ALL components shown above are present.
• that ALL mating components fit together.
• that there are no damaged components.
• that the system you have purchased is appropriate for your vehicle year, model and
configuration.
• that the system will not interfere with any modifications previously installed or planned.
• that you have read and understand these instructions.
If you have any questions or are uncertain about any aspect of the installation of this
system to your vehicle please contact your dealer before commencing installation.
2007-2010 Mustang GT500, 2005-2009 Mustang GT Street Series Cat Back Removal of Stock System:
1. Apply a penetrating lubricant liberally to all exhaust fasteners, hangers and rubber insulators.
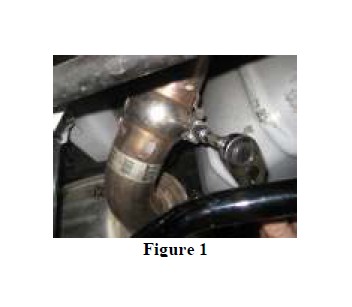
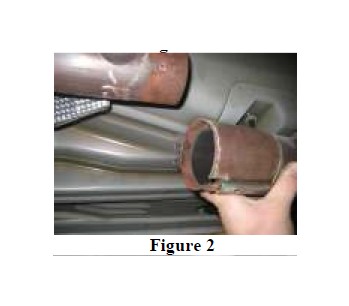
2. Loosen both OEM clamps located at each muffler inlet, and both OEM band clamps at the H Pipe outlet. Lift the lock tab to slide the band clamp rearward. Do not discard these clamps.
Refer to Figures 1 and 2.
3. Remove the OEM over axle pipes by lowering the inlet ends and pulling them out towards the front of the car.
4. Remove both M10 bolts that secure the Panhard Bar Brace to the Driver Side Frame rail. Pull the brace downward to allow more room to remove the OEM mufflers. Unbolt the Rear Muffler Hanger Brackets from the framrails, slide the muffler assemblies forward to remove them from the car. Do not discard Rear Muffler Hanger Brackets.
Refer to Figure 3.

Installation of MBRP Inc. Performance Exhaust:
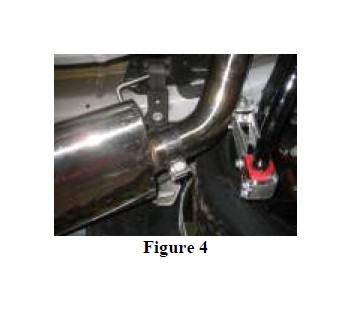
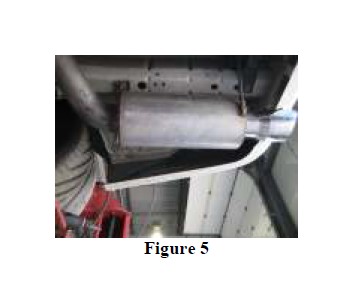
1. Install the Driver Side and Passenger Side Mufflers by inserting the forward hangers into the OEM isolators and sliding the muffler forward. Install the previously removed Rear Muffler Hanger Brackets onto the rear Muffler Hangers and lift the Muffler Assemblies up into position and secure the Muffler Hanger Brackets with the previously removed hardware.
Refer to Figures 4 and 5.
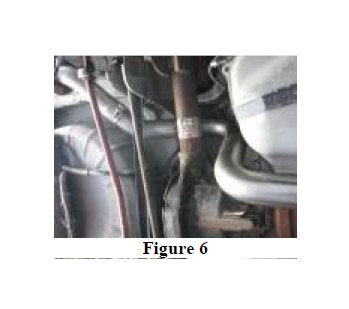
2. Install both Driver and Passenger Extension Pipes over the axle and insert into the Driver and Passenger Mufflers. Be sure that the supplied Clamps are installed over the joint. Do not tighten yet.
Refer to Figure 6.
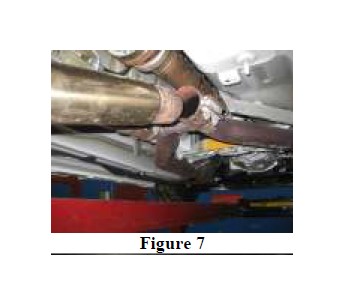
3. Connect both Driver and Passenger Extension pipes by first installing the OEM band clamp removed in Step 2 onto the inlet ends of the Extension Pipes. Slide the Extension Pipes onto the outlet ends of the H pipe. Do not tighten yet.
Refer to Figure 7.
4. Tighten all clamps just enough to hold the pipes in place but allowing for adjustment.
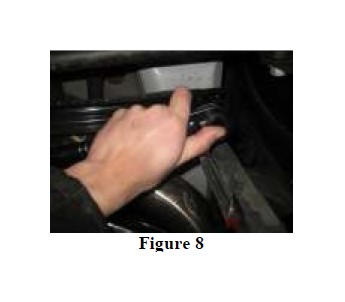
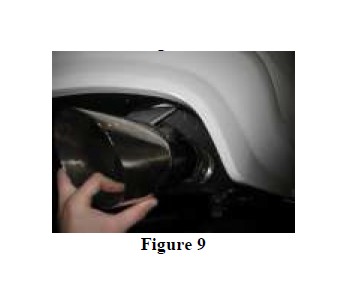
5. Reattach the Panhard Bar Brace to the Driver side Frame rail with the supplied M10x50 bolts and Spacers to allow more clearance for the Driver Side Extension Pipe. Install the Tips onto the Muffler outlets.
Refer to Figures 8 and 9.
6. Adjust the system to provide clearance between all other under body components and hoses while ensuring the Tips are centered in the rear Fascia. Tighten all clamps once properly adjusted.
Congratulations! You are ready to begin experiencing the improved power, sound and driving excitement of your MBRP Inc. performance exhaust system. We know you will enjoy your purchase.
