 FREE 1 to 3-Day Delivery on Orders $149+ Details
Mustang Light Tint - Installation Instructions
Installation Time
15 minutes
Tools Required
- Spray Bottle w/ Dish Soap and Water Mixture
- Plastic Squeegee

Shop Parts in this Guide
- SEC10 Third Brake Light Tint; Smoked (94-98 Mustang, Excluding 94-95 Cobra)
- SEC10 Tail Light Tint; Smoked (99-04 Mustang)
- SEC10 Quarter Marker Light Tint; Smoked (99-04 Mustang)
- SEC10 Tail Light Tint; Smoked (05-09 Mustang)
- SEC10 Third Brake Light Tint; Smoked (05-09 Mustang)
- SEC10 Quarter Marker Light Tint; Smoked (05-09 Mustang)
Installation
Tail Light Tint Install:
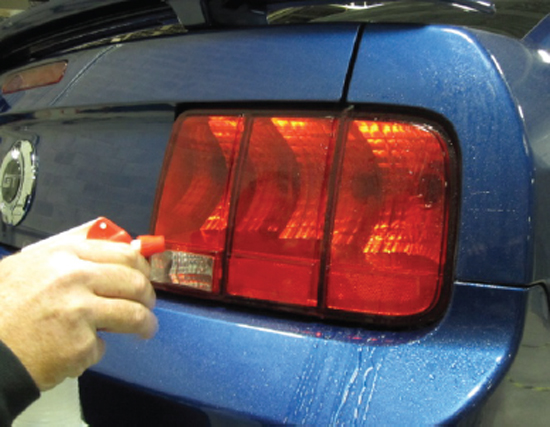
1. Thoroughly spray the tail light lens with the soap and water solution.
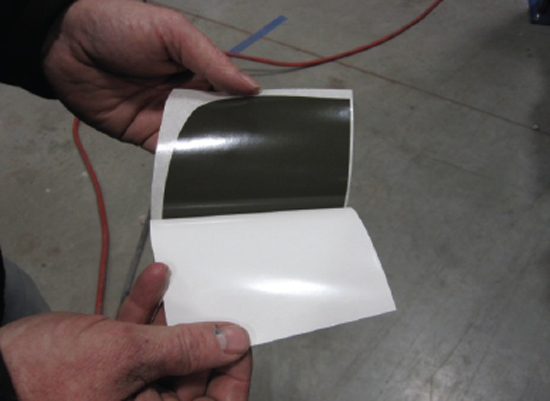
2. Cut the tint into the three separate sections. Peel the protective film from the tint and place it on the tail light as shown.
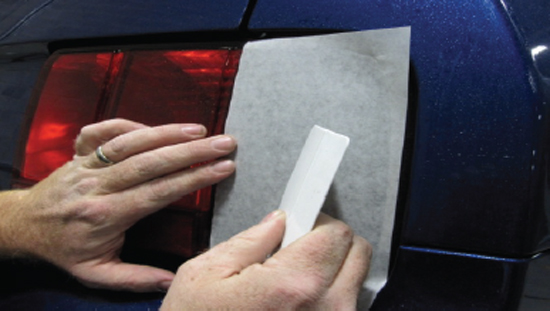
3. Using the supplied plastic squeegee, push any air bubbles out toward the sides of the tint.
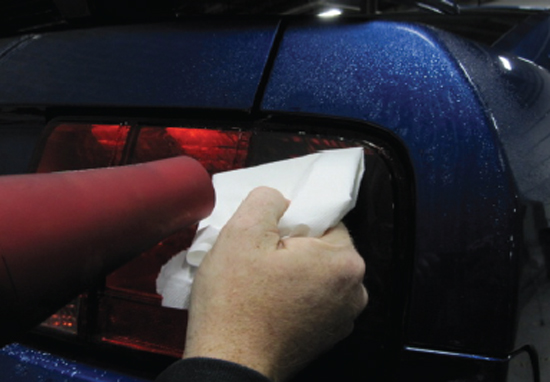
4. Spray the tail light again with the water & soap solution. Wait 3-5 Mins then peel the backing from the tint, leaving the tint on the tail light

5. If there are any remaining air bubbles, wrap a soft towel around the plastic squeegee and push them toward the outside of the tint. Make sure to wrap the squeegee as it may scratch the tint if not protected. You may also use a hair dryer to apply heat if necessary to help the tint form better around any curves (this is especially helpful on 99-04 one-piece tail light tint).
6. Repeat for remaining pieces of tint to complete the installation.
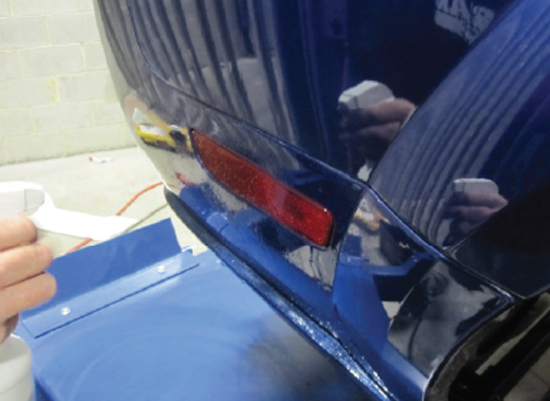
Side Marker & Third Brake Lights;
1. Thoroughly spray the lens with the soap and water solution.
2. Peel the backing from the tint and place the tint over the lens. Use the supplied plastic squeegee to remove any air bubbles.
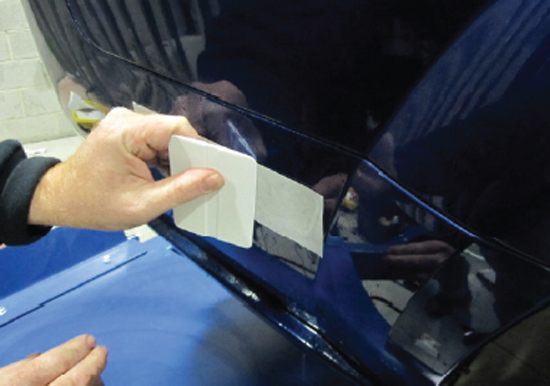
3. Spray the water and soap solution over the backing tape and wait 3-5 Mins before peeling it off. Once off, you can use the plastic squeegee with a soft rag wrapped around it to remove any remaining air bubbles from the tint. (For certain side markers located in the front bumper of the vehicle, you may have to use your fingers or a credit card to remove any air bubbles as the plastic squeegee with not fit in the space.)
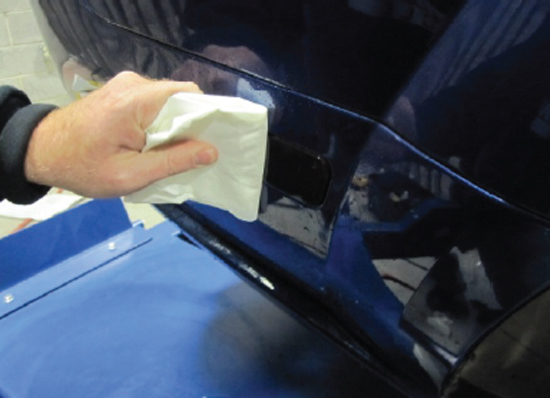
4. Once there are no air bubbles remaining, repeat instructions for other side to complete the installation.
Installation instructions provided by Manufacturer.
