 FREE 1 to 3-Day Delivery on Orders $149+ Details
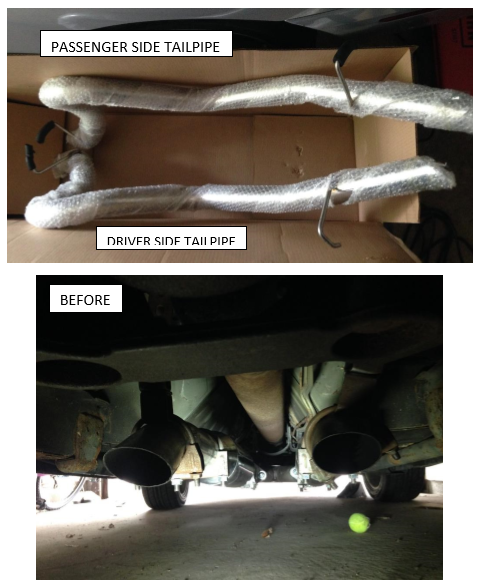
How to Install SR Performance Stainless Steel Tailpipes (86 GT; 87-93 5.0 LX; 93-97 Cobra; 94-97 GT) on your Ford Mustang
Installation Time
3 hours
Tools Required
- Floor jack
- 2 Jack Stands
- 19 mm ½" drive socket
- 13/16" ½" drive socket
- Wheel Lock Key
- ½" Breaker Bar
- Flathead Screwdriver

Shop Parts in this Guide
1. Begin by first removing the lug nut covers on the driver side rear wheel as well as the passenger side rear wheel.
2. Using the 13/16” socket, 19 mm socket, the wheel lock key, and the ½” breaker bar, loosen the 5 lug nuts on each wheel but do not remove.
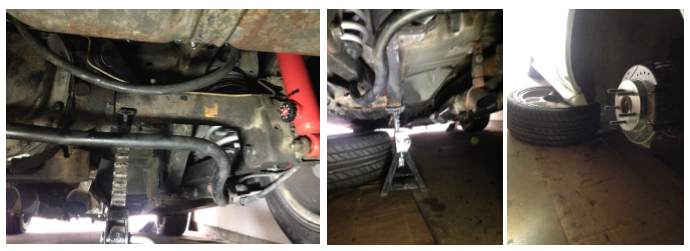
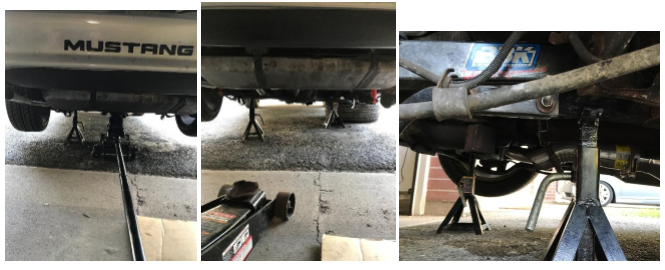
3. Jack the rear of the vehicle up as high as possible (or as high as jack stands will safely permit). At this point the rear wheels will begin to tilt. NEVER WORK UNDER ANY VEHICLE THAT IS NOT SAFELY SUPPORTED! SERIOUS INJURY OR DEATH MAY RESULT!
4. To install the driver side tail pipe, place one jack stand on the passenger side of the rear end and one on the driver side under the frame just in front of the mounting point of the rear sway bar. This will allow the axle on the driver side to droop enough to install the driver side tailpipe.
NOTE: Whenever removing wheels and working underneath a vehicle it’s a good safety precaution to slide the removed wheels under it.
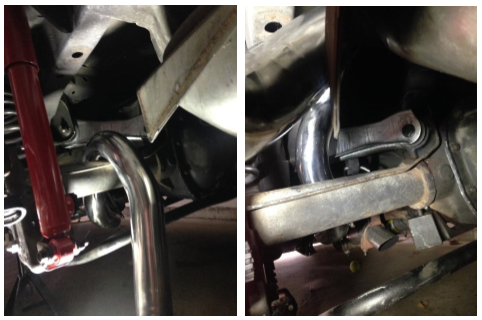
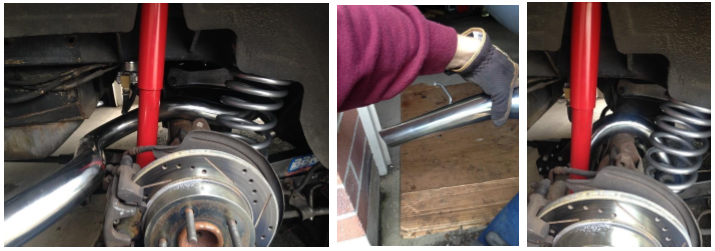
5. Once the axle on the driver side is sufficiently drooping, take the driver side tailpipe and turn it sideways so that the bend is parallel with the ground for ease of installation. Once the bend is over the axle, rotate the tailpipe and insert the hanger into the rubber isolator at the rear of the vehicle. Once the hanger has been inserted through the rear most hanger, insert the forward hanger into the rubber isolator. If the hanger installed in either location is in poor condition (dry rotted or sagging), remove and replace with new isolators.
6. In order to install the passenger side tailpipe, using the floor jack raise the vehicle and place one jack stand under the driver side of the axle and the other underneath the area just in front of the rear sway bar mount on the passenger side to achieve a sufficient amount of droop for installation.
7. Once the passenger side of the rear axle is sufficiently drooping, turn the passenger side tail pipe so the bend is parallel with the ground for ease of installation. Once the bend is over the axle, rotate the tailpipe and insert the rear most hanger into the rubber isolator at the rear of the vehicle. Once the rear most hanger has been installed, insert the forward hanger into the rubber isolator. Inspect and if necessary replace the rubber exhaust isolators.
8. Now that both tailpipes are on and secured, replace both tires onto the rear axle studs and tighten the lug nuts in a star pattern as tight as possible while still on the jack stands.

9. Jack the vehicle up using the floor jack remove the jack stands. Confirm that all tools are removed from below the vehicle prior to lowering to prevent damage. Once on the ground, torque the lug nuts to the specified torque in your owner’s manual.
10. My installation required that I drive to an exhaust shop to have pipes bent to connect my resonators to the tailpipes. This particular step will vary depending upon exhaust setup but this guide’s goal is to outline the more challenging aspect of tailpipe installation.
Installation Guide submitted by AmericanMuscle customer: Andrew P. on 7/27/17

