Installation Time
(approx) 2 Hours
Difficulty Level:
Light to Moderate mechanical skill required.
Installation Guides
FREE 2 or 3-Day Delivery on Orders $119+ Details
$194.45
FREE Shipping + $25.00 Oversized Item Fee Market Price $221.99 You Save 12% ($27.54)Saved - View your saved items
We're sorry. We couldn't save this product at this time.
or use
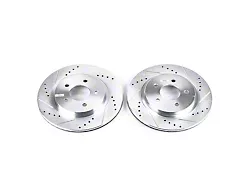
PowerStop Evolution Cross-Drilled and Slotted Rotors; Rear Pair (05-14 Mustang, Excluding 13-14 GT500)
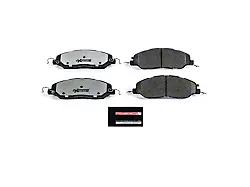
PowerStop Z26 Extreme Performance Ceramic Brake Pads; Front Pair (11-14 Mustang GT w/o Performance Pack, V6)
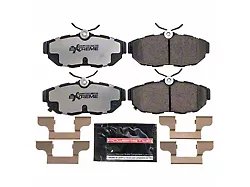
PowerStop Z26 Extreme Performance Ceramic Brake Pads; Rear Pair (11-12 Mustang GT, V6; 13-14 Mustang)
Justin: If you're looking for an affordable brake upgrade for that non-Brembo '11 to '14 GT at home that will also look good behind your favorite set of wheels, then you'll want to check out the PowerStop Evolution Drilled and Slotted Rotors that we have here on the table today. Now, this set of front rotors will feature the G3000 iron castings along with the silver-zinc coating all for right around that low $200 price point for the pair. Install according to the site, guys, is gonna get a soft two outta three wrenches on the difficulty meter. Take a couple of hours or so to complete from start to finish as we'll show you later in the video.So PowerStop is a very popular name here on the site because they offer a wide variety of affordable braking components for a wide variety of Mustang owners out there. Now I really like PowerStop because they do give Mustang owners a bunch of options depending on what you're using your car for. For instance, they offer complete turnkey kits like the OE replacement, Z23 or Z26 kits that will include things like brand new rotors, new pads, and even sometimes calipers depending on how deep you want to go. Now, on the other hand, they offer individual components such as the rotors we have on the table here today for owners who might wanna just piece together their own system or components. Now, no matter what method you end up going with, I think you'll find that most of the PowerStop stuff is very affordable when compared to checking out some other big brake options such as Willwood or Brembo, for instance, which, let's be honest, can run you thousands of dollars.But what do you say we dive a little bit deeper here with the PowerStop Evolution rotors, and these guys actually start off life as a G3000 grade cast iron blank. Now, from there, the rotors get that slotted and drilled treatment using precision machine rounded slots and beveled holes, and then the entire rotor is finished off with a durable silver-zinc plated finish which basically is just gonna help prevent or reduce, I should say, any rust or corrosion on your non-friction surfaces. Now I do get asked all the time, what's the deal with this whole slotted and drilled treatment with my rotors? Well, couple of schools of thought on that and without getting too deep into the weeds, guys, the idea behind the slotted and drilled face is to help reduce brake temperatures over a solid rotor in some cases up to 180 degrees cooler according to PowerStop, and this will help reduce brake fade making for more consistent braking performance. Again, thanks to less fade, less temperature. Temperature, as we all know, is the enemy of braking performance so if you can help reduce that in any way, shape, or form using a slotted or drilled rotor such as this, then certainly worth mentioning.But aside from the cooling benefits, if you will, the slots are gonna help kind of remove any excess brake dust debris or moisture keeping that rotor surface and the pad itself nice and clean for even more effective stopping power. And again, more consistency. Now, finally, guys, it is worth pointing out that every PowerStop rotor is looked over and mill balanced first before being shipped out to help ensure that owners aren't going to run into any noise, any shaking, or shimmying once these things have been installed. And if you do happen to encounter any issues at all with the PowerStop Evolution rotors, they do have your back with a 90-day or 3000-mile warranty.But now we wanna shift gears and segue into the install, guys, and again, site's gonna call this middle of the road two out of three wrenches on the difficulty meter, maybe two hours of your time to complete from start to finish. Obviously, those wheels have to come off, you have to remove the calipers, remove those stock rotors, and then replace the new PowerStops and reverse order. But to give you a better idea of how this all looks and how this will go down in the garage or driveway at home, feel free to check out our detailed walkthrough and tool breakdown now.Man: Tools used for this installation: a hammer, 3/8 drive ratchet, and 15-millimeter socket. Hey, guys, I'm gonna walk you through the uninstall and install of our front cross-drilled and slotted rotors on our '14 Mustang, let's get started. So now that we have our vehicle up in the air, we have our wheel off, first thing we're going to do is we're gonna take a 15-millimeter with a ratchet and we're gonna take the 2 bolts off in the back here that hold the caliper bracket with the caliper assembly. Now, if you want to take your caliper off individually, if you're gonna replace the pads, you can do that. On this car here, we've had this off many times where I'm gonna just take off the bracket and the caliper because we're gonna use the same pads and then we'll be able to take and then remove our rotor. Now, I'm going to use a 15-millimeter on a 3/8 ratchet. If you're just...and this is your first time taking this off, you're probably gonna have to use maybe a breaker bar to get them loose. Usually, they're very tight. So we'll get into it. We'll get our 15-millimeter in our ratchet and we'll start removing our caliper and caliper bracket.So now I'm gonna take my 15-millimeter on my 3/8 ratchet and we're going to loosen our 2 bolts up down here, one here, and then one up top here. Now that I got that one off, we'll go up to the top one. We're gonna take it out by hand. Once I get them both out, then what we're gonna do is just let our caliper come off and you can just hang it to the side there. Now we'll be able to remove our rotor. So now that we have our caliper and our bracket off, now we're gonna be able to remove our rotor. Now, if you've never had your caliper or your rotor off before, there could be some metal little clips here over the studs holding it on. You're gonna wanna take a pair of cutting pliers or needle-nose and just remove them clips, that'll make it so that you can remove the rotor. What I'm gonna do now is take my hammer and you're gonna give it just a good smack right in this area right here. Make sure you try not to hit your studs. Give it a good whack, it should come loose and free. Sometimes it takes more than one. At that point, you can remove your rotor. Now, once you have your rotor off, you're gonna wanna make sure you take some kind of wire brush or anything and get any kind of the rust off of your, your spindle mount here. That way, when you put your new rotor back on, that you have a good surface, the rotor's not gonna have any slag, it's not gonna wobble. But now we're ready to clean this and then we're ready to install our new rotor.Now I took some Scotch-Brite, just went over my spindle here a little bit, got most of the rust and heavy stuff off of it. We're ready to install our rotor. I'm gonna take my rotor, slide it over the studs, give it a good push, get it seated, and now we're ready to reinstall our caliper and bracket. So now that we have our rotor in place, now we're going to take and reinstall our caliper and bracket. I'm just gonna slide it back into place right where it was and we'll get our bolts and get our caliper bracket started with our bolts. And once I get them started, I'm gonna take my 15-millimeter on my ratchet. And now at this point we have everything installed, we have our bolts on. You're going to want to torque these bolts to manufacture specs, it's very important to do so. And then what you're gonna wanna do is repeat the same whole procedure on the other side.That wraps up this review and install of our PowerStop Evolution Cross-Drilled and Slotted Rotors Front Pair '11 to '14 standard GT Mustangs. Thanks for watching, and for all things Mustang, keep it right here at americamuscle.com.
Subscribe to our YouTube Channel
Features, Description, Reviews, Q&A, Specs & Installation
Brand | PowerStop |
Rotor Location | Front |
Rotor Type | Drilled and Slotted |
Information on PowerStop's proper Break-In Procedure can be found here: https://www.powerstop.com/brake-pad-break-in-procedure/
Fitment:
DetailsPowerStop AR85144XPR
CA Residents: WARNING: Cancer and Reproductive Harm - www.P65Warnings.ca.gov
Installation Info
Installation Time
(approx) 2 Hours
Difficulty Level:
Light to Moderate mechanical skill required.
Installation Guides
What's in the Box
Tech Guides:
10 More Questions
Does not fit on rear. Not compatible with Brembo equipped models