Talk to a Challenger Sales Tech
1-877-887-1105
M-F 8:30A-11P, Sat-Sun 8:30A-9P
$20K Sweeps! 10 Chances to Win! Enter Daily >

Raxiom LED Tail Lights; Black Housing; Smoked Lens (08-14 Challenger)

Item CH3762
Verify parts fit and get product recommendations.
Challenger Sales Techs: Connect Now M-F 8:30A-11P, Sat-Sun 8:30A-9P
$0.00
On Sale

$597.99 (kit)

FREE Shipping Market Price $736.99 You Save 19% ($139.00) Up to 10% off for Military & First Responders! See Details

Will this fit your Vehicle?

Select a different vehicle Help?
Update or Change Vehicle
Out of Stock

Ship to: Enter Zip
Sorry, please enter a valid US or CA postal code
We're sorry, zip can't be updated at this time.
    Create a list
    Add to New List

    Saved - View your saved items

    We're sorry. We couldn't save this product at this time.

    or use

    Get a $30 Prepaid Visa Card!

      Video Review & Installation

      Hey, guys. Adam here with americanmuscle.com. Today we're taking a closer look at and installing the Raxiom Smoked LED Tail Lights, available for the '08, to '14 Challenger. You should be checking these out if you're looking to ditch the very traditional outdated factory tail lights in favor for one that's gonna give you a stealthier more aggressive rear end with a modern technology and a bit of a bonus with some sequential tail lights. Now, these right out of the box, as you can see are completely different than the factory options. You're getting rid of the chrome red kind of reflective interior with the Dodge logo in the middle in favor for one that's got a black interior housing and a dark smoked lens. When the tail lights are completely off, you have something that just looks like a blacked-out bar going across the back end, which is super stealthy. When the tail lights are on you have a red LED light as opposed to your factory incandescent bulbs. They're super opaque and vibrant and they go all the way around the edges there and then your turn signals are right in the middle.When you turn your turn signals or your hazards on these will blink in sequence with a bright, vibrant amber LED, going from the inside out in one extremely smooth motion. Now, some of the other aftermarket options out there require you to just stick on LEDs the outside of your factory lights. This is for the guy looking for the complete replacement in addition to some upgraded technology. Now, as you can see in the middle one last thing I wanna mention is that your factory light of course has the Dodge chrome reflector in the middle along with the reverse light. This deletes the Dodge badging on the back end, keeps it very smooth and minimalistic with the reverse light built-in as well which is again gonna be a bright white LED upgrade. Overall, the price for this kit is gonna come in right around $650 bucks. The install I'm giving two out of three wrenches on our difficulty meter here, there is a little bit of cutting and splicing required for some of the wiring transferring over a factory trunk button, which I'll show you guys how to do in just a little bit. The entire trim among that comes with it.Now, the install there is gonna take you about two hours from start to finish. I'm gonna walk you through every step of the process, what do you say we get started. All right, tools used in this install include impact gun or a ratchet, extension, Phillips head socket or Phillips head screwdriver, T20 Torx bit, panel removal tool. For splicing, you'll need wire strippers, wire cutters, and pliers along with some splicing hardware like these male-female connectors.All right, first step to the uninstall of our factory tail lights, we're gonna start with our center bar her. Pop your trunk, we have four twist-off knobs that we have an extra trunk liner we have to get off, and then to bump stops in the middle. All right, these you can just do by hands, you don't need any tool for this. I'm just gonna twist these guys straight off, and I'm just gonna set them inside of our trunk for safekeeping.All right, for these bump stops, grab a panel removal tool, you're gonna peel up, pull up on the middle, just like that, and then go up underneath of it and pull that out in one piece. All right, do the same thing for both.All right, now if you look at the corner here, your Challenger may have a little black plastic trim here that you need to remove, ours does not but if yours does, grab a panel removal tool and just pop that guy off to expose this Torx screw underneath. Now, you have a Phillips head for reference here, go right on the inside, right on the colored panel there and you should be able to see that. Grab a T20 Torx bit. I'm gonna use an impact gun but a ratchet works as well and just get that off. All right, I just wanna safely bring that down. All right, repeat on the other side.Now, we can firmly pull off the center section, you'll wanna lift up on both sides, just like that. Pull that straight up. Now, there is still one wire harness right here that we need to pinch and disconnect. So, what you'll do is just pinch that, disconnect it, set the center section aside. All right, so now we can focus on the tail light section instead of the center. Now, on the outside here you have one plastic panel you got to pull off. So, you just gonna pull firmly off of that. There's just two metal clips on the inside, we're gonna set that aside. Now we can focus on the inside of that.All right, so on the inside, we have another one of those little twist knobs we can do by hand. So, let's get that guy off. And now we can peel back that carpeting. All right, so underneath that carpet liner, we have another one of those twist tabs. So, we're gonna twist that off as well. And then right past that is our tail light harness. So just pinch and disconnect. All right, just like that. There is a red locking tab here that you can push off to the side and then pull this out. All right, so on the outside, pull that back. It's free, repeat on the other side.All right, so now we have our center section on our table here, we have to remove the trim piece on the top of the center section to transfer it over. There's eight Phillips head screws holding that answer, grab a Phillips head socket or a Phillips head screwdriver and remove those screws.All right, so now with the Phillips head out of the way, there's just little plastic clips kind of holding that on. I'm just gonna start here at the edge. Pry that off, there's one here. So, you're just gonna basically follow this along the edge carefully, but firmly pull these guys out. All right, so those disconnected and the goal here is to take this button with us.All right, now at this point, you can see that this wire here connecting your trunk button, if your vehicle comes equipped with one, is all one piece. There's really no room or place for you to disconnect it without cutting. So, grab some snips and what you wanna do is kind of go right in the middle. You wanna leave yourself room so if you want to return it back to stock, you have some room to splice. You also wanna give yourself enough wire here connect to the buttons that you can splice into the new wiring. So, I'm gonna go right about here right in the middle, and just gonna cut these guys straight off. All right, so now this is disconnected, and we have enough room to splice it into our next one.All right, so we got our factory tail lights off of our '13 RT behind me and it's on the table next to our Raxiom Smoked LED tail lights. Let's go through some similarities and differences between the two kits. First and foremost in terms of fitment and quality of construction, you can expect all OEM quality, it's gonna be very similar in that respect.In terms of design and technology, yery different. Your factory tail lights, which you can see here, the center section and the two tail lights on either side there are very traditional red chrome reflective tai lights with incandescent bulbs. They're not very attractive, they're not very modern, they're really not that bright, all in all just very traditional. They've also got the traditional Dodge logo on the back there with the chrome trim, that's gonna be for your reverse light. Now, when it comes time for your Raxiom LED option, this is gonna be very different. This has LEDs throughout the entire kit, center section, and side tail lights, that's gonna be a lot brighter, more attractive. It's gonna be a lot more of a vibrant color for both the red brake lights, your turn signals, and your white reverse light. All of that built-in, no need to transfer over any of the bulbs there. Now, the nice thing about this particular thing is it has an added bonus when it comes to your turn signals which will act in sequence.So, that's not something you typically get with an aftermarket tail light for the Challenger, definitely some of the newer things that you're seeing on new Gen vehicles off the factory line. Now with modern technology you can have your tail lights here from Raxiom. In addition to that, you're also getting a very dark smoked tail light, both the tail lights and the center section. No need to get any other vinyl tint, which we know doesn't last as long. This is a really dark, stealthy look at the rear. And because the LEDs are so bright, you don't have to worry about it hindering any of that lighting output. It's gonna go straight through the smoked polycarbonate lens, no problems. It's also got an interior black housing, which again, smoked lens already darkens it up. But the fact that it has the black interior housing just takes it that much further. Your factory lights of course have that Chrome red like I said earlier. So, a big change-up in terms of appearance, huge change-up in terms of technology and brightness. And it's obviously gonna do a lot for visibility at night with some enhanced safety.With that said we still have to transfer over one thing, that button on the end here. Now, again, not all models came with that trunk button. If you did, we're gonna be following that method. If not, you just need to transfer over the trim. Either way, let's get to it.All right, so now we can transfer over that button trim. You're gonna start by lining it up and snapping it into place just like it was on the factory one. But now on your Raxiom.All right, so now you can take your Philips head screws, start putting them in, just thread them in a couple by hand, grab your socket or your Phillips head screwdriver and tighten them down. You don't wanna overtighten them stripping out the plastic, so just make sure they're nice and snug. Now we have to do some cutting and splicing when it comes to the button wires for our trunk. I'm gonna grab these wire strippers, I'm gonna strip back some of the wiring here on the button itself just to expose that copper, just like that. I'm gonna do the same thing on the yellow and black wire from the new center tail light section just to expose some of that wire.Now, there's a number of ways to cut and splice. You can twist these guys directly together and electrical tape them shut, or you can use some quick splice connectors, you can use male-female connectors like I'm going to. Basically what we're going to do is put a male end on one side, the female end on the harness on the back of the tail light, and then they're just gonna plug in, it's gonna be that easy. So, that's what I'm gonna do. Again, a number of ways to tackle this, this is my preferred method, you can use whichever method you see fit. So, now what I'm gonna do is take my male end here, I'm gonna slide the wire, make sure first off the wire is tight. Slide that wire straight in. All right, so once you have it in there, you're gonna grab your pliers, give that guy a crush, so it squeezes that wire, so you can just give it a tug and make sure it's tight. All right, so now that's secure. Next, what we'll do is take the yellow wire here, because if the yellow wire is gonna go to this brown and the green wire, that's your power, black to the black will be your ground.We're gonna put the negative side of that on the yellow wire so that those two will plug in. All right, just give it a quick tug, make sure it's secure. Take both of those guys and plug them in. You wanna make sure that they're all the way seated together. Now we can do the same thing for the black on black. Now we can plug in the black wires.All right, so now we can start installing our tail lights first before our center section. Plug in that plug and play harness. This extension wire here is gonna run up to the wire connected to the center section. So, we do have to feed that through that open hole. It's gonna reach my hand in and pull the excess all the way through. All right, with that, feed the plug and play harness back through and seat the tail light. All right, so now we can secure everything from the back. All right, we wanna hook the carpet around that stud, grab that twist knob, and set it back in place to secure the tail light.All right, so now we have to feed that longer wire up toward where our center tail light section is gonna mount. In order to do that, we're gonna go up through our trunk liner here. So you will have this wire hanging out just like that, you're only gonna see from here to here and then straight back to the tail light. Keep in mind guys that you do already have that happening on the other side, there's already this wire hanging out. So, we're just pretty much duplicating that on this side in order to run it upward. So, first thing I'm gonna do is go up to our trunk liner, pop just one push pin clip, I only need to take this guy off. That's gonna give me enough gap here to feed it up through and pull out the rest. All right, so I'm just gonna take that, feed this up through, I'm gonna put my hand up here to pull up the rest of the harness. Now, you may have to peel this trunk liner up over the latch there. I've already taken care of that ao this is free. We're gonna push that guy up and then pull up here, just like that. Repeat this whole process on the other side. All right, so now we have the center section propped up here on the back trim. We're gonna bring our trunk downward, like this. So now we can focus on plugging stuff in.This is our main master harness. So we're just gonna go ahead and plug that guy right in. All right, so that clicks. The rest of the harnesses these two guys that we fed up from our tail lights. We can start plugging in. You wanna make sure that you're plugging in the left one to the left side, the right side to the right side. So you may have to confirm which is which. All right, so I have the left side tail light harness on my left hand, I'm gonna plug that into the left side harness on our center light so it matches up. That's these really small connectors here, clips right in just like that. Just gonna tuck in some of that excess. Then we can do the same thing to our right, tuck that in as well.All right, with all the excess tucked in as much as possible, we can start mounting the center section. All right, so now we can continue just to seat that through, these two holes should line up and now we can start bolting it back down. All right, so now I'm just gonna put these four thumb screws back on right underneath where the trunk liner is.Now we can put those pushpins back in, one on each side. All right, last step here, just put that plastic trim panel back on the corners of your tail lights. Repeat that on both sides and you're good to go. That's gonna wrap up my review and install for the Raxiom smoked LED tail lights available for the '08 to '14 Challenger. You can pick yours up right here at americanmuscle.com.

      Product Information

      Features, Description, Reviews, Q&A, Specs & Installation

      Features

      • Race Track Inspired Styling
      • Brighter than OEM for Additional Safety
      • Sequential Turn Signal Indicators
      • Unique Running Light Design
      • Super Bright LED Technology
      • Smoked Polycarbonate Lenses
      • Black ABS Plastic Housings
      • DOT and SAE Compliant
      • Easy Plug and Play Installation
      • Sold as a Pair, Driver and Passenger Side Included
      • Fits All 2008-2014 Dodge Challenger Models

      Description

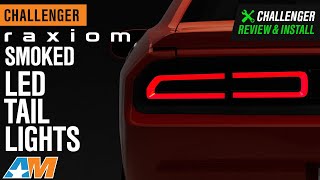
      Updated Modern Styling. An excellent way to add a modern appearance to your 2008-2014 Dodge Challenger is by installing a set of Raxiom Smoked LED Tail Lights that feature sequential turn signals. With a unique race track inspired running light design, these Tail Lights will update the look your Dodge Challenger's rear end and will also ensure that you are clearly seen by distracted drivers when braking.

      Quality Construction. Manufactured from OEM grade materials, these Raxiom Tail Lights are assembled to precise standards for long lasting quality. These Tail Lights feature durable, black plastic housings with smoked polycarbonate lenses. Employing red diffused LEDs for use as brake, running and turn signal lights, these Tail Lights use white diffused LEDs for the reverse lights. Each section of the Tail Light assembly is weather-sealed to prevent dirt and moisture from harming the state of the art electronics found inside.

      DOT/SAE Compliant. These Raxiom Smoked LED Tail Lights will not only bring a fresh new look to your Challenger, but they also meet or exceed the strict guidelines set forth by the U.S. Department of Transportation (DOT) and the Society of Automotive Engineers (SAE), making them legal for street use.

      Simple Plug and Play Installation. Raxiom designed their LED Tail Lights to be a direct plug and play replacement for your Challenger's original factory housings. There is no cutting or modifications required for a clean straight forward install. Installation can be completed in about 45 minutes with just basic hand tools.

      Application. These Raxiom Smoked LED Tail Lights are designed to fit all 2008-2014 Dodge Challenger models. Driver, passenger and center section included.

      Fitment:

      Raxiom CH3762

      CA Residents: WARNING: Cancer and Reproductive Harm - www.P65Warnings.ca.gov

      Installation & What's in the Box

      Installation Info

      What's in the Box

      • Driver Side Tail Light
      • Passenger Side Tail Light
      • Center Section Tail Light
      4.7

      Customer Reviews (35)

        Questions & Answers

        10 More Questions