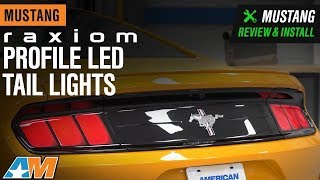
Installation Time
(approx) 30 Minutes
Difficulty Level:
Simple installation for anyone.
Installation Guides
FREE 1 to 3-Day Delivery on Orders $119+ Details
$554.99 (pair)
FREE Shipping Market Price $654.99 You Save 15% ($100.00) Up to 10% off for Military & First Responders! See DetailsAdd Local Shop Installation
Saved - View your saved items
We're sorry. We couldn't save this product at this time.
or use
Get a $30 Prepaid Visa Card!
Hey, guys. Today, we're gonna be taking a look at and installing the Raxiom Profile LED Tail Lights for the 2015 and newer Mustangs. These are gonna be for anyone who's looking to change up the exterior appearance of their Mustang in a very bold and big way. These tail lights offer a big change in the overall appearance of the car. They're a direct plug and replacement. They have very bright LEDs and they do maintain the sequential turn signals. They cost about $500. I'm gonna call the install a one out of three wrenches in the difficulty meter, and these will take you about 30 minutes to get installed in the car. We'll go ahead and show you how it's done now.For this install, we used a 3/8 drive ratchet. You'll need a 10-millimeter socket, a body panel removal tool as well as a plastic body panel tool. To start our install we'll pop the trunk. We need to remove our factory tail lights first. There are four screw and fasteners on the backside of this trunk panel. We're gonna go ahead, unscrew them and remove the panel.So, we're just gonna go ahead, unthread these. All right, now we can pull this panel off. Just do keep in mind that it is clipped in place into the body so it may give you a little bit of resistance at first, but then it'll pop out. We'll get this trunk liner out of the way so we can remove our trim panel. Next, we're gonna remove this plastic pushpin right here so we can fold the trunk liner back and get access to our tail light. I'm gonna use the body panel removal tool for that.We're gonna do the same thing on the other side. There are three nuts that are holding our tail lights in place. We are going to take a 10-millimeter socket and remove them. We'll also unplug the tail lights while we're back here, so we're just gonna press down on the tab and pull. All right, we'll also unplug this one. Now, we're ready to pull the taillights out of the car. So, if you guys find that the taillights are a little bit sticky, what I like to do is reach back under the studs and, kind of, wiggle them and push towards you. And what it's gonna do is help pop the taillight out of place.So, a lot of times I'll just wiggle on the studs, and it'll help me pop the tail light out. Okay, then we just have this chrome in here that's holding things in place. You can just grab this, work it out of the hole in the body and remove the electrical connection. So, we'll do the same thing on the other side. I'm going to push back on the studs a little bit and help me get the tail light out of place. Okay, we'll grab the grommet on this side and remove the tail light.Real quick, before we install our Raxiom tail lights, let's take a look at them on the table compared to our factory tail lights. So, first things first, you guys can tell right away that the Raxiom tail lights look very different than the factory tail lights. They're gonna offer a huge styling change. Gone is the scallop look of the factory tail light and now you have a flush tail light. You do keep the three-bar design though and of course, you are gonna keep the sequential turn signals if you choose to go with these tail lights. These have very bright red LEDs in them.You're also looking at a gloss black housing with a smoked polycarbonate lens. They're a direct fit replacement. You guys don't have to worry about doing any wiring at all. You just plug them in and bolt them down. We do have a couple of pieces that we have to transfer over from the factory tail light to the Raxiom tail lights before they're ready to be installed. So, let's go ahead and do that now.So, we have to remove this upper plastic trim panel which is on the top of the tail lights here. In order to do that, I am going to use a plastic body panel removal tool. So, I'm basically just going to wedge this in here and see if I can get this popped out of place. So, now we'll snap this into place on our new tail light, and do the same thing on the other side. Once we snap this one into place, we'll be ready to install the tail lights into the car. I'm gonna reinstall these tail lights the same way. The first thing I'm gonna do is fit the electrical connection in. I wanna make sure that the grommet is seated, I'm gonna line the tail light up and get it in place. Do the same thing on this side.We'll go ahead, fit our electrical connection in, we'll get our grommet in place and then line up our tail light. Now, we can go on the inside of the trunk and bolt the tail lights back down. So, we'll go ahead, plug in our tail lights and then bolt them down. Now, we'll go ahead and tighten them down. We don't wanna make these too tight, but we definitely wanna snuggle. So, we'll plug in our electrical connection on this side and then bolt the tail light down. And now, we can put our trunk liner back. Make sure to push the pushpin back in and do the same thing on the other side. Now, we can get the trunk panel back in place. And we're just gonna line up with our studs here. We'll line up over the trunk latch, press our clips down into place. We'll grab our fasteners and tighten them back down. Now, the last thing we're gonna do is replace the trunk mat.All right, guys, that's gonna wrap up this review and install. Keep in mind you can always check these tail lights out more online. I'm Stephanie and for all things Mustang, keep it right here at americanmuscle.com.
Subscribe to our YouTube Channel
Features, Description, Reviews, Q&A, Specs & Installation
Fitment:
Raxiom 402183
CA Residents: WARNING: Cancer and Reproductive Harm - www.P65Warnings.ca.gov
Installation Info
Installation Time
(approx) 30 Minutes
Difficulty Level:
Simple installation for anyone.
Installation Guides
What's in the Box
10 More Questions