 FREE 1 to 3-Day Delivery on Orders $149+ Details
How to Install an SR Performance Bump Steer Kit in Your 2015-2016 Mustang
Installation Time
2 hours
Tools Required
- Ratchet
- 8mm Socket
- 18mm, 22mm Wrench
- 3/4", 7/8", 1-1/8" Wrench
- Flat Screwdriver

Contents:
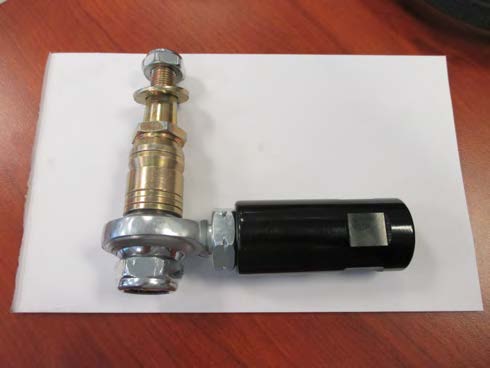
(2) - End Link
(2) - Tapered shafts
(4) - Nuts
(2) - Washers
(12) - Bushing spacers

**Important Notes:
We always recommend a professional alignment after installing any suspension components.
Step 1:
On a level surface, raise and support the vehicle on jack stands. Remove front wheels.
Step 2:
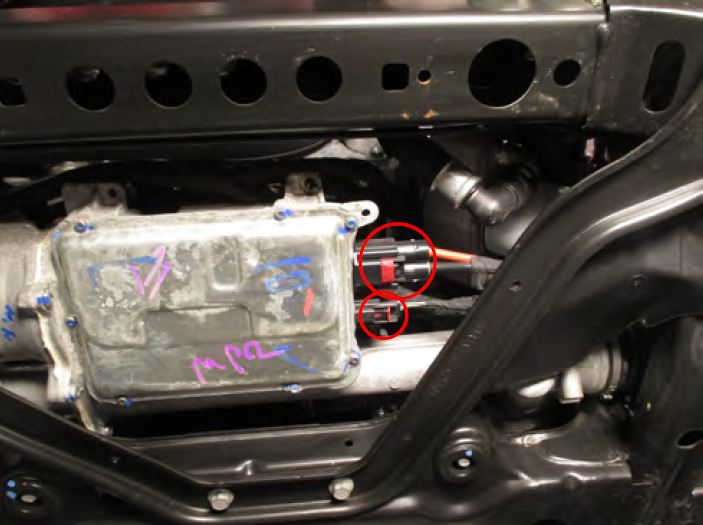
NOTICE: Disconnect the Electronic Power Assist Steering (EPAS) steering gear power supply electrical connector or damage to the steering gear internal power relay may occur resulting in steering gear replacement.
NOTICE: The ignition must be off when disconnecting EPAS electrical connectors. Failure to follow this direction may lead to DTCs being set in the EPAS module that cannot be cleared, and result in the need to install a new EPAS assembly.
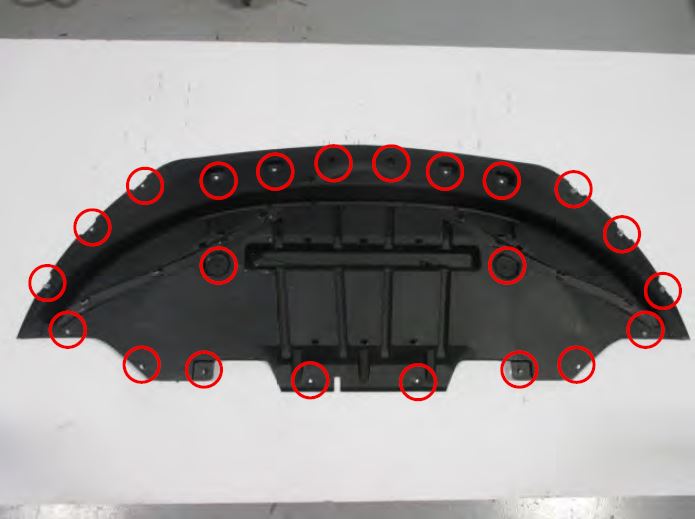
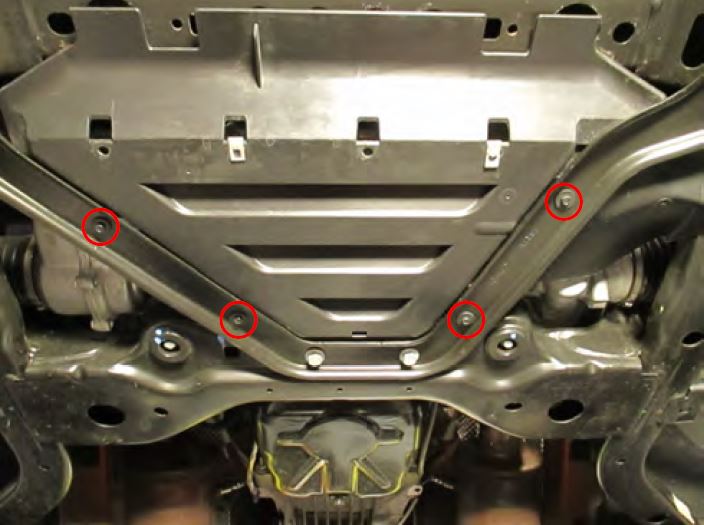
Remove splash shields
Release the red CPA feature and disconnect the EPAS power supply electrical connector.
Step 3:
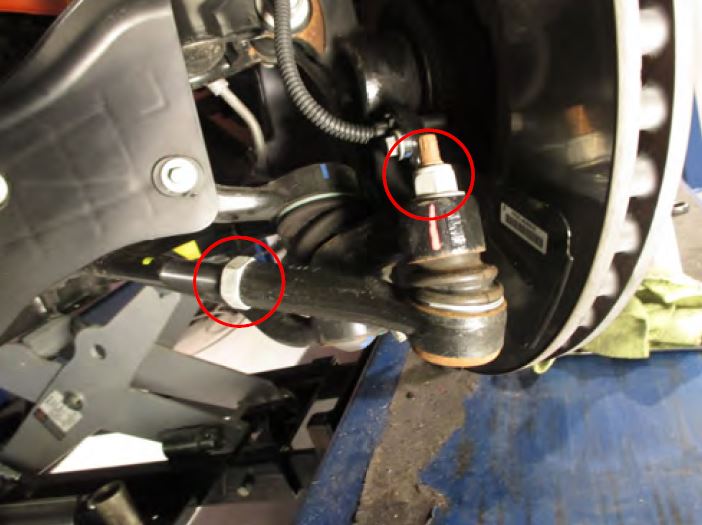
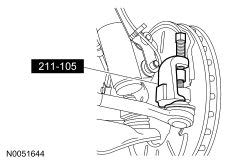
Loosen the lock nut. Remove tie rod nut. Using a Tie Rod removal tool separate the outer tie rod from the wheel knuckle.
Step 4:
Measure the difference in length between the stock and SR end link. It is required that the heim joint be threaded into the threaded sleeve as far as possible.
Step 5:
Then account for the difference in length by moving the lock nut on the inner tie rod outward.
**Note: A professional alignment is always highly recommended to ensure proper steering geometry and tire wear.
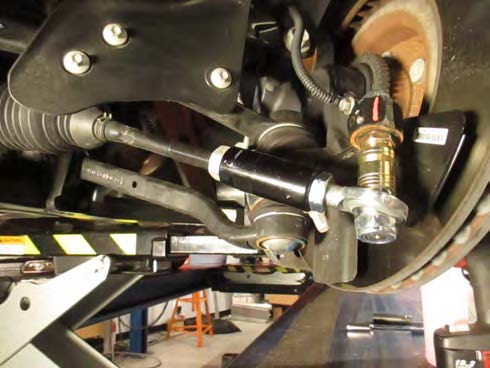
Step 6:
Re-install tie rod into the knuckle. Torqueing the nut to 59 ft-lb. Tighten the lock nut to 41 ft-lb. Reinstall cross brace and plug in EPAS.
Step 7:
Connect the EPAS power supply electrical connector and secure the CPA feature.
Step 8:
Reinstall the splash shield.
