FREE 1 to 3-Day Delivery on Orders $149+ Details
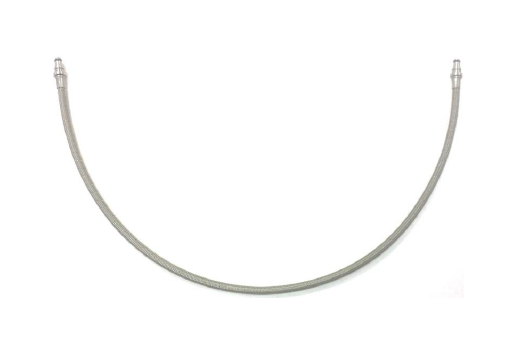
How to Install Steeda Heavy Duty Braided Hydraulic Clutch Line on your Mustang
Installation Time
2 hours
Tools Required
- 10mm socket and ratchet, or wrench
- Long needle nose pliers, or hose pliers
- Small picks
Installation
1.Remove the sound tube from its grommet and its mounting positions, then relocate it out of the way.
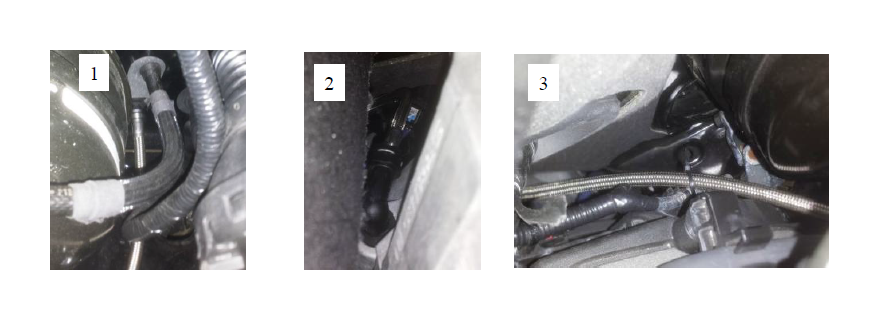
2.Place towels or shop rags underneath the clutch line connection at the firewall. Brake fluid does not need to get on any of the painted surfaces.
3.Remove the top connection using the metal pick. Slide the pick behind the metal retaining clip, and remove it. Be careful not to lose this clip because it will be reused. Pull the line out of this fitting.
4.Reinstall the metal retaining clip into the fitting at the firewall. This will make reinstalling easier.
5.Raise and safely support the vehicle.
6.Remove the lower end of the clutch line. It is located in the black 90 degree elbow on the left side of the transmission bell housing. Slide the pick behind the metal retaining clip on the clutch line end of this elbow. Pull the clip out but do not remove it completely. This clip is designed to stay in the elbow while also allowing the line to be removed. Be sure not to be directly below the clutch line, and push the line up and out of the fitting.
7.Once you have removed the line from the fitting, push the metal retaining clip back in.
8.Remove the stock clutch line from the vehicle
9.From the engine compartment, install the new steel braided line into the fitting on the firewall. Push the line in until you feel a solid “click.” Pull out gently on the line to make sure it is firmly installed.
10.Route the line next to the firewall, and down to the transmission. Using the supplied zip tie, secure the line to the wiring harness at the back of the driver’s side cylinder head. See figure 3. (An extra zip tie is included for other securing options.)
11.From underneath the vehicle, push the metal retaining clip back into the fitting completely.
12.Using the hose pliers or long needle nose pliers, feed the new braided line down into the fitting. Again, make sure you hear a “click” once you feel like the line is pushed in all the way. Pull up on the line gently to make sure it is installed securely.
Bleeding the clutch system
The clutch system will need to be bled after installation of the new steel braided line. This involves pumping the pedal 100 times or so. At first, the pedal may go to the floor and not return. If this happens, pump the pedal by hand until it is returning on its own. During the bleeding process, make sure to check the fluid reservoir for proper fluid level, and refill if necessary. Once the pedal feels like it is performing as it should, take it for an easy test drive, being sure to cycle through all of the gears. Be sure to check the fluid in the reservoir again when you are done with the test drive. Now, enjoy your new Steeda Stainless Steel Braided Clutch line upgrade!