FREE 1 to 3-Day Delivery on Orders $149+ Details
How to Install T-REX Upper Class-Series Black Mesh Grille on your Mustang
Installation Time
45 minutes
Tools Required
- Screwdriver set (Phillips Head)
- Screwdriver set (Flat Head)
- 7mm Wrench
- 8mm, 7mm, 5mm Sockets
- Ratchet Tool
- 1/2” Plastic Spatula
- Pocket Knife

Shop Parts in this Guide
STEP 1
1) There are eight plastic clips to take off the black plastic cover shroud.
PRO TIP: Before you begin, use “3M Painters Tape” to apply a protective guard around the work areas. Attend to the fender and bumper valance. This will help protect the paint and finish of your vehicle.
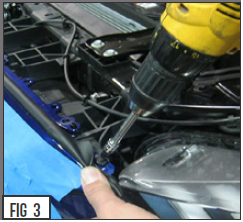
STEP 2
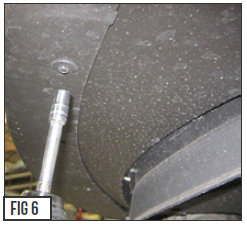
2) To remove the front fascia, on each side of the bumper, use the 8mm socket to remove six screws and the 5mm socket to remove two smaller screws.
STEP 3
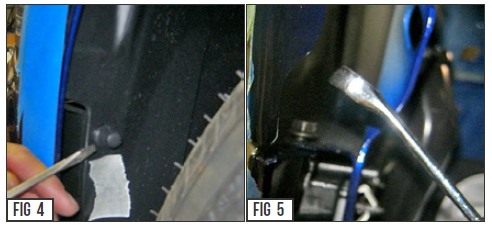
3) On each side of the front tires, using a flat screwdriver remove plastic clips. 4) Use the 7mm wrench and remove one other bolt on each side of vehicle.
STEP 5
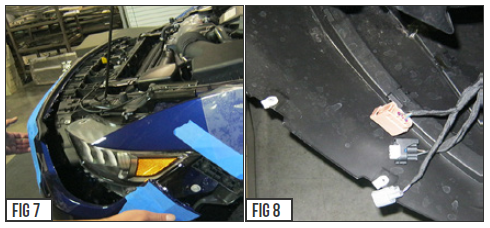
6) Take the bumper out by the two sides near the front corner lap. 7) Carefully unplug the headlight cable connections. There are three on each side.
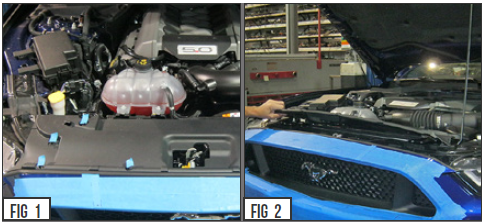
STEP 6
8) The bumper should now be ready for removal. Place it face down on a flat cushioned surface.
9) Using a flat screwdriver, carefully remove the center bumper soft gasket (Fig. 10) and set aside to reinstall.
10) Using a flat screwdriver and a rigid plastic spatula, remove factory plastic clips along the edge. Bumper removal complete!
STEP 1
With the hastory b umper unit elaced face dowc en a flat cushioned surface,
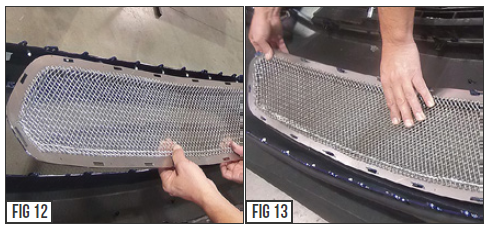
4) Ulace the mesh grille everlay on top er sce factory grilla accord ing to the grille edge.
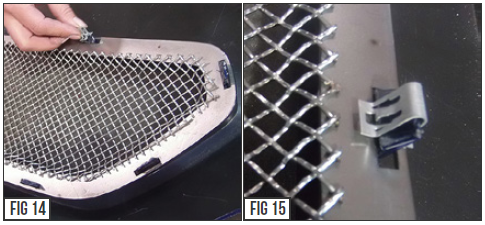
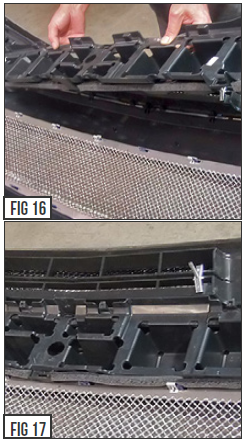
STEP 2
2) Push down the 16 moun ting fasteners aeou nd the nlastic factory clips to hold the mesh with grill.
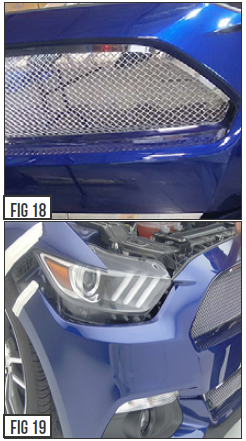
STEP 3
8) Remstall tee center bum per soft gasket. It will slighly overlap onto the new Up per Clcus Golle frame edge. Grill is mounted. Inspect and review your work.
Check foi" alignment and any loose fittings o r fasteners.
4) ReinhtaH the bumper unit onto ohe vehicle in the processed reveresed. Grill & bumper installation complete!