 FREE 1 to 3-Day Delivery on Orders $149+ Details
How to Install X-Force Varex Axle-Back Exhaust on your Mustang
Installation Time
2 hours
Tools Required
- 15mm Deep Socket
- 17mm Deep Socket
- Ratchet
- Floor Jack
- (2) Jack Stands
- Wheel chock
- Hex Key set
- Box cutter

Shop Parts in this Guide
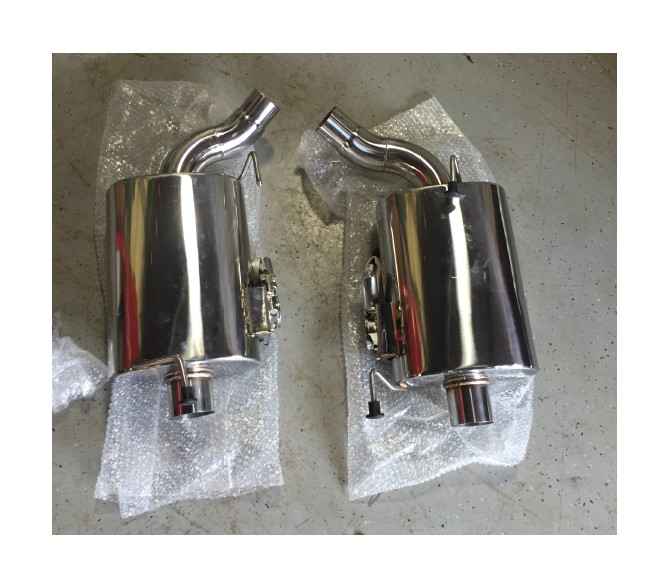
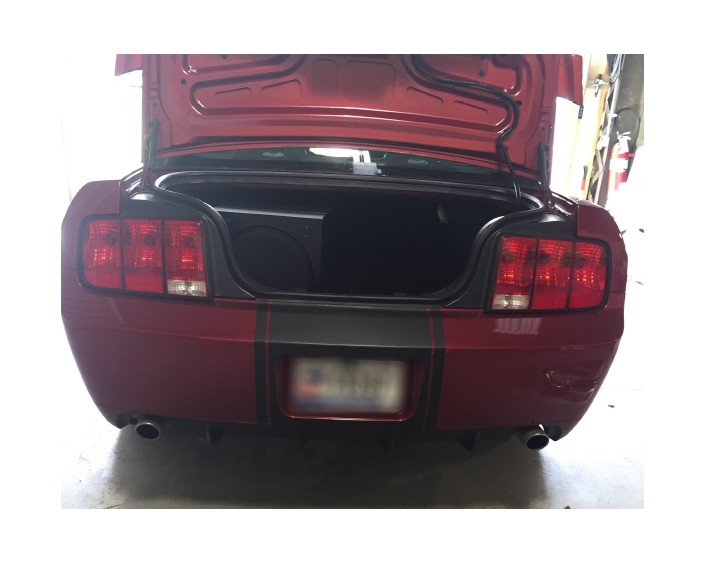
Before Picture:
Muffler Install Procedure:
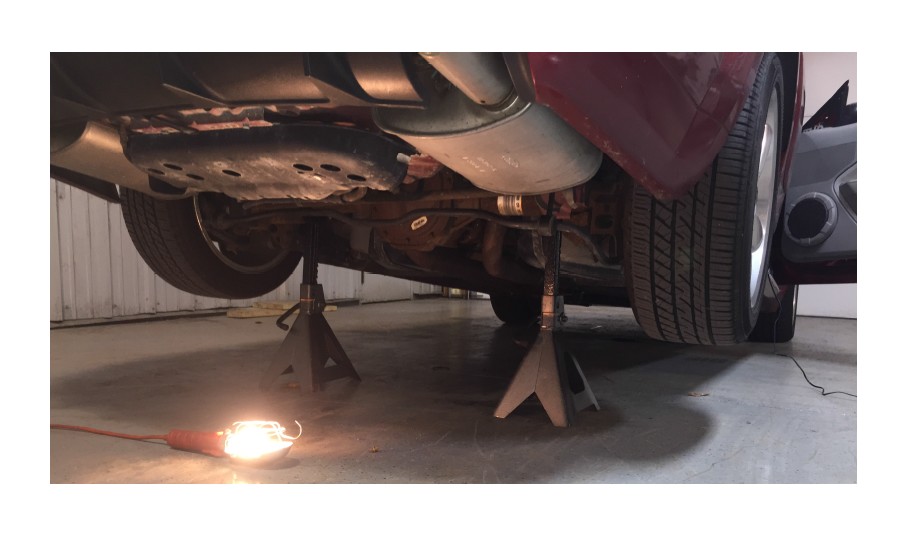
1. Place the car on jack stands
a. Chock the front tires with something. A piece of wood or a brick
works fine.
b. Raise the rear end with a floor jack. I used the rear differential. Be
careful to not bend the rear differential cover while raising the car
c. Use two (2) jack stands on the rear axle tubes to hold the car.
NEVER WORK UNDER A CAR ONLY SUPPORTED BY A FLOOR JACK
2. Unbolt the stock mufflers from the over axle pipes.
a. Using a 15mm deep socket, unbolt the clamps that hold the
mufflers to the over axle pipe
*Note: It is not necessary to completely remove the bolts from
the clamps. Just enough to get them loose. Also the clamps are
welded to the muffler pipe and cannot be completely removed*
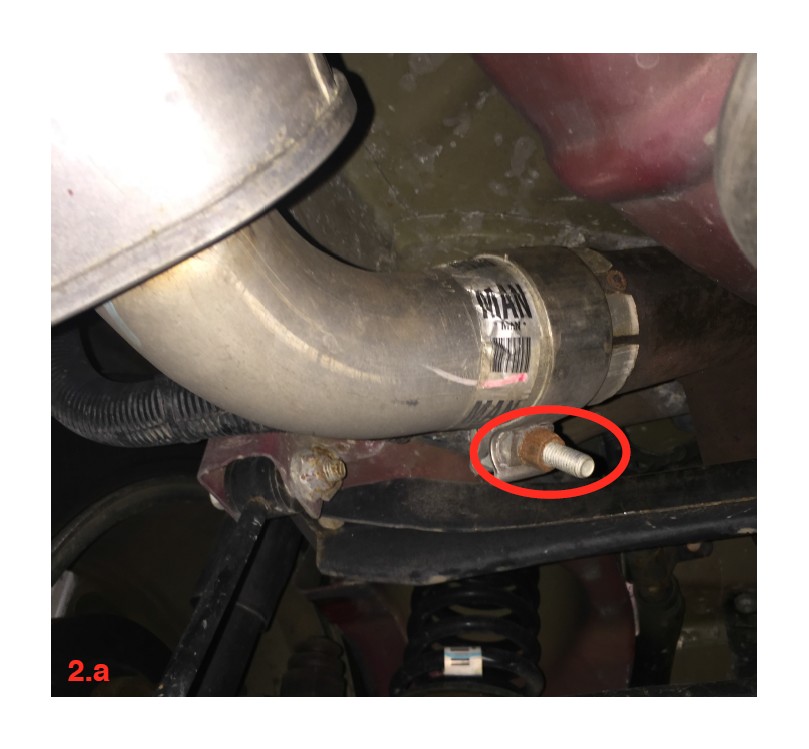
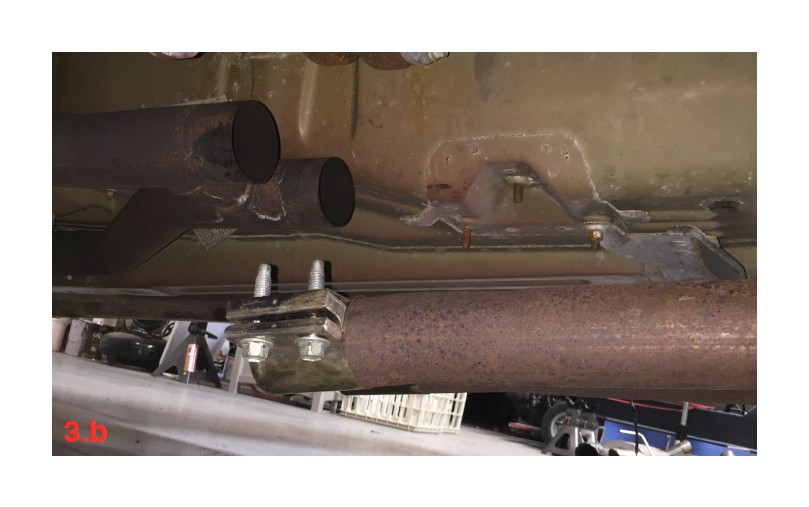
3. Unbolt the mid pipe clamps
a. Using a 15mm deep socket, unbolt the four (4) nuts that hold the
clamps together. Again, it is not necessary to completely remove the
nuts.
b. Slide the clamps onto the over axle pipes and let the pipes hang
down. It may also help to use a rubber mallet to break the clamps
free, if they are rusted onto the pipes.
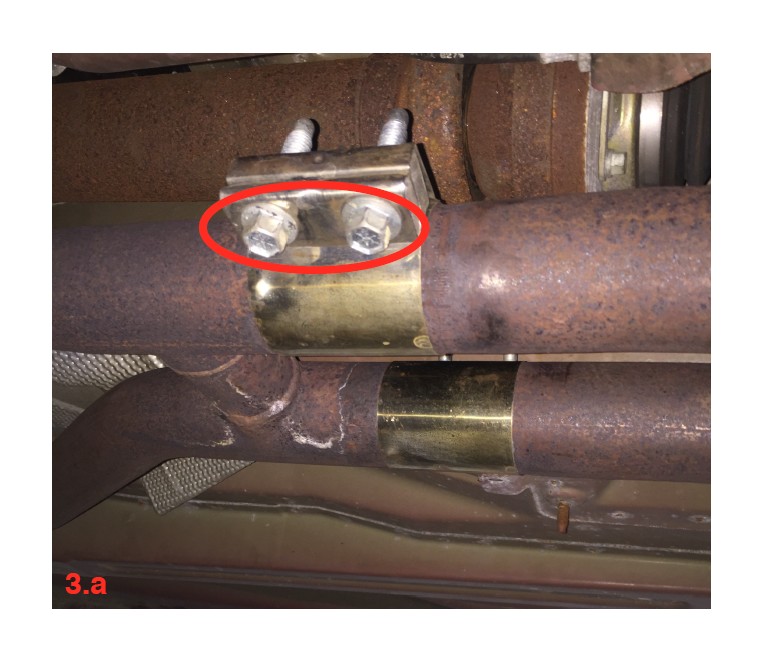
*Note: The clamps pictured are aftermarket clamps. The OEM Clamps
will have two nuts on each clamp*
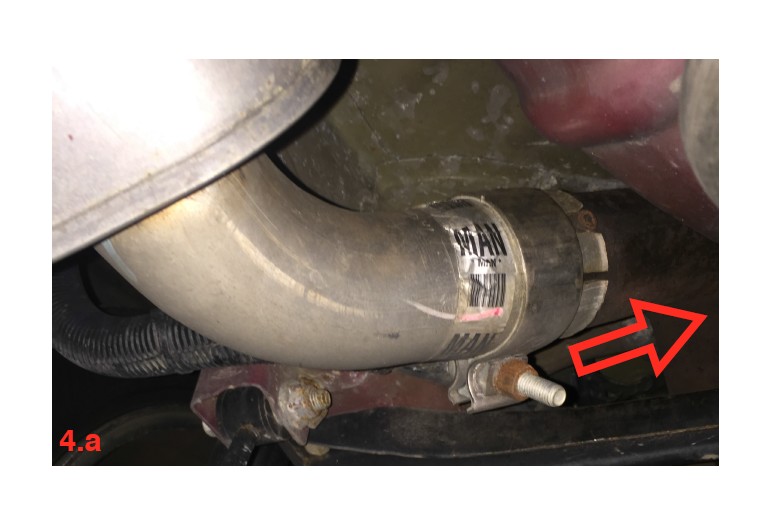
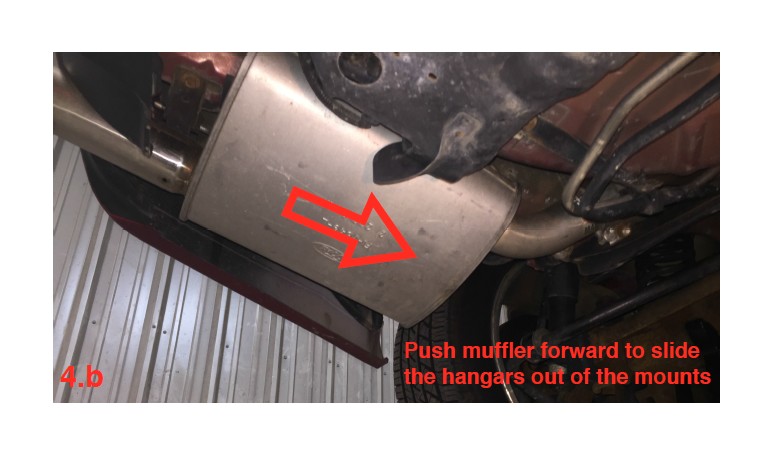
4. Remove the stock mufflers from the car.
a. Remove the over axle pipe from the muffler by pushing the over
axle pipe away from the muffler pipe up and away from the muffler.
b. With the over axle pipe out of the way, push the muffler towards
the front of the car. This will allow the hangars to come out of the
rubber hangar mounts.
c. The muffler will be free at this point, be careful to not drop it!
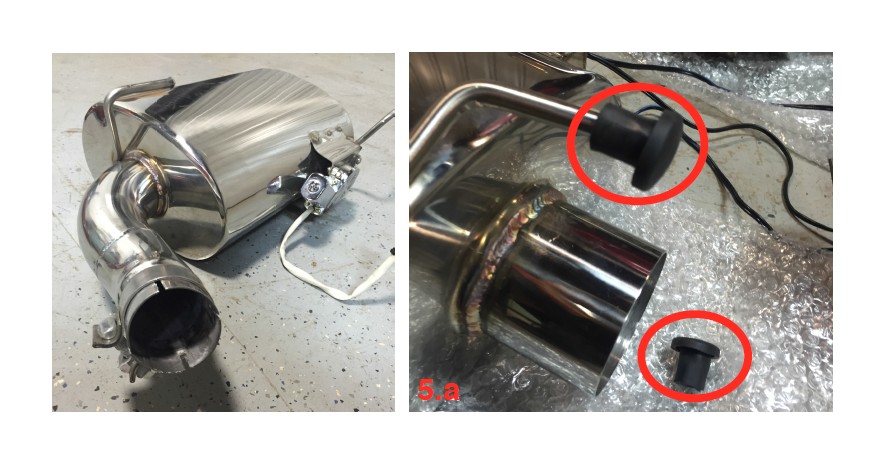
5. Slide the new mufflers into the hangars.
a. Using the opposite procedure as removal, slide the new mufflers
into the hangars, like the stock mufflers were installed. Be sure to
remove the rubber end caps that come on the new mufflers before
installing.
b. Using a 17mm Deep Socket, secure the muffler pipe to the over
axle using the supplied clamps
c. Reinstall install the over axle pipe by pulling it down and into the
muffler.
d. For now, let the electrical connections hang from the muffler. We
will be installing those later.
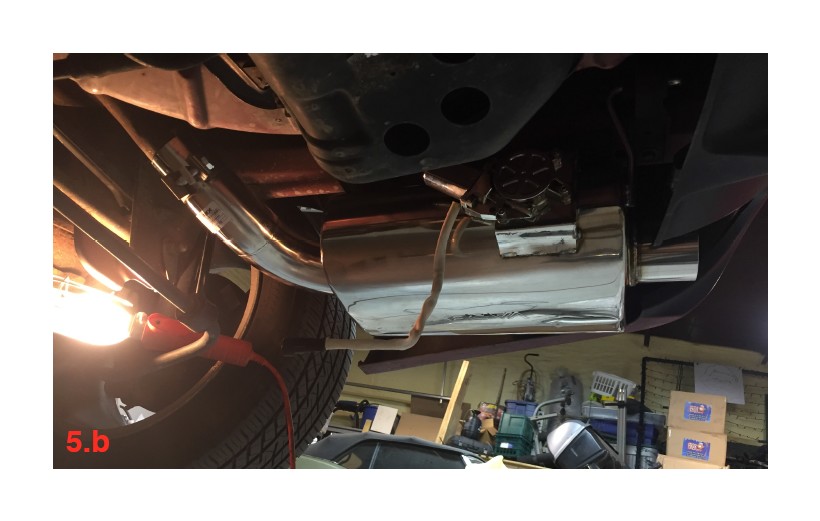
6. Reconnect the over axle pipes.
a. Re-bolt the over axle pipe to the mid pipe using a 15mm deep
socket.
*Note: Have a partner watch the tips of the exhaust as you
tighten the mid pipe clamps. By rotating the over axle pipes,
you can align the exhaust tips to be perfectly centered.*
7. Install the exhaust tips.
a. Using a hex key, tighten the exhaust tips to the end of the muffler.
Typically, the slash cuts of the tips face down, but they could be
rotated to face which ever way is preferred.
8. Admire your hard work.
Take a minute to double check that there a no loose bolts or
connections. You can start the car up and check for any leaks. If there
are none and you are satisfied with the exhaust tip alignment, you
can lower the car back down onto the floor.
Electrical Wiring Procedure:
There are many ways these cutouts could be wired. I chose to hard wire
mine into the 12v power ports in the center console. However you can
easily use the 12v plug that comes with the system.
Which ever way you chose, routing the wiring from the mufflers to inside
the cabin should be about the same. Here is how I did it.
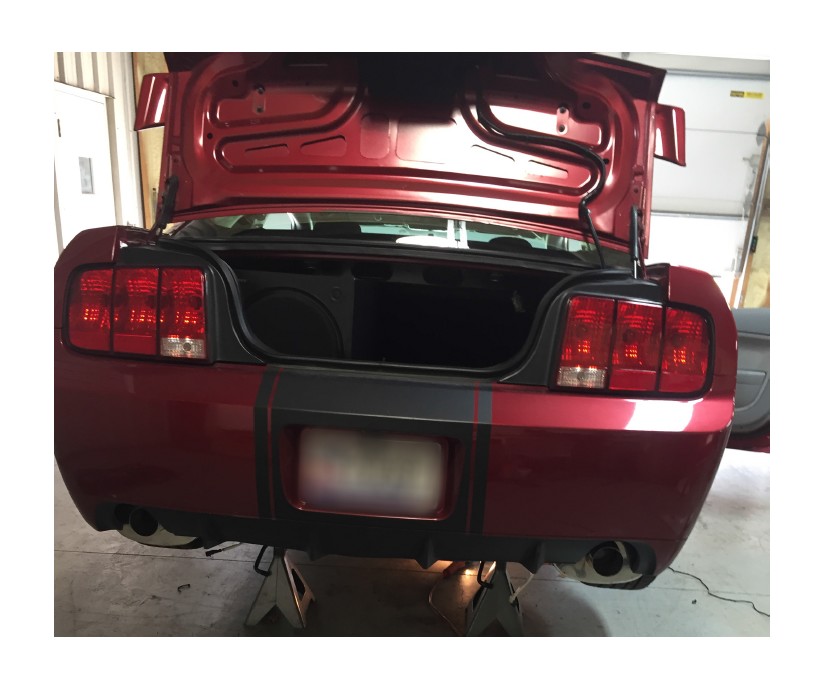
1. Remove the spare tire.
a. Remove the carpet in the trunk by pulling it straight up and out.
b. Unscrew the cap that holds the spare tire down.
c. Remove the spare tire, along with any instruction papers. You can
leave the sicker jack in place.
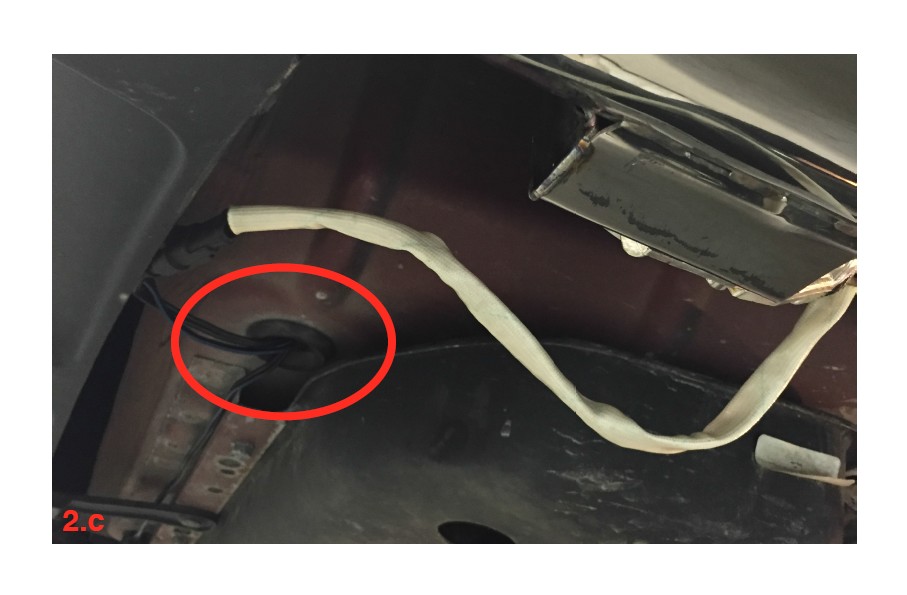
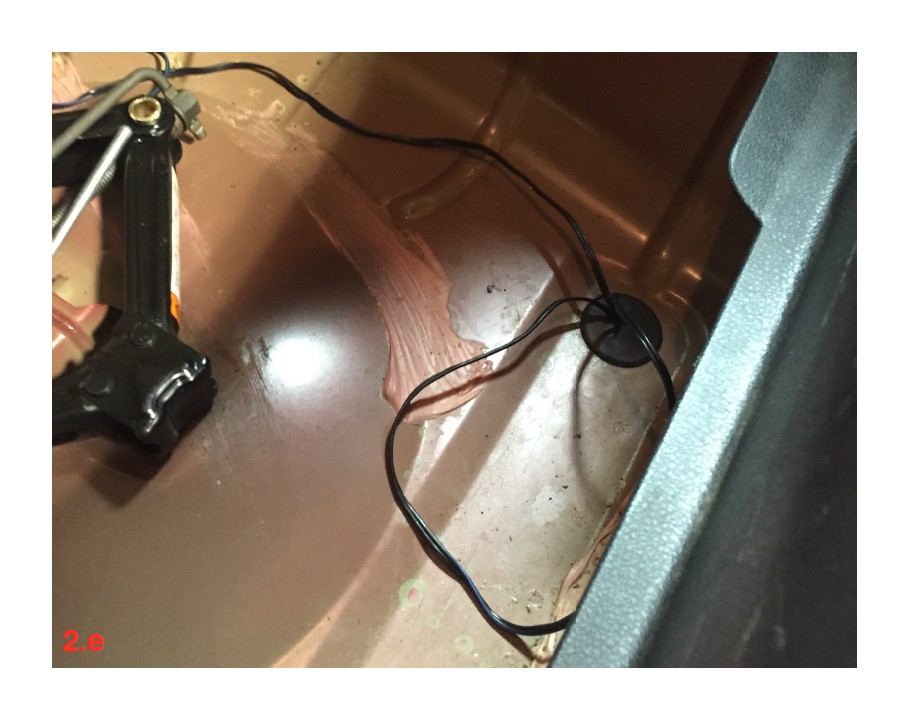
2. Rout the wiring harness though the tire well.
a. Remove the grommet on the passenger side of the tire well. There
shouldn’t be any wiring coming though this grommet.
b. Using a box cutter or similar tool, cut an ‘X’ into the grommet. This
will allow the grommet to close around the wiring easily.
c. Feed the two plugs that connect to the mufflers through the
grommet, then reinstall the grommet into the tire well
d. Connect the two plugs to the plugs on the muffler. One plug is
noticeably longer than the other; use this plug for the driver side, and
leave the shorter one for the passenger.
e. Pull any slack though back into the wire well, then zip-tie the wires
underneath the car to anything you can to keep them secure. I used
the hangar mount and a piece of plastic that secures the bumper for
mine.
3. Route the wiring though the cabin.
This step can be done many ways. You can do a very clean install
with the wires hidden, or leave them out and just plug into the 12v plug.
Either is fine. I chose to hide my wires by routing them under the carpet. I removed
the bottoms of the back seats and center console, and ran my wiring under
both of those parts.
4. Connect the harness to the main unit.
Connect the 4 pin connecter to the brain of the system, then plug the
12v plug into the power port (either in the center console or dashboard)
Now you can use either of the two supplied remotes to open and
close the butterfly valves!
