FREE 1 to 3-Day Delivery on Orders $149+ Details
How to Install X-Force Varex Cat-Back Exhaust on your Mustang
Installation Time
2 hours
Tools Required
- panners and Sockets required 10mm, 13mm, 14mm, 15mm, 17mm 2. 3/8 1/2 9 1/6 5/8 11/16
- 3. Supporting stand
- 4. Extension bar
- 5. Can of spray lubricant
- Tube of O2 Sensor safe sealant for all gaskets

Step 1
Disconnect Battery (located under a rubber lid in the engine bay on the left side near the windscreen)
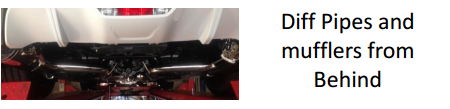
Support the exhaust using a stand and then unbolt the exhaust at the 2 x 2 bolt flat band clamps (15mm) in the middle of the car
Spray the rubbers with lube and unbolt the rubber hangers from the rear subframe above the diff. Now remove stand and slide the exhaust forwards (towards the engine) until the hangers on the rear mufflers are released from the rubber.
Once the exhaust is on the ground refit the rubber hangers to the subframe but leave loose.

Step 2
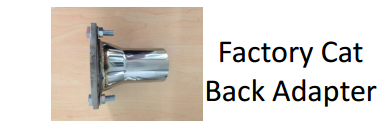
If fitting to the factory cats use the factory cat back adapters and factory 2 bolt flat band clamps.
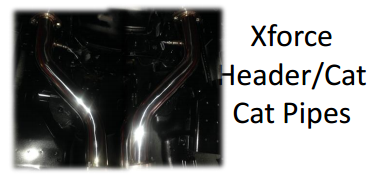
If fitting to the Xforce headers and cats use the long cat pipes which bolt to the 2 bolt flange at the back of the cats.
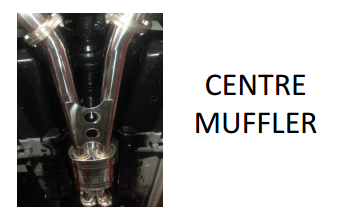
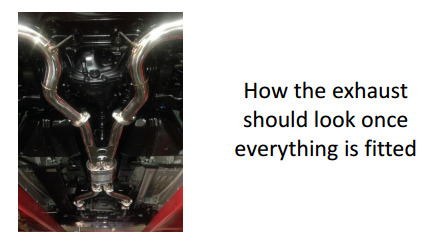
Fit the centre muffler bolting it to the flanges after the cat pipes (or adapters). Put a stand under the muffler to support the system.
Make sure all gaskets are in and all bolts at this stage are finger tight only.
Step 3
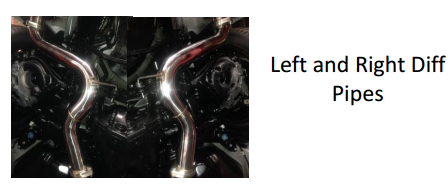
Slide the diff pipes hangers into the rubber mounts on the subframe above the diff and bolt them to the back of the centre muffler.
Remove the stand from the centre muffler.
Fit the rear muffler 1 at a time by bolting to the back of the diff pipes then using the stand to support.
Slide the round rear hanger over the muffler with the bolt that clamps it onto the muffler (at 9 o'clock for the left muffler and 3 o'clock for the right)
Make sure all gaskets are in and bolts at this stage are finger tight only.
Step 4
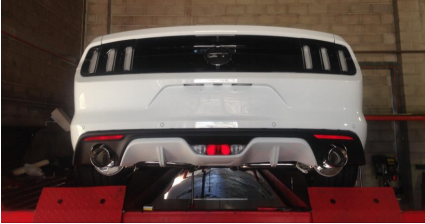
Fit the tips and adjust the hangers from left to right so the tips are centred in the rear bar (if needed rotate the round part of the hanger up or down to adjust the height).
Do all the bolts up tight from the back to the front.
Now check the tips again and adjust the hangers if needed if the aren’t centred.
Step 5
Now check that the exhaust doesn’t hit anywhere that may cause a rattle or damage to any other part of the car. Once you are satisfied tighten the hangers from the rear to the front.
Start the car, check for leaks and now enjoy your new
XFORCE PERFORMANCE EXHAUST.
Note: When you first start your vehicle after the installation of your new XFORCE Performance Exhaust System, there may be some smoke and fumes coming from the system. This is a protective oil based coating used in the manufacturing of mandrel bent performance exhaust tubing. This is not a problem and will disappear within a very short period of time after the exhaust has reached normal operating temperatures.