 FREE 1 to 3-Day Delivery on Orders $149+ Details
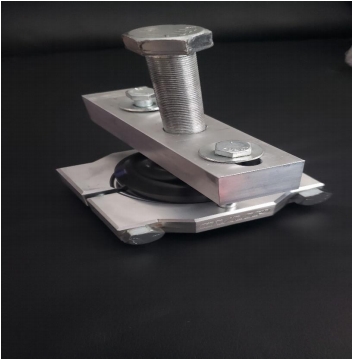
How to Install VMP Ultimate Pulley Tool w/ 2.4 in. Supercharger Pulley & 90MM Idler (13-14 GT500) on your Ford Mustang
Installation Time
2 hours
Tools Required
- Electric/pneumatic Impact (optional)
- ½” Ratchet
- ½” drive 1 1/8” Socket
- ½” drive 15/16” socket
- ½” drive ¾” socket
- ½” drive 9/16” Socket
- 15/16” Wrench
- ¼” breaker bar
- ½” crescent wrench
- Pry bar/cheater bar (used for leverage)
For proper operation of VMP Pulley, vehicles computer will require reprogramming

Installation Instructions:
STOCK PULLEY REMOVAL
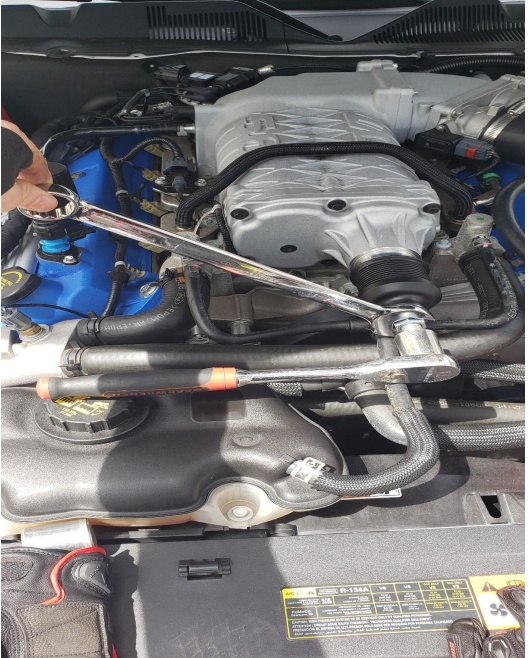
1. Loosen and remove the OEM Belt from your stock supercharger pulley. (DO NOT completely remove the belt from other pulleys) To remove the belt, you will need to take your ¼” breaker bar and plug it into the square hole at the end of the idler pulley, then press downwards on the breaker bar until the OEM belt is loose enough to pull over the stock supercharger pulley.
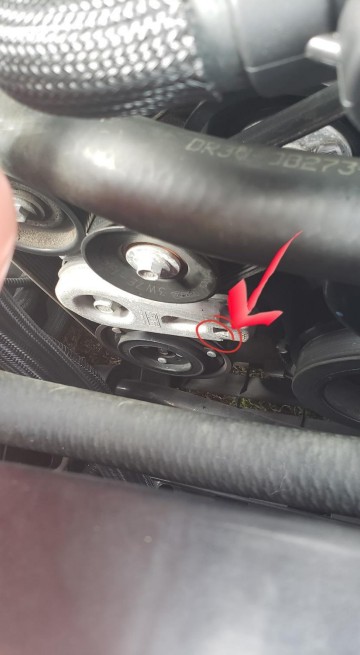
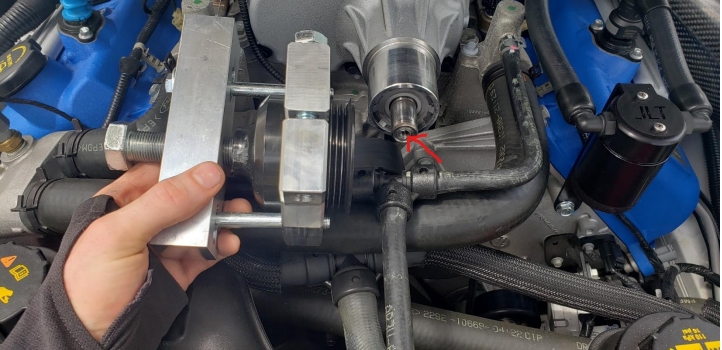
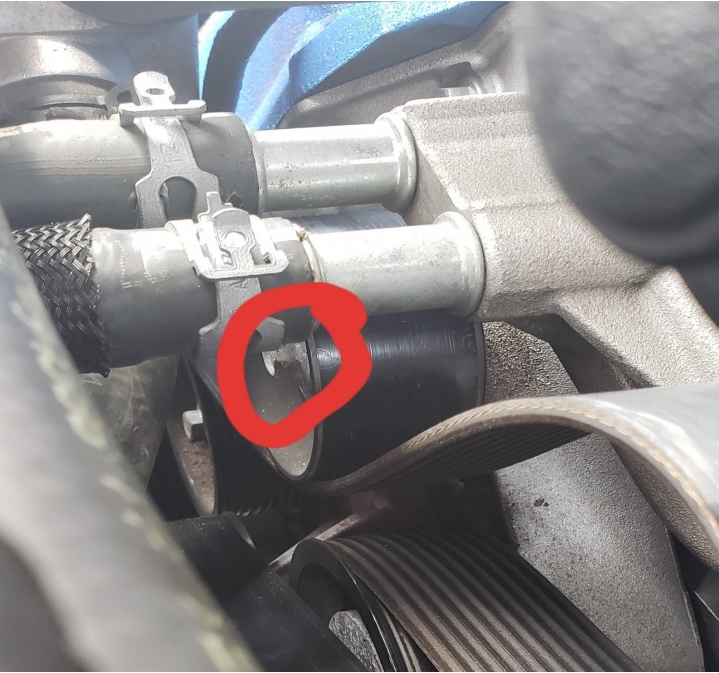
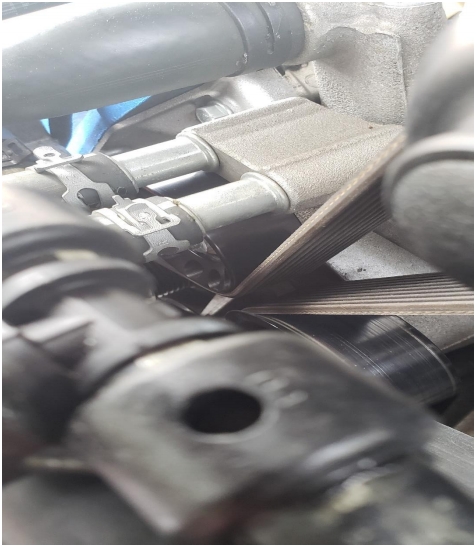
2. Remove black Plastic Cap at then end of the stock supercharger pulley.
To remove, you will need to spin the cap counter clockwise. You can use a flat head screw driver to turn the cap but be cautious of scratching the OEM pulley.
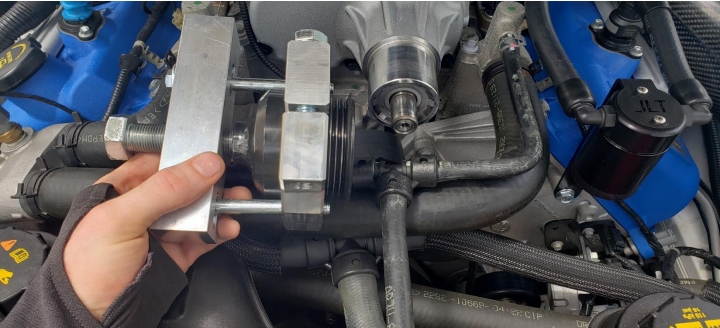
3. Attach HD Clamp Shell to OEM supercharger pulley (keep Clamp Shell as far forward on the pulley as possible.)
Note: Tighten both Bolts on the bracket until they are hand tight and snugged. DO NOT over tighten them.
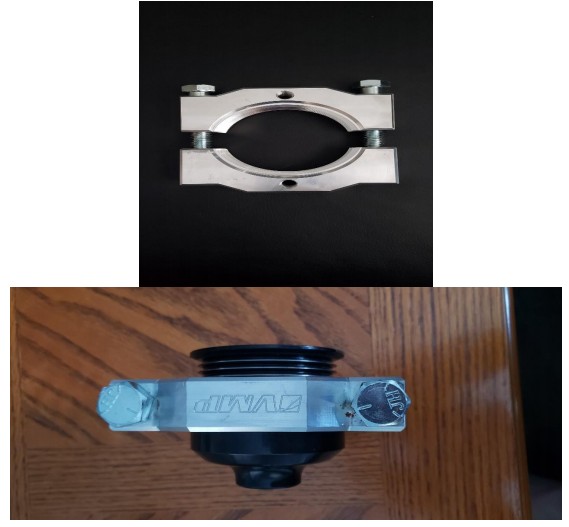
4. Attach Pulley Removal Square and Bolts to HD Clamp Shell
Note: Add round washers to Bolts to spread the load. To keep Block even during removal, hand tighten bolts down until they stop themselves and then snug bolts tight. DO NOT over tighten bolts.
5. Screw in Bolt with Nub to the Removal square to complete assembly of the VMP Pulley Tool.
Tighten Bolt with Nub until bolt stops
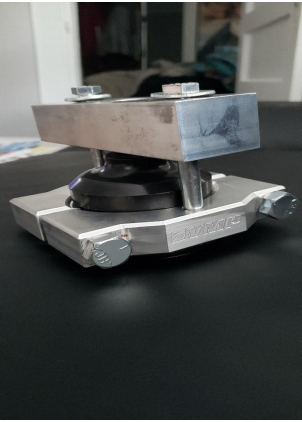
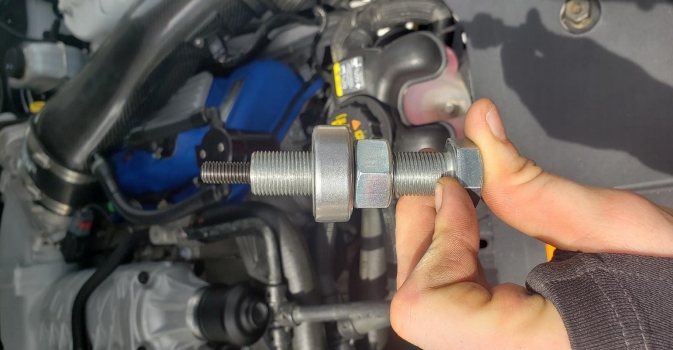
6. Using a Impact gun or Ratchet with a 1 1/8” socket. Tighten Bolt with Nub until charger Stock pulley is removed.
Note: If using a Ratchet, you will need a pry bar/cheater bar as leverage to keep VMP Pulley removal tool from spinning during removal.
Installation of VMP 2.4 Pulley
7. Assemble Pulley installation Bolt
Using the Bolt with tapped hole, screw the M8 x 40 full thread screw into the tapped hole of the bolt. Then screw on the 18 Nut, about ¾ of the way onto the Bolt with tapped hole. Then slide the Large D-3 bearing onto the Bolt with tapped hole until it sits against the 18 Nut to complete assembly.
8. Screw in newly assembled bolt
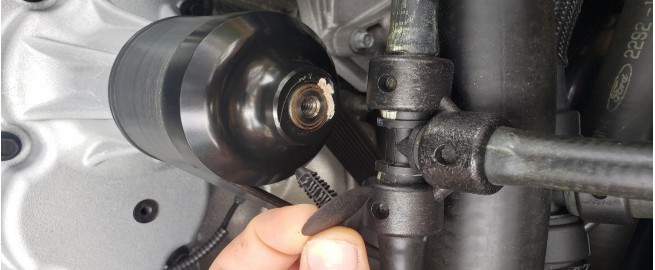
(With the VMP 2.4 Pulley snug on the super chargershaft) Screw newly assemble pulley installation Bolt (Bolt from Step 7.) into the tapped hole of the supercharger shaft. (Where you removed the cap from Step 2) Tighten full thread screw into Superchargershaft until the Bolt from step 7 is flush with the end of the superchargershaft.
9. Install VMP 2.4 Pulley
With a ½” ratchet and 15/16” socket, Hold the bolt from Step 8 still. Then using a 15/16” crescent wrench, tighten the 18 Nut against the Large D-3 bearing until the Large D-3 bearing is flush with the supercharger shaft and then the new VMP 2.4 Pulley should be fully seated.
Note: Plug black cap from Step 2, back in place after installation of new VMP Pulley
OEM Idler Pulley Removal
10. Remove stock OEM idler pulley.
Using a ½” crescent wrench, untighten and remove stock OEM idler pulley. Save bolt for later, you will need it to install new 90mm Idler Pulley.
Installation of 90mm Idler Pulley
11. Install new 90mm Idler Pulley
Using Bolt from Step 10, install 90mm Idler Pulley in place of old OEM Idler Pulley.
12. Attach Belt
Using the same instructions from Step 1. Take your ¼” breaker bar and push down on the idler pulley, giving the supercharger belt enough slack so they you can reattach the belt onto the new VMP Pulley.
Installation Instructions Written by AmericanMuscle Customer Jacob Palensky 05/07/2019
