FREE 1 to 3-Day Delivery on Orders $149+ Details
How to Install Raxiom Smoked Projector Headlights - CCFL Halo on your Mustang

Shop Parts in this Guide
Note: It is necessary to remove the front bumper cover for installation of the Raxiom Headlights. Please follow the included bumper cover removal instructions prior to installing your new headlights.
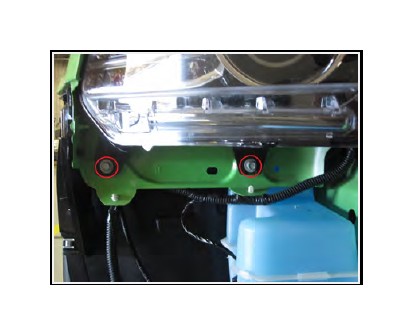
STEP 1: With the bumper cover removed, remove the plastic retaining clip and 10mm bolt on the top of the headlight housing as shown.

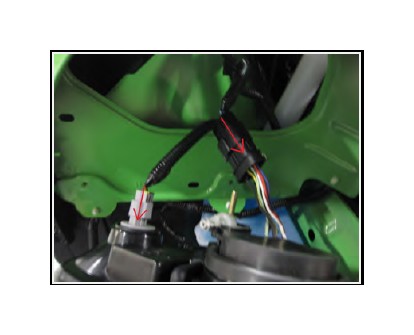
STEP 2: Remove the two 10mm bolts holding the lower portion of the headlight housing to the bumper support. Pull the headlight away from the vehicle and disconnect the two wiring harnesses as shown. You can now remove the headlight from the vehicle.
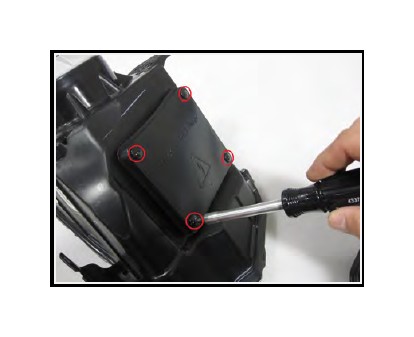
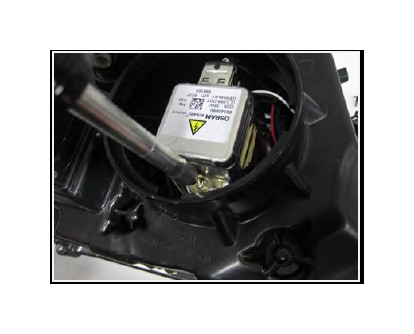
STEP 3: Lay the factory headlight next to the new headlight on a workbench, taking care to not scratch the lens on either light. Using a T15 Torx Bit, remove the factory HID ballast from the headlight as shown.
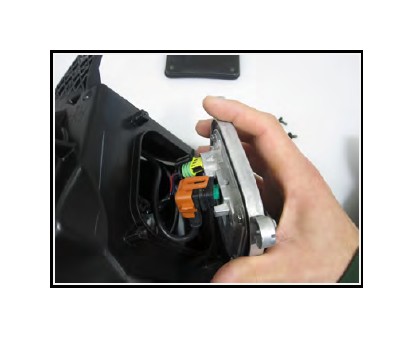
STEP 4: Disconnect the two wiring harness clips once the ballast is loose from the housing and set it aside (It will be re-used on the new head).
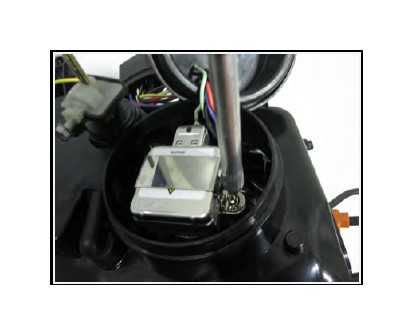
STEP 5: Remove the bulb cover on the factory housing to expose the HID bulb. Use a Phillips Head Screwdriver to release the bulb from the housing. Also remove the small wiring harness that goes from the HID bulb to the HID Ballast, it will be re-used on your new headlight. Note: Never touch the HID bulb itself with your fingers.
STEP 6: On the new headlight housing, remove the Phillips head screw as shown and pull back the metal retainer to install the HID bulb. Re-install the Phillips head screw to secure the metal retainer once the bulb has bee installed.
STEP 7: Route the HID bulb harness through the housing so it can be connected to the ballast.
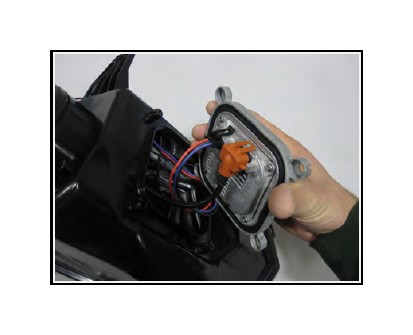
STEP 7b: Connect the two wiring harnesses to the factory ballast and install the ballast onto the new headlight housing using the T15 Torx head screws removed from the factory housing in Step 3.

STEP 8: Connect the factory wiring harnesses to your new headlight and install onto vehicle. Use the same 10mm bolts removed in Steps 1 & 2 to secure the headlight to the vehicle. Repeat steps 1-7 for opposite side. Be sure to check the functionality of all lights before re-installing the bumper cover.