FREE 1 to 3-Day Delivery on Orders $149+ Details
How to Install MMD Mirrors on Your 1999 - 2004 Mustang
Installation Time
2 hours
Tools Required
- Flat Head Screwdriver
- Phillips Head Screwdriver
- T10 Torx Bit or Driver
- 11mm Socket w/Ratchet

Shop Parts in this Guide
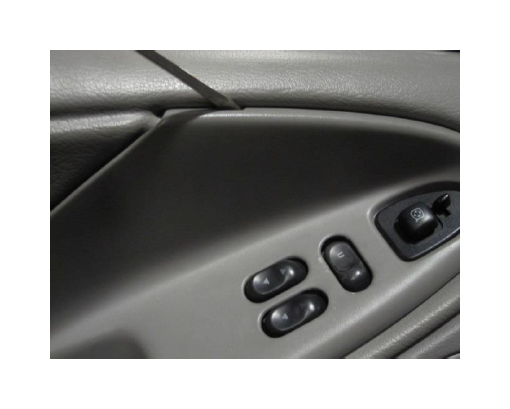
Step 1: Begin my removing the inner door panel to gain access to the mirror wiring. Use a flat head screwdriver to remove the window switch bezel as shown, unplug the mirror connection and power window connection (using a Phillips head screwdriver).
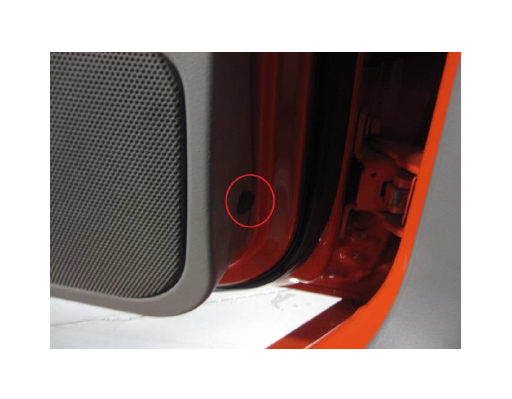
Step 2: Remove the speaker cover by prying gently with a flat head screwdriver. Remove the speaker assembly by removing the Phillips head screw as shown below.
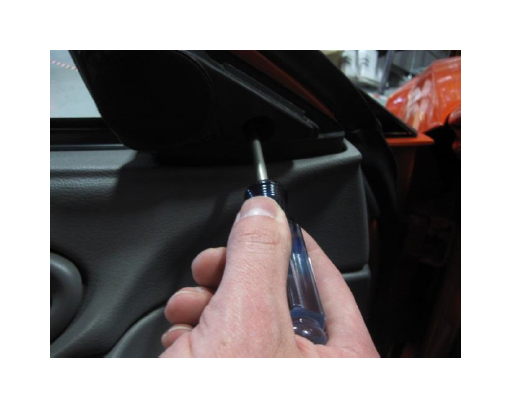
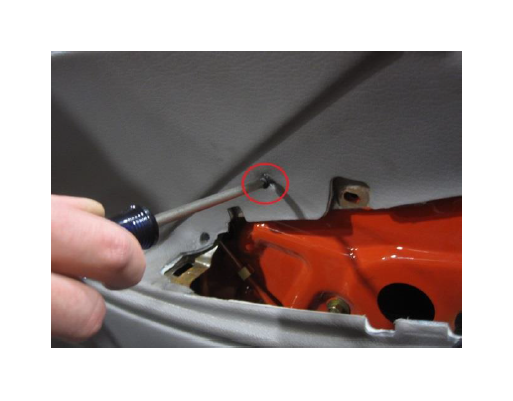
Step 3: Remove the retaining clip at the front of the door panel along with the Phillips head screw shown in the photo below.
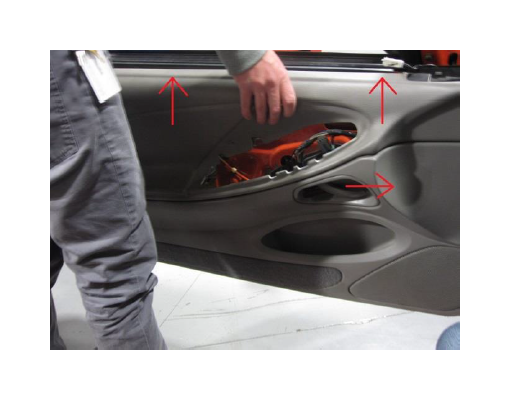
Step 4: You can now remove the door panel by firmly pulling up and away from the door. Be sure to maneuver the panel around the interior door handle as shown.
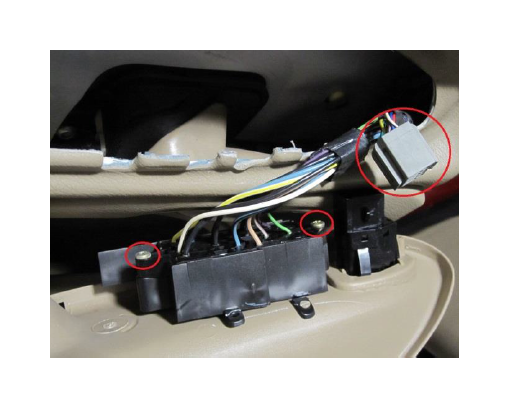
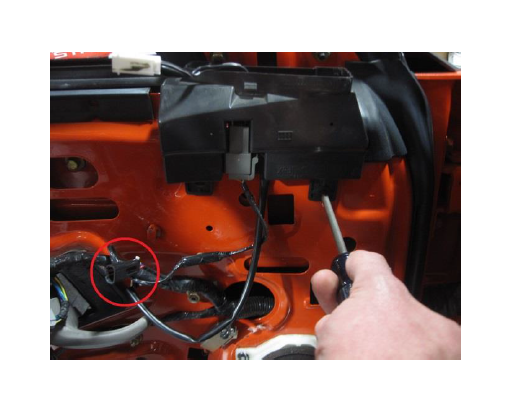
Step 5: With the door panel removed, use a Phillips head screwdriver to remove the speaker assembly panel and unplug the mirror control harness circled in red in the photo below.
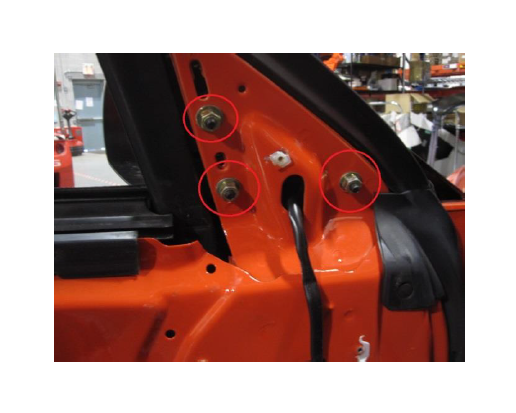
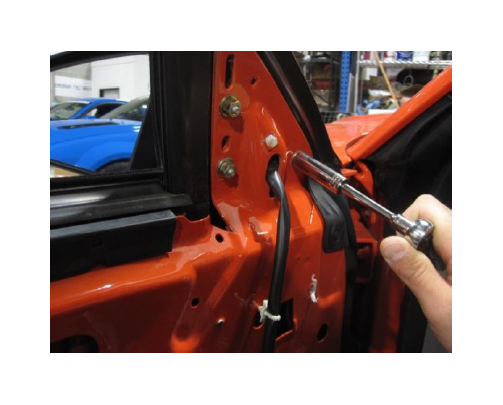
Step 6: Using an 11mm socket, remove the three nuts securing the mirror to the door and remove it from the vehicle.
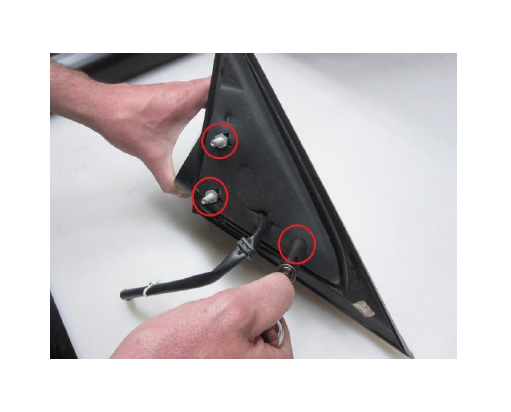
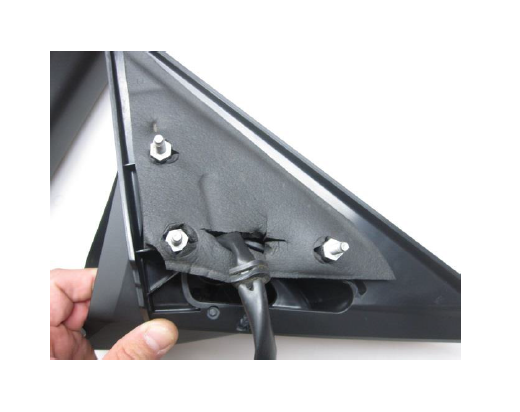
Step 7: You will re-use some of the parts from your factory mirror in the installation of your new mirror; the mounting studs, the foam insulator, the motor and wiring harness, and the motor retaining screws. Remove the mounting studs using an 11mm socket. Then remove the foam insulator.
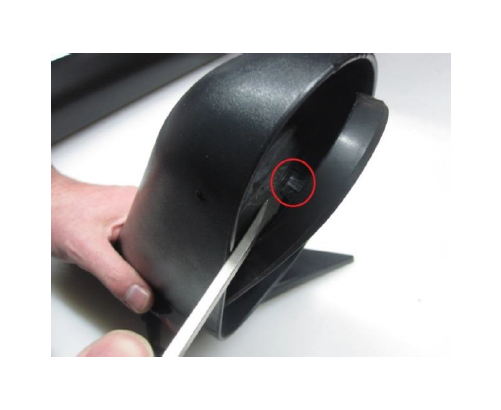
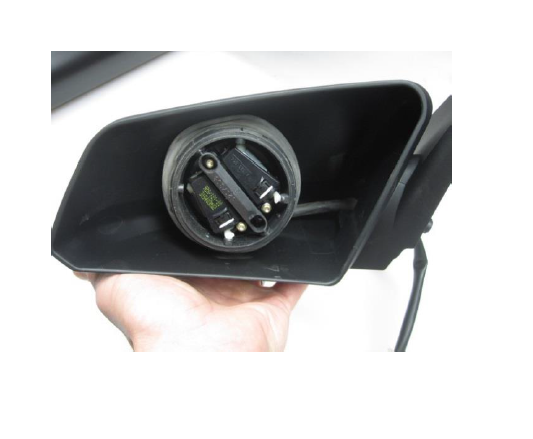
Step 8: Remove the mirror glass by using a flat head screwdriver and carefully releasing the tabs securing the glass to the motor.
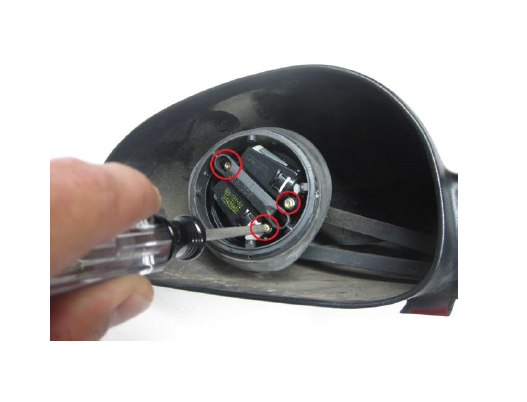
Step 9: Remove the motor from the mirror housing using a T10 Torx driver. It may help to unplug the harness from the motor before removing the harness from the mirror housing.
Step 10: Plug the harness back into the motor and mount it in your new mirror using the factory screws. Tighten until just snug, do not over tighten the mounting screws.
Step 11: Install the foam insulator and factory mounting studs onto the new mirror as shown.
Step 12: Install the provided mirror onto the motor as shown. Press firmly around the outer edges until the clips snap into place. Do not press directly in the center of the mirror, this could cause the glass to crack. Be especially careful on the passenger side mirror as the convex glass is slightly raised in the center, making it more prone to flex when pressure is applied.

Step 13: Install the mirror back on the vehicle using the three nuts removed in Step 6. Once the mirror is mounted, repeat Steps 1-5 in reverse to re-install the speaker and door panel assemblies.
Step 14: Repeat Steps 1-13 from opposite side mirror to complete the installation process.
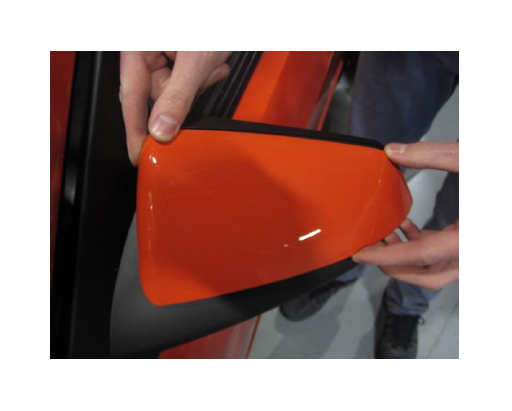
Installing the optional mirror covers:
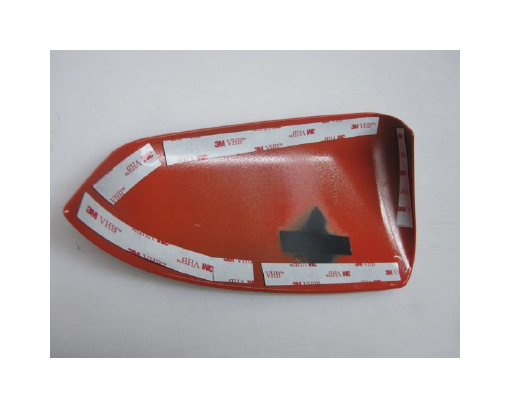
Step 15: Thoroughly wipe down the inner surface of the mirror cover as well as the mirror itself with the supplied alcohol prep pads. Install the supplied 3M tape on the underside of the mirror cover as shown.
Step 16: Peel the backing from the tape and place the cover over the mirror starting with the inside part of the cover. Once the cover is properly positioned, press down firmly to fully seat the adhesive tape.