 FREE 1 to 3-Day Delivery on Orders $149+ Details
How to Install Raxiom Smoked Fog Lights - CCFL Halo on your Mustang
Installation Time
1 hours
Tools Required
- Flat Head/Phillips Head Screwdrivers
- 7mm/8mm Sockets
- 1/4” or 3/8” Drive Ratchet
- 8mm Socket
- T15 Torx Bit

Shop Parts in this Guide
Front Bumper Cover Removal for 2013+ Mustang
Although not absolutely necessary, jacking the vehicle up and removing the front wheels before beginning makes it a bit easier to remove the front bumper cover.
Tools Required:
Flat Head/Phillips Head Screwdrivers
7mm/8mm Sockets
1/4” or 3/8” Drive Ratchet
Step 1:
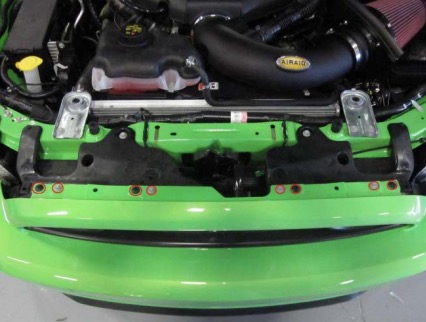
Remove the 8 clips securing the plastic radiator cover to the support and remove it from the vehicle.
Step 2:
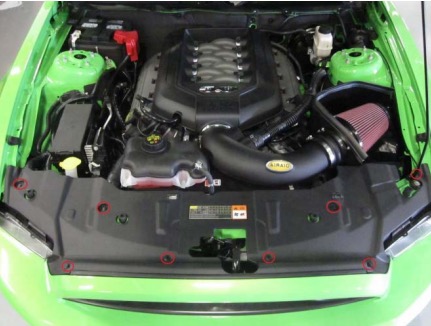
Remove the four Phillips head clips and four 8mm bolts securing the bumper cover to the bumper support brace.
Step 3:
On each side of the bumper, remove the four 7mm trim bolts.
Step 4:
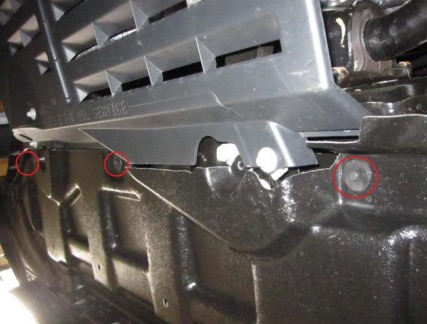
Remove the remaining three 7mm trim bolts underneath the bumper just in front of the plastic oil service splash pan.
Step 5:
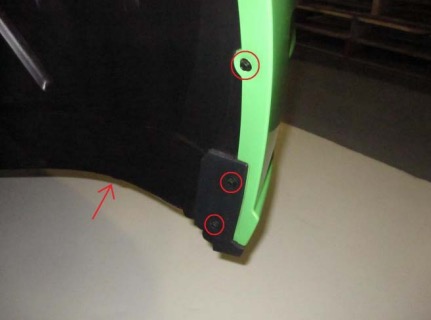
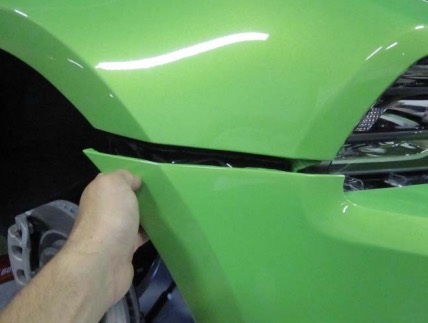
On each side of the bumper cover, carefully pull the bumper cover forward as shown to release the retaining clips.
Step 6:
It is recommended to have an extra set of hands at this point to help remove the bumper cover from the vehicle. Once the side retaining clips are loose, pull the bumper about 6” away from the vehicle and disconnect the ambient air temperature sensor from the lower grille (just pull the sensor down towards the ground to release the clips).
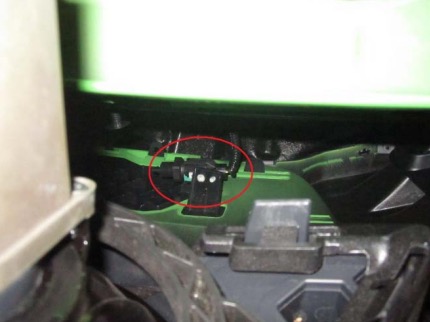
Step 7:
If you have a GT model with fog lights, be sure to disconnect them as well before removing the cover. The connectors are located under the lower portion of the heat sink as shown below.
Step 8:
Pull the bumper cover as an assembly away from the vehicle and place it down on something soft so as not to scratch the finish.
Re-installation of your bumper cover is the reverse of removal. Be sure to re-connect any fog light and /or air temperature sensor connections when re-installing the bumper cover.
Installation Instructions for 2013 Mustang Halo Fog Lights
***You must remove the front bumper assembly to properly install these fog lights. See included “2013 Bumper Removal Instructions” before beginning***
Tools Required:
8mm Socket
T15 Torx Bit
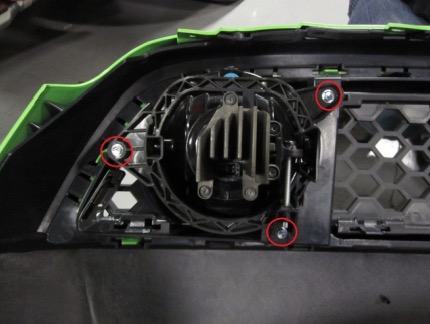
Step 1:
Once the front bumper cover is removed, use an 8mm socket to remove the fog lights from the grille.
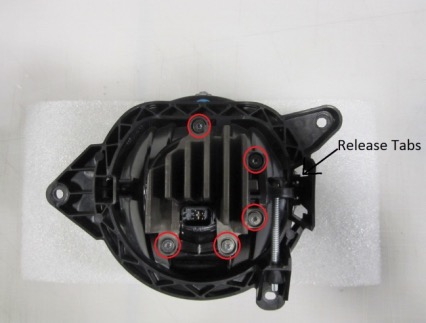
Step 2:
Use a T15 Torx bit to remove the LED bulb assembly from the factory fog light. Remove the bracket from the factory fog light assembly by releasing the tabs on the sides of the bracket
Step 3:
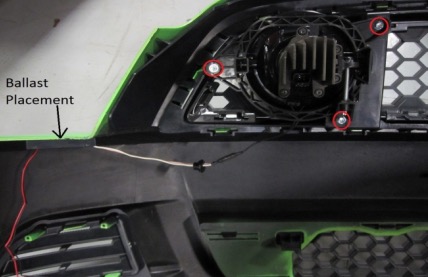
Install the new fog light into the bracket and re‐ install the bracket onto the factory grille as shown. If equipped with Halo’s, remove the backing from the adhesive on the ballast and apply it to the underside of the bumper (be sure to place the ballast about three inches from the edge to avoid any interference with headlights).
Step 4:
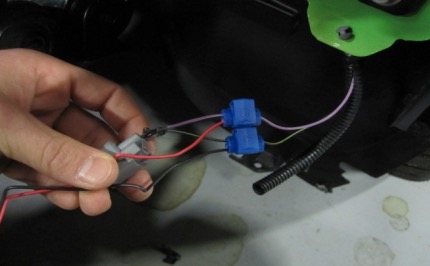
Use the supplied Scotch Locks to wire the Halo wires into the parking light wiring harness as shown (Red – Purple / Black – Black/Green Stripe).
Step 5:
Check to make sure both the Halos and the fog lights operate properly. Once proper operation is confirmed, re‐install the bumper to complete the installation.
