Talk to a Mustang Sales Tech
1-877-887-1105
M-F 8:30A-11P, Sat-Sun 8:30A-9P
$20K Sweeps! 10 Chances to Win! Enter Daily >

Roush Active Axle-Back Exhaust (18-23 Mustang GT w/o Active Exhaust)

Item 404878
AmericanMuscle no longer carries the Roush Active Axle-Back Exhaust (18-23 Mustang GT w/o Active Exhaust). Please check out 1979-1993 Mustang Axle-Back Exhaust for an updated selection.
Verify parts fit and get product recommendations.
Mustang Sales Techs: Connect Now M-F 8:30A-11P, Sat-Sun 8:30A-9P
$0.00

    Product Videos

    Justin: If you're looking for one of the most advanced axle-back exhaust systems currently available for your 2018 and newer GT, the Roush might just be the system for you. Now, when installed, the Roush axle-back will not only allow you to control the volume of your system from the comfort of your driver seat using the included knob but you can even create your own custom sound through the very attractive Roush iOS app. Now, prospective buyers can expect a full 304 grade stainless build from tip to tip here, in addition to all of the wiring and hardware needed to get the system installed for the very first time. The Roush and it's nearly $2,600 price tag is certainly not a cheap system by any stretch of the imagination, but the quality will be top-notch and the install, while labor-intensive, is pretty straightforward thanks to the included instructions from Roush. Now, on the surface, expect a strong two out of three wrenches on the difficulty meter here, guys, certainly a little bit more difficult than your standard axle-backs for the S550 due to the included drilling and wiring needed to get this system in place. So it's no secret that the active exhaust stuff has been all of the rage lately ever since getting introduced widespread on the 2018 Mustang. Basically, it gives you the luxury of keeping things quiet in or around the neighborhood or cranking things up whenever you wanna be heard. Luckily for you guys, if you happen to miss it from the factory, a bunch of aftermarket companies have started making their own variation with fantastic results such as AWE, Corsa, Verex, and, of course, the Roush system we're featuring here. Now, Roush actually debuted this system or a variation of this system on some of the '15 through '17 cars. And it was so darn popular despite the higher price point that they kept it rolling here into the 2018 model year. And with that in mind, let's talk a little bit more about what makes the active system from Roush so special. And it really just comes down to a combination of the presets along with the custom tuning aspect that owners can play around with. As far as your presets go, Roush does give you three to choose from including touring, sport, and track. As you'd imagine, the touring keeps things the quietest by keeping that valve closed at all times, and that's gonna deliver a volume level that's very close to stock, if not a good bit quieter. So let's call it a two out of five on our one to five or one to wake the neighbor scale. Up next is the sport option, which is the coolest in my opinion because it's adaptive, meaning the system determines the position of the valve based on accelerator position along with your vehicle speed by using the included dongle here for your OBD2 port. Basically, what that means, if you're lugging around town in low gears, the valve will be mostly shut. But once you merge onto the freeway and put it to the wood, that valve will open up. And at that point things will get much louder and much more aggressive. Because of the varying volume level with this option, it's really hard to put a specific number on the sport mode in regards to our one to five or one to wake the neighbor scale. Last but not least, we have track mode. And as the name suggests, this is going to be the loudest of the three presets from Roush as that active valve remains fully open at all times. Roush actually claims that this isn't legal for street use due to the extreme volume levels. But if I know my fellow Mustang owners out there, that certainly won't stop you guys from letting this thing be heard on full-on track mode. Now, going to my wake the neighbor scale here, the track is a very, very strong four out of five. But keep in mind, guys, this is still with that factory suitcase style resonator in place. Remove that thing in favor of an aftermarket X or H-pipe and things will get even louder. Let's briefly talk about that fourth and final option, this custom mode. And Roush claims endless possibilities with this when using the iPhone app, which by the way, is necessary to really unlock the full potential of the Roush active system. Quick heads up here, guys, an Android version of this software is still in the works. So just be patient for that. In a nutshell, custom mode lets you take full control of that valve or flap allowing you to change the position based on vehicle speed, RPM, and also accelerator position, again, essentially giving you endless amount of sound options. But with the sound covered, let's get into the construction of the Roush axle-back, and because we are talking about the legendary brand Roush, we know the quality is gonna be completely top-notch. And that is the case here with this particular system. Premium 304 grade stainless steel throughout including the small amount of two and a half inch mandrel bent tubing, guys. It does split off and lead into the open chambered mufflers before finally exiting out the quad four inch tips finished in that nice beautiful brushed chrome finish. Also quick heads up here, guys, these are your active exhaust valves. They will be mounting to the mufflers themselves. And again, you are getting all the wiring, the hardware, in addition to your OBD2 dongle right here from the guys over at Roush. Now, because this is an axle-back, cutting, of course, is required. However, this system will also involve a small amount of drilling both inside the car to mount that switch in addition to underneath the car to install a couple of new hangers from Roush. You'll also need to run the wiring for the brains in the valve actuator. So, all-in-all, guys, don't expect a standard axle-back job here by any means. However, to give you a better idea of what's involved for this job, here's a detailed walkthrough in addition to a tool breakdown. Man: First thing we need to do is cut the factory exhaust system. Roush tells us to come off the end of the resonator 20 and a quarter inches and make a line and we will cut from there. And we're gonna do the same thing on the other side. I'm gonna measure out 20 and a quarter inches, make a mark, and this is where we're gonna cut. Once you've got your exhaust measured out and marked, we can go ahead and use a Sawzall to cut it. All right. Once you've got this cut, we can pull the rest of the pipe out. Next I'm gonna remove the rest of the heat shield that's left on our factory cat-back. Next we're gonna remove the two hangers that we just removed the pipes out of. They're gonna be a 13 millimeter, and we're gonna save these and put them aside because we will be reusing these. Next thing we're gonna do is remove one by one our sway bar bushings here. So we're gonna remove this 13 millimeter bolt and replace it with a stud. And once we have this stud on, that's gonna allow us to install the provided heat shield. So I have a 13 millimeter socket and we'll start pulling these out one at a time. You don't want your sway bar dropping down on you. And we have two more on the other side. And it does look like there's some blue loctite in there. So these are gonna give you a little bit of resistance coming out as well. All right. Once we've got our studs installed, we can go ahead and install our heat shield now. So we'll slide that over the stud, throw on a provided nut, and we'll get this tightened down. This is gonna be a 13 millimeter nut as well. Next you need to go to the very last page of the instruction booklet and find the template. And what we're gonna do here is cut this first template out. Next thing we're gonna do is take the template that we just cut out and we need to go up onto the rear frame rail here and we're gonna go right in front of the last hole in the frame on this notch. And this is where we're going to drill our holes. So what I'm gonna do is tape my template up here. Once we've got our template taped up into place, I'm gonna take a center punch and mark the two holes that we need to drill out. And we'll do the same thing on the other side. Once you've got your holes marked out with your template, you can go ahead and start drilling two holes. I'm gonna be using an eighth inch drill bit as a pilot hole. After that, we'll move on to a seventeen-thirty-seconds drill bit. Once you've got both holes drilled, the next thing we're gonna need to do is insert our rib nut that is provided in the kit. Once you've got both Nutserts installed, we can go ahead and install our hangar. This is provided in the kit also and the hardware as well. So I'm gonna get these started. And they're 10 millimeter. We're now ready to throw our new axle-backs up into place. Before we do that, we wanna make sure we put a clamp on this end. I'm gonna slide the other hanger...rubber isolator onto this hanger right here. And we'll take the added isolator and slip it onto this hanger right here. Now let's get this thrown up into place. All right. We can go over to the other side now and do the same thing. Next we can go ahead and secure our two hangers here with the stock bolts. They are 13 millimeters. All right. Next thing we're gonna do is tighten up our two clamps here to secure our exhaust in place. I have a 15 millimeter socket on my impact gun. Next up we're gonna put our active exhaust valve into place. Start off by putting up a gasket up here first followed by the valve. I'm gonna get this bolt in place. All right. We can tighten these down now. It's gonna be a 13 millimeter socket. Next we can go ahead and put our tips up into place. All right. We're gonna do the same thing on the other side. We're gonna start off with a gasket followed by our active valve. And we'll get this tightened down now with a 13 millimeter socket. All right. We're gonna do the same thing on the left side now. Let's get our tips up into place. You can go ahead and get our tips tightened down now. We're now ready to start running our active exhaust wiring harness. To do so, we need to make some room to tuck the wires in. First thing I'm gonna do is remove the spare tire liner cover here. Next we're going to remove the plastic trim panel in here. There's four knobs, two on this side, two on this side. We'll go ahead and unscrew them and remove this panel. Now we're gonna pull straight out on this trim panel here to release it from the car. Next thing we need to do is come into the back seat here and we're gonna remove the rear seat bottom. To do that, you wanna find the opening in the bottom of the seat, push your hand in, and push in on the little clip. And that's gonna release the seat bottom. And there's two of these. There's one on this side as well. And once you've got them up, you can just simply pull up on your seat and pull it out of the car. Next thing we're gonna do is fold down the back seat. Grab onto our latch. Next thing we're gonna do is remove the driver side, the kick panel molding here. You're gonna pull up to release the clips. Next thing we wanna do is remove the carpet in the trunk. There's two push pins here that we need to remove. I have a pry tool. All right. We're in the trunk now. You wanna locate the J clip and bolt that comes in the hardware pack. Once you have all the carpet removed back here, we're gonna take our J clip and get it in place back here. And this is gonna give us a spot to melt our control module. So once we've got the J clip, we can take our module. You're gonna take your wiring harness, find the relay, and bolt this together, module and the relay all in one. And this is an eight millimeter bolt. All right. Once you've got that tightened up, we can come right here and plug our control module in. Next thing we're gonna do is route our wiring harness down the left side of the trunk. Over to the grommet on the passenger side. What we wanna do is pull this grommet out and find the end of the wiring harness that has the grommet already installed with the two small plugs for our active valves on our mufflers. So I'm gonna go ahead and stick these right through the hole down to our mufflers. And we wanna make sure that we fully seat this grommet into the hole. Next thing we need to do is attach the ground to the ground screw that is already in our trunk. So with an eight millimeter socket, I'm gonna remove this ground bolt. And we're going to find the ground that's in our wiring harness along with the white push-in pin here. That's gonna secure our harness to the trunk. All right. Once you've got your ground hooked up here, you can use some of the zip ties that they provide you and just clean this up a little bit in here. Now we're gonna lift the vehicle back up so we can plug in our active valves on our mufflers. Next thing we're gonna do is route the two wires that go to each muffler for our active valves. So we already have them dropped through the floor going to the grommet. And we're gonna be using the supplied zip ties with the clips on the end of them. I'm gonna start out with the left side wire. We'll get this routed up through here. All right. Once you've got your wire ran all the way over, you can go ahead and plug it in to your active valve. We can now start buttoning up things in the trunk here. We got all our wires ran up to the driver side front door. So I'm gonna start putting the carpet back in. After the carpet, we'll put our trim panel back in and then our spare tire cover as well. From there, we'll move up to the front of the car and finish running our wires there. Next up is the trunk trim panel. We're gonna slide this back into place. Make sure that these hooks go in their respective holes. All right. Once we've got our wire from the trunk into the backseat, we can start routing the active wiring harness along the left side of the car here. So I'm gonna go behind the seatbelt. I'm gonna start tucking it up under the trim panel here out of the way. Next thing I'm gonna do is remove this pushpin here that's holding the carpet down. That's gonna allow me to tuck my wire behind the carpet. There's another one right here. Once we have those out, we can tuck our harness underneath our carpet here. All right. We can put our pushpins back in the place now. All right. I have a pick tool here. I'm gonna remove the kick panel. First thing we need to do is remove the center cap off of our hood release. Next we need to remove this trim panel before we can remove our kick panel. I'm gonna use a plastic pry tool here. And get this guy released nice and easy here. Once we've got all of our trim panels off here, I'm gonna start routing the wire up and get it close to the OBD2 port. So our next step is going to be to plug in the OBD2 pass-through. Take a couple zip ties and secure this in. You're gonna wanna find the OBD2 pass-through plug. We're gonna plug this in to the harness. All right. Once we have the pass-through plug plugged in through the active harness, we can go ahead and plug it right into the OBD2 port in the car. Once we've got our OBD2 port plugged in, I'm gonna clean this up a little bit with some zip ties, basically just gonna follow the factory wiring harness that's in the door seal here. All right. I'm gonna start putting some trim panels back on now. All right. Next we can reinstall our hood latch. I'm just gonna pop this right back into place and put our center cap back on. Next we can install our trim piece here on our door seal. Next thing we need to do is remove our center console. First thing I'm gonna do here is remove this panel. And underneath this panel are two seven millimeter screws that need to be removed. And we're gonna go ahead and do the same thing on the other side. Next thing I'm gonna do is open up our center console lid and I'm going to pry up on the edge of our console here. I'm gonna lift straight up, get these clips released, pull the e-brake up. And we have two plugs under here that we need to unclip. All right. So we need to release this shift boot from the center console. I'm gonna do that with a pair of needle nose pliers. We need to squeeze in on these white tabs one at a time. So once you have your shift boot released from the center console, we are gonna leave the shift boot in place and just pull straight out on our center console. I'm up here under the dash routing our wire up to get it into the center console, gonna get a couple zip ties up on here. All right. So we need to get these two wires into the center console. This wire here needs to go over to the passenger side kick panel where our fuse panel is. So I'm gonna feed these up into here for now. So we need to reach down into the center console and unplug our cigarette lighter here. We need to find the end of the Roush harness that has the yellow wire coming out of it and we're going to depin our 12-volt cigarette lighter. So I have a small pick tool here. I'm going to disconnect the red locking tab in the inside of our plug here. All right. So once we have our locking tab out of the front of the plug, we're gonna depin the gray wire with a red stripe. So again, take your pick tool, go in and push the tab over and gently pull out on your wire. And once you have it unhooked, it's gonna pull straight out of the back of your connector. Now, once we've done that, we're gonna take the yellow wire and repin our 12-volt connection here. Stick it right up into place. Make sure you hear it click. So next thing we're gonna do is take the red locking tab and put it back in the front of our connector now. Next thing we're gonna do is take the gray and red striped wire that we depinned out of our cigarette lighter and we are going to put a plug end on it that was supplied in the Roush harness. So, first thing we're gonna do, slide the plastic cap over the end, followed by the rubber grommet, and then we can take the plug end and slide our wire right into place and place our cap and our weather seal on the end here and snap the cap into place. And we're gonna go ahead and plug these in now. Here's [SP] a click and then push the red locking tab over. Now, once you have that plugged in, we can go ahead and plug our cigarette lighter back in. All right. Next thing I'm gonna do is remove the fuse panel cover and the passenger side kick panel here. Pull straight out on this, and then lift up and it will reveal your fuse panel. I'm just gonna finish routing the rest of my wire right on over to our fuse panel. I'll get a couple zip ties on that in a little bit. All right. Once you've got your fuse panel uncovered, we're gonna remove the 10 amp fuse in the number 23 location. Once we do that, we're gonna take our add a fuse here, stick the 10 amp fuse pin and the 10 amp fuse that was provided in the kit. And we'll go ahead and put this right back into number 23. And I'm gonna replace the fuse panel cover now. Next thing we wanna do is go into the last sheet of our instruction manual and grab our template for our switch plate. I'm gonna go ahead and cut this out now. Next thing I'm gonna do is attach the switch plate bracket to our switch panel. I'll get a screw started in this. All right. So we got our switch plate template cut out. We're gonna place this on our center console, and you wanna line up the contour of the template with the center console. I have some painter's tape here. And we're gonna tape this into place. Next thing we need to do is take a center punch and mark the four holes on our template here that needs to be drilled out. Next thing we're gonna do is drill these four holes out with a quarter inch drill bit. Once we've got our holes drilled here, we can remove our template. All right. We are gonna put the active exhaust switch through the center console. We'll flip this over and make sure we are centered up. We're gonna take the two push nuts that were provided and put one on each stud here. What I'm gonna do is take a seven millimeter deep socket and push down on these and get the other one started. All right. Now it's time to put our knob into place. We're now ready to put our center console back into place. So, I'm go ahead and grab this, make sure your e-brake handle is up. First thing we wanna do is slide it over our e-brake handle, come back a little bit, and we'll get our shift boot in position as well. And before we go too much further, I'm gonna lift this up and we're gonna make our final connection here. This is our active switch panel. This is the Roush harness and here is the connector off of the switch panel. We're gonna go ahead and plug this in. We're gonna finish plugging everything in here. And we can snap our shift boot back into place now. All right. We can snap our side panels back into place now. And we're gonna do the same thing on the other side. And the last step here to complete our installation is to put the back seat back into place. Once you've got it set, you're gonna wanna reach under here and feed your seat belts back up into place. All right. So with our new Roush active exhaust installed, we have our switch panel right here. And that gives us four different exhaust modes. Start off with touring, sport, track, and custom. Also this is an LED fault light. This light will not illuminate. The only time this light will illuminate is if there is a fault with the Roush active system. That's gonna wrap up our review and install. Be sure to check out more at americanmuscle.com.

    Product Information

    Features, Description, Reviews, Q&A, Specs & Installation

    Features

    • ROUSH Active Axle-back Exhaust System
    • Select Between Touring, Sport, Track and Custom Exhaust Notes
    • Custom Programming with Included WiFi OBD2 Interface and Roush iOS App
    • Unique Open-Chambered Muffler Design
    • 304 Stainless Steel Construction
    • Full Mandrel-Bent Tubing
    • 4" Stainless Steel Quad Tips With Chrome Flashing
    • Cut & Clamp Installation
    • Fits 2018-2023 GT Mustangs Not Equipped with Factory Active Exhaust

    Description

    ROUSH Active Exhaust System. Designed for use on 2018-2023 GT Mustangs that are not equipped with the factory Active Exhaust, this Roush Active Exhaust Axle-Back will let you take full control of the volume and performance of your S550 GT Mustang. Roush's proprietary Active Exhaust system ties directly into your Mustang's powertrain control module, opening and closing the mufflers valving based on throttle position.

    Four Distinct Exhaust Sounds. The ROUSH Active Exhaust System includes a center console mounted selector knob that allows you to easily switch between four different sound modes on the fly. Choose from Touring, Sport, Track, and Custom.
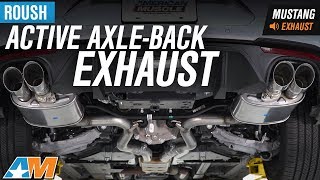
    Touring. The Touring mode closes the mufflers valves completely keeping the exhaust volume to an absolute minimum.

    Sport. The Sport mode keeps the exhaust quiet during normal driving conditions. Accelerator position and vehicle speed are used to determine valve position, opening up under acceleration for a more aggressive sounding ride.

    Track. The Track mode is wide-open. This mode keeps the exhaust tailpipe valves fully open at all times and doesn't restrict the raw sound of your Mustang. This mode is intended for track use and is not legal for street use.

    Custom. The Custom mode lets you create a custom sound map with the included WiFi OBD2 interface and ROUSH iOS application to personalize the exhaust sound to your own tastes. With the app you gain full control over the position of the valves based on vehicle speed, rpm and accelerator position. Download the free ROUSH Active Exhaust App for iOS - Here
    Quality Roush Construction. Roush manufactures their exhaust systems from mandrel-bent 304 stainless steel for durability and corrosion resistance. This Axle-Back Exhaust features two unique open chambered mufflers that improve exhaust flow. The system includes two dual wall 4 inch quad tips that are finished in a new chrome flashing process that is resistant to exhaust heat discoloration.

    Cut & Clamp Installation. The installation of this Roush Axle-Back Exhaust will require cutting and removing the factory muffler assemblies and clamping the new muffler assemblies in place. Clamps and instructions are provided.

    Application. This Roush Performance Active Axle-Back Exhaust System is designed to fit 2018-2023 GT Mustangs that are not equipped with the factory installed active exhaust.

    CA Residents: WARNING: Cancer and Reproductive Harm - www.P65Warnings.ca.gov

    Installation & What's in the Box

    Installation Info

    What's in the Box

    • (1) Exhaust Pipe with Valve – LH
    • (1) Exhaust Pipe with Valve – RH
    • (1) Flashed Controller, Active Exhaust
    • (1) Vehicle Ready Wiring Harness 
    • (1) OBDII Active Exhaust Programmer
    • (1) Hardware Kit – Active Exhaust
    • (1) Switch, Mode Selector
    • (1) Switch Plate, Metal with Engraving
    • (1) Switch Bracket
    • (2) Bolt – M4 x 0.7 x 10
    • (2) Push Nut – 3/16” 
    • (3) Washer – M4 Nylon 
    • (7) Zip Tie with Edge Clip
    • (1) Knob, Knurled Style
    • (1) Set Screw – M3 x 0.5 x 6 
    • (1) J-Clip – M6  
    • (1) Bolt – M6 x 31 HEX
    • (2) Foam Tape 30 mm x 35 mm x 7.9 mm
    • (1) Micro Fuse – 10 AMP   
    • (20) Zip Tie – 7”  
    • (1) Multipurpose O-Ring, 5.6 mm
    5.0

    Customer Reviews (2)

      Brand Image

      Reviews of Roush Exhaust products have an average rating of 4.8 out of 5

        Questions & Answers

        10 More Questions

            Related Mustang Categories