 FREE 1 to 3-Day Delivery on Orders $149+ Details
How to Install Roush Front Fascia - Unpainted (05-09 GT, V6) on your Ford Mustang
Installation Time
4.5 hours
Tools Required
- 3/8 Drive Ratchet
- 10mm Socket
- 7mm socket
- 3M Adhesion Promoter
- Roush H10 3’Fog Light Extension Harness
- Jack Stands
- Tire Removal Tools
- Zip Ties Small 6"
- 1/8" & 1/4" Drill Bit
- Small/Med Flat Blade Screwdrivers
- Phillips Screwdriver
- Rivet Gun

Shop Parts in this Guide
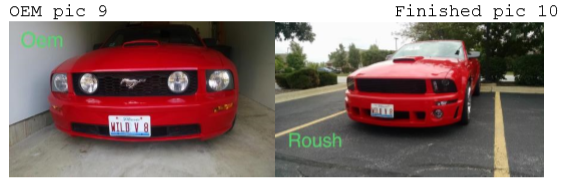
Pre install bumper must be pre-fit and be painted.
Installation Instructions
1 ) First remove three push pins from inner fender well with Phillips screwdriver after removing center pin pull push pin out then gradually maneuver inner well over fender lip to allow extra room. Pic ) 1 A,B,C / D is fender well slid over fender.
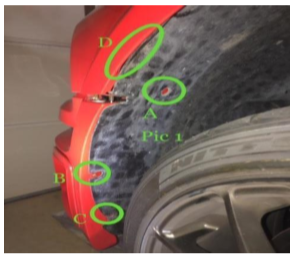
2 ) Loosen and remove 2 /10mm nuts on the inside of the fender to loosen the bumper side pic 2.

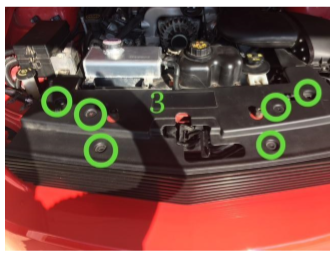
3 ) With hood up remove radiator service panel by sliding the center of 6 pushpin out with your small flat blade screwdriver then slide the pushpin out set cover aside pic 3.
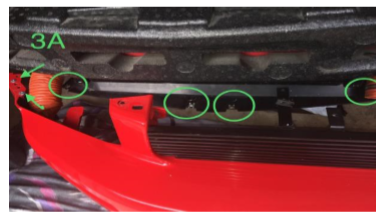
4 ) Unscrew just the front of lower closeout panel with 7 mm socket to release the lower bumper cover shown from top side after bumper is removed for a better visual location pic 3A.
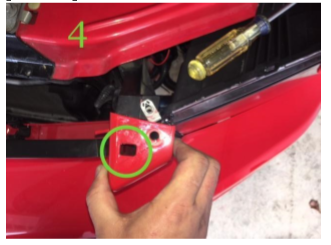
5 ) Back on top remove the final push pins right hole from pillars in between headlights and grill with medium flat blade pry the top upward to clear the wedge hook then loosen 2 phillips screws holding grill in place pic 4.
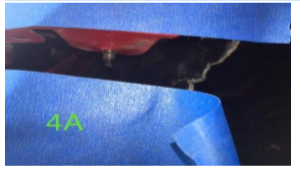
6 ) Before bumper removal use some painters tape on bumper and fender to safeguard paint while removing bumper. If you have an helper it makes it easier to maneuver bumper removal pic 4 A.
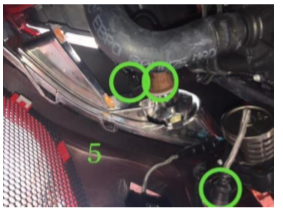
7 ) From the underside a counter clockwise turn removes signal bulb and marker bulb from housing and let them hang free repeat with fog lights if applicable pic 5.
8 ) Gently pull down on bumper sides to clear 10mm stud then lift pillar up to clear wedge this should allow bumper to slide forward and off the car.
9 ) Remove turn signal lights off old bumper using ¼” drill bit to remove oem rivets also remove upper grill then set old bumper aside.
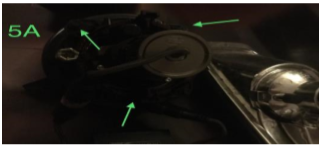
10 )if using oem grill skip this step for gt assemble new provided fog lamp using provided 7mm hex head screws pic 5A.
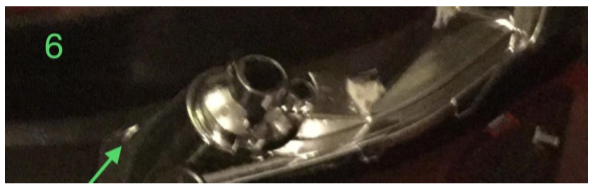
11 ) With provided screws attach marker light to new facia pic 6.
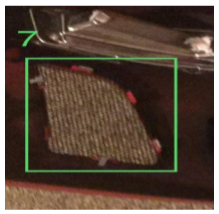
12 ) Clean areas to receive 2-way tape with adhesion promoter apply 2 way tape around edge remove bottom tape only for easier alignment once square remove balance of tape and press in place once secure install black out grill as shown in pic 7.
13 ) With supplied rivets install corner brackets to reinforce 10mm bolt slots pic 3A green arrows.
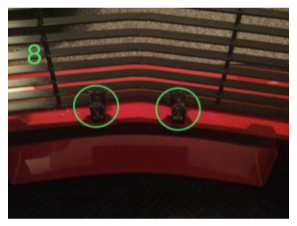
14 ) Drill 1/8 inch hole to mount supplied bracket in 2 bumper tabs pic 8.
15 ) Reinstall bumper on vehicle with helpers assistance and align before final tightening.
16 ) Install upper grill hardware once facia is in place and reconnect all wiring check all lights for function ignition must be on to power fog lights if lower fogs are used Roush harness extenders are available cheaper than supplies can be purchase to make them.
17 ) On v6 models fog lamp switch and relays must also be installed to power fog lights.
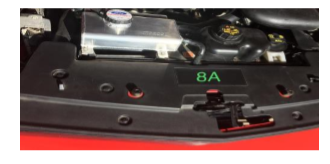
18 ) Connect lower extension closeout panel to oem panel with 4 provided u clamps pic 3A and 7 mm hex screws last reinstall the upper radiator service panel pic 8 A.
This Installation Guide was Written by Bob Caputo on 10/27/17.
