FREE 1 to 3-Day Delivery on Orders $149+ Details
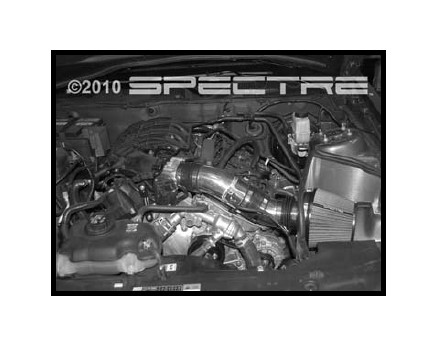
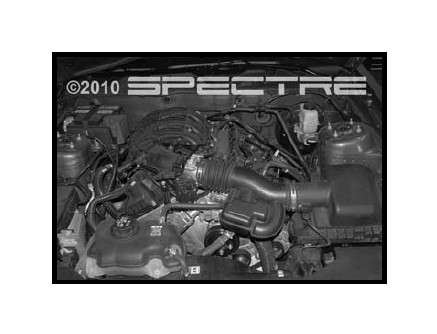
How to Install Spectre Performance Cold Air Intake - Polished (11-14 V6) on your Ford Mustang
Tools Required
- 5/16” Nut Driver (or flat blade screwdriver)
- Ratchet
- 10mm Socket
- T-20 Torx Driver
- Philips Screw Driver
- Pliers

Shop Parts in this Guide

Parts List
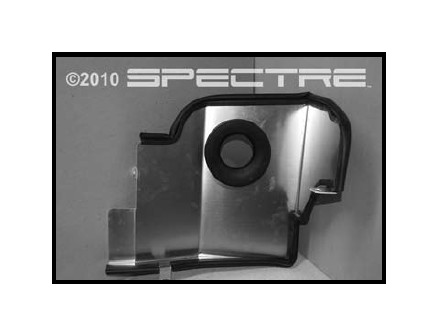
1 – Heat shield
1 – Long Intake Tube
1 – Short Intake Tube
31” – Rubber seal
27” – Rubber seal
5” – Rubber seal
1 – Velocity stack adapter
1 – 889886 Air Filter
1 – 3.5” Coupler
1 – 3.5” Coupler, flex
1 – 3” - 3.5” Coupler
1 – Hose clamp, 3”
5 – Hose clamps, 3.5”
1 – MAF Calibration sleeve
2 – M4-0.7x10mm
15” – 5/8” Breather hose
1 – Vacuum cap
Step 1: Safety first! Before you begin the installation, make sure that the vehicle is in park with the parking brake set. Disconnect the negative battery terminal and verify all components listed are present.
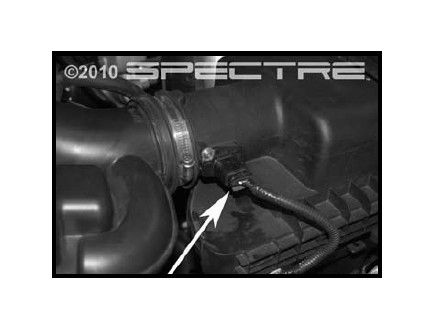
Step 2: Disconnect the MAF sensor connector by sliding the Red clip away from the tube and pulling the connector off of the sensor.
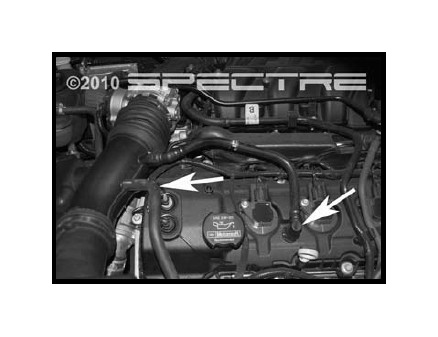
Step 3: Disconnect PCV tube from the valve cover by pushing on the green tab and pulling the tube off. Disconnect the brake aspirator line if equipped (auto trans only).
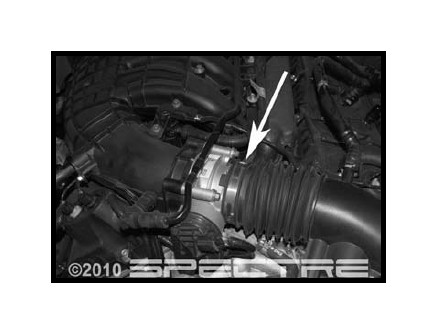
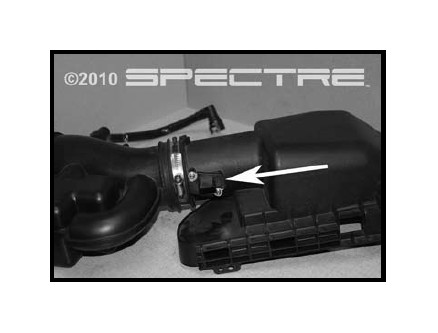
Step 4: Loosen the hose clamp at the throttle body.
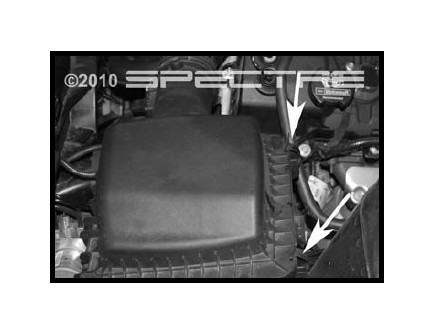
Step 5: Unclip the air box lid. Now the stock air intake tube and lid assembly can be removed from the vehicle. Be careful when removing since the factory wiring harness is anchored to the airbox lid. Using pliers unclip the anchor and remove the assembly from vehicle.
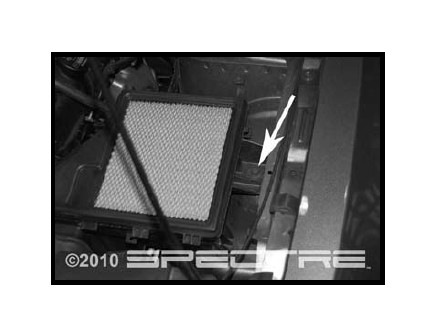
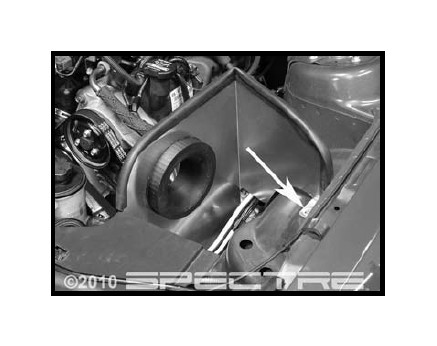
Step 6: Remove the air box base by removing the 10mm bolt and lifting it out.
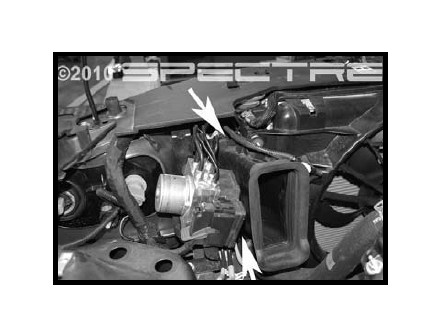
Step 7: Remove the air box inlet by unsnapping the inlet from the vehicle. You may need a long flat blade screwdriver to do this.
Step 8: Unscrew and remove MAF Sensor from stock air intake box. This will be used again in your new Spectre Performance kit.
Step 9: Place the velocity stack adapter in the heat shield and install the supplied flex boot making sure the coupler is pushed completely against the heat shield. Once the adapter and coupler are tight against the heat shield, tighten the clamp. Make sure that the clamp for the intake tube is installed but left loose at this time. Dress heat shield with rubber seal.
Step 10: Install factory MAF Sensor on the long intake tube using the supplied Phillips head screws. Install the MAF sensor calibration sleeve by sliding the sleeve into the tube while aligning the slot with MAF . Bottom out the step on the calibration sleeve with the edge of the tube.
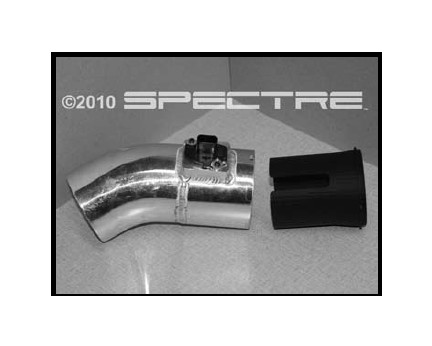
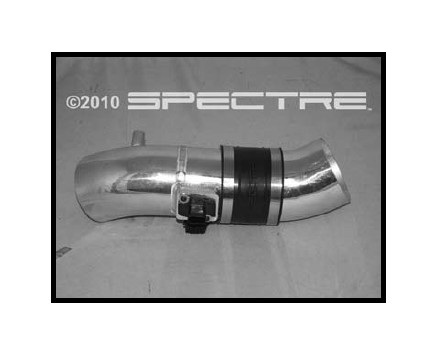
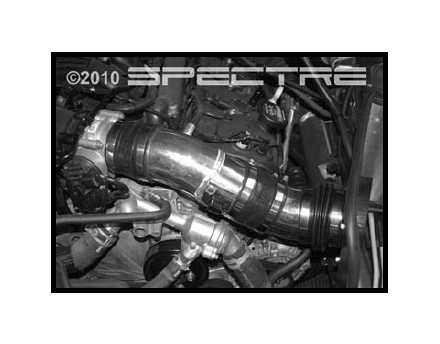
Step 11: Assemble intake tubes so that the tubes bottom out completely on the raised lip in the coupler. Take note of the orientation but leave the supplied clamps loose until assembled in the vehicle.
Step 12: Loosen 10mm bolt that holds the ABS support bracket to the chassis so that you will be able to slide the heat shield between the bracket and the factory hardware. Loosen the upper hardware on the radiator shroud enough so the new heat shield will fit between the shroud and radiator.
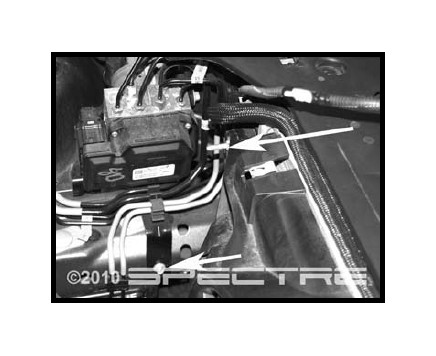
Step 13: Install the heat shield and secure it using the bolts removed in step 12, and the bolt removed in step 6. Fully tighten all mounting hardware.
Step 14: Install coupler over the throttle body and secure with a supplied 3” clamp. Install a second clamp but do not tighten at this time.

Step 15: Install intake tube that was pre assembled in step 11. Rotate tubes until everything is aligned properly and tighten the clamps.
Step 16: Connect the MAF sensor harness. Push the red clip towards the tube to lock in place.
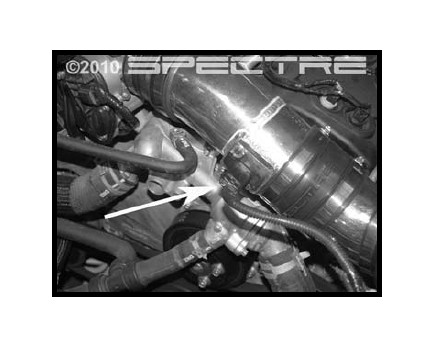
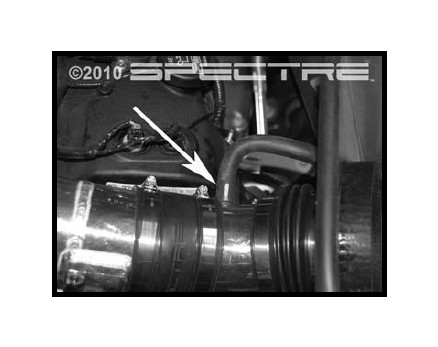
Step 17: Install the supplied 5/8” breather hose from the valve cover to the intake tube as shown.
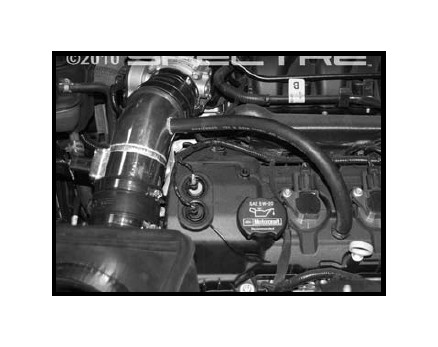
Step 18: Connect the brake aspirator line if equipped (auto trans only). as shown. If not install supplied vacumm cap onto tube.
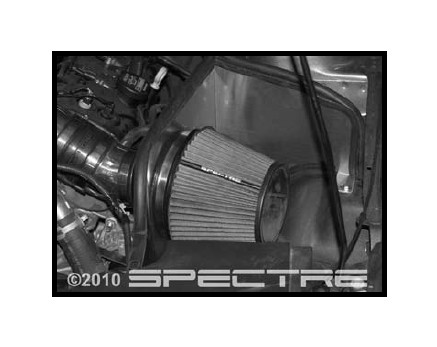
Step 19: Install the air filter and clamp to the velocity stack adaptor. Verify all hardware and clamps are fully tightened.
Step 20: Reconnect the battery cable. Start vehicle and let warm up. Shut off and inspect the installation once more for any loose clamps or wires. Test drive & enjoy!