 FREE 1 to 3-Day Delivery on Orders $149+ Details
How To Install SR Performance Rear Control Arms on your 1999-2004 Mustang GT, V6, Mach 1
Installation Time
3 hours
Tools Required
- Tire lug wrench or air wrench
- 1⁄2”wrench and socket
- 3⁄4” wrench and socket
- 13/16” Socket
- 18mm wrench and socket
- Ratchet wrench and (optional) extensions
- Floor jack
- Bottle jack
- 12–18”Prybar
- Various size punches
- 6x6 wood blocks or a second floor jack
- Silicone lubricant

Shop Parts in this Guide
Lower Control Arm Replacement Procedure:
Engage emergency brake and put transmission in gear; automatics use Park.
Place bricks or wheel chocks in front of and behind each of the front wheels.
Jack up the driver’s side rear of the car and remove the wheel. This also removes most of the
compression on the rear spring.
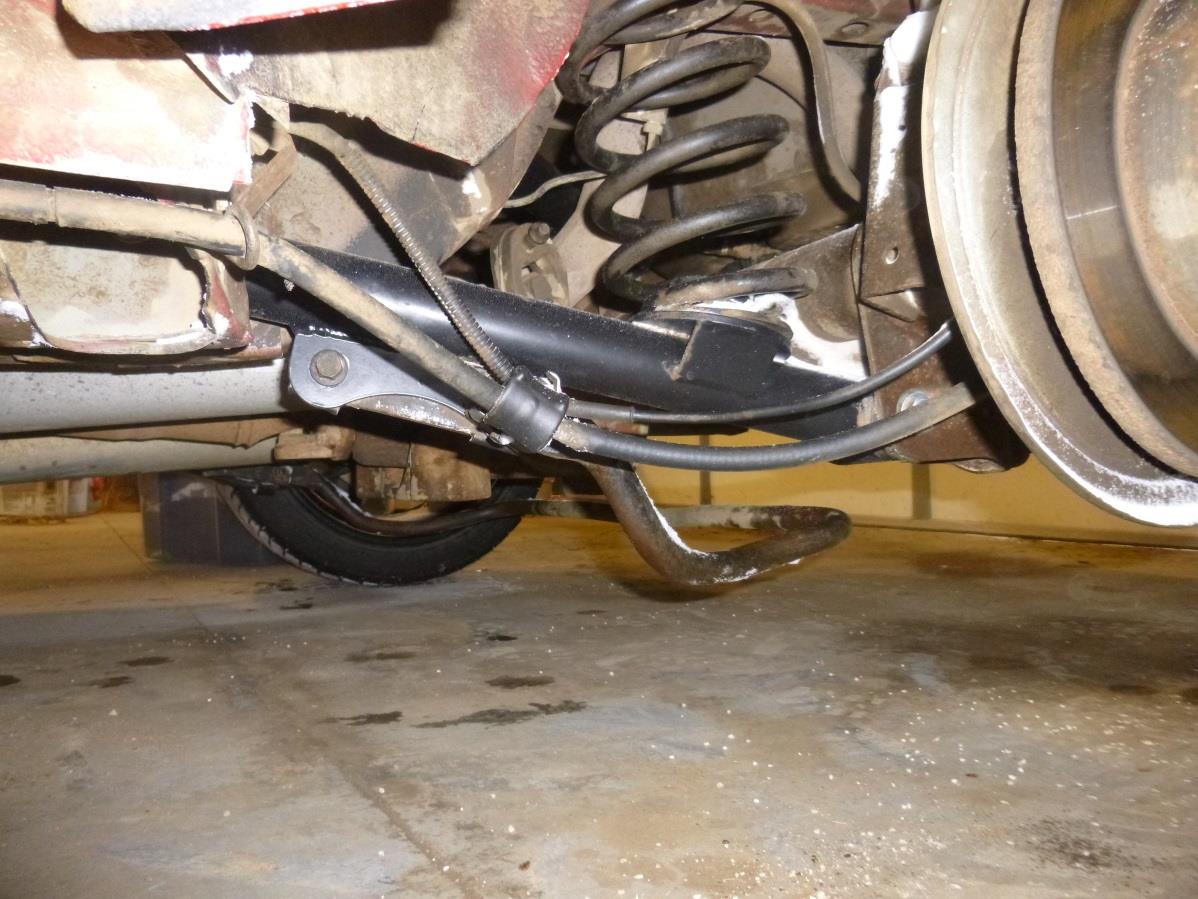
Remove the flexible brake line from the slot in the clip that is bolted to the lower control arm, as
shown in the before and after in the next two pictures.
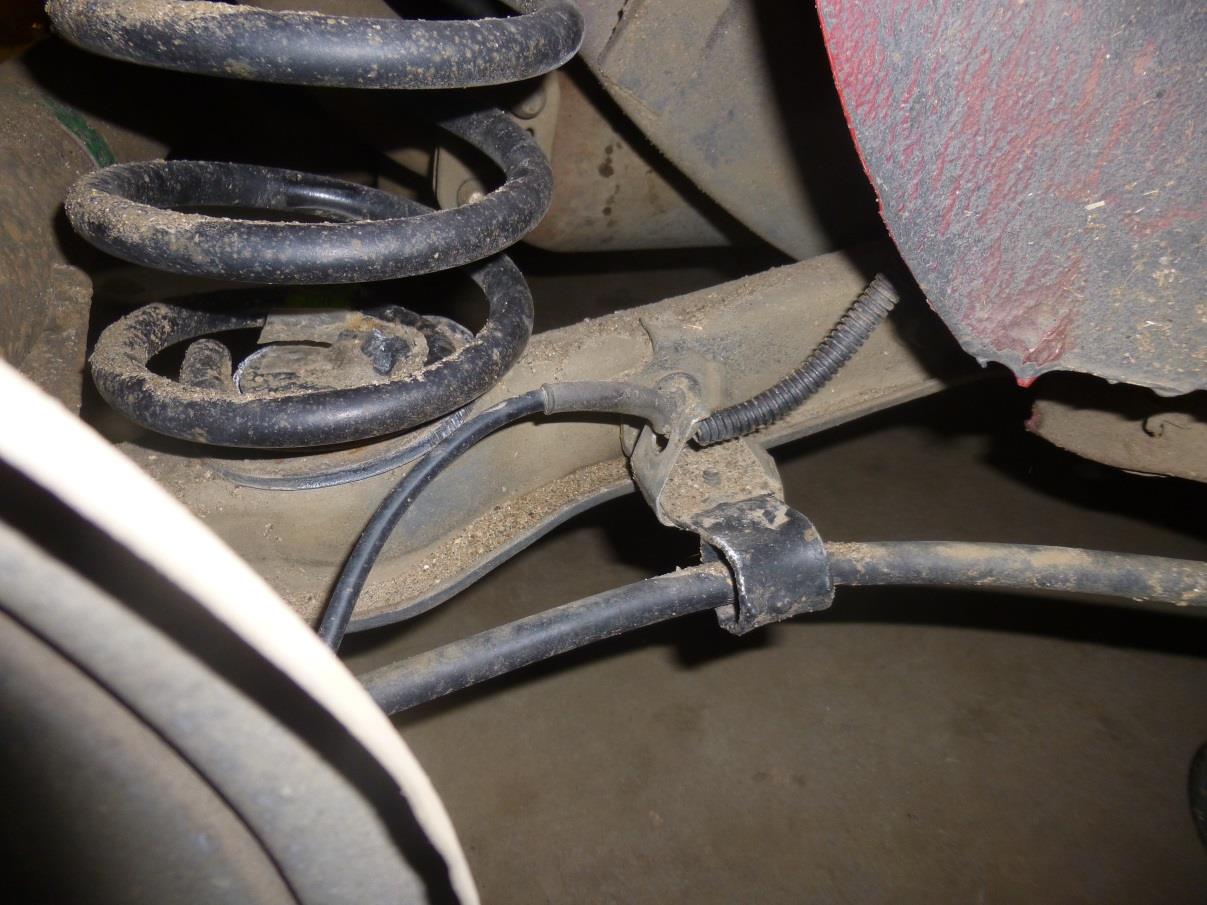
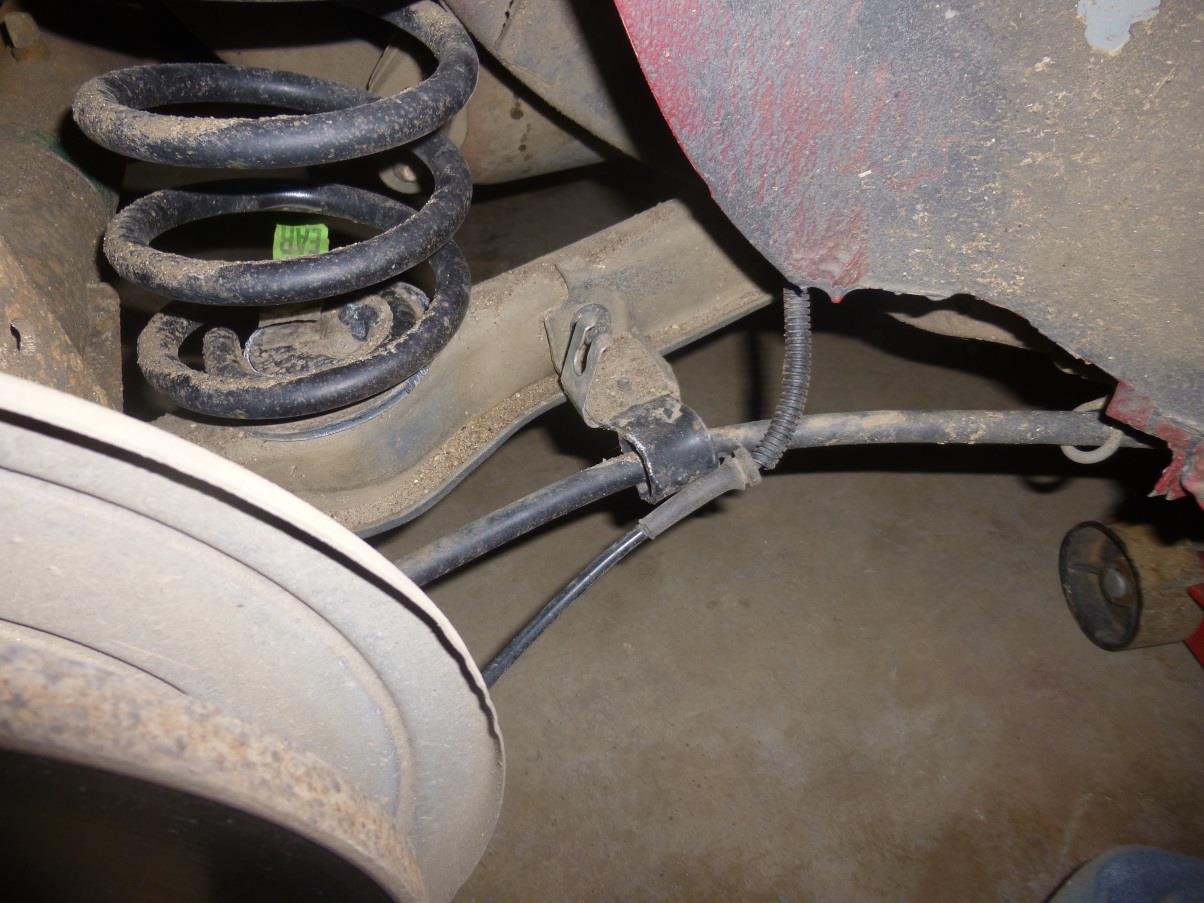
Remove the two bolts that connect the lower control arm to the sway bar with the 1⁄2” socket and wrench.
Repeat steps 3 through 5 on the passenger side. If you have 6x6 wood blocks or a second floor jack (or if you are working on a lift), you can take both rear wheels off to work on both sides. If not, at this point put the wheel back on the driver’s side and move to the passenger side).
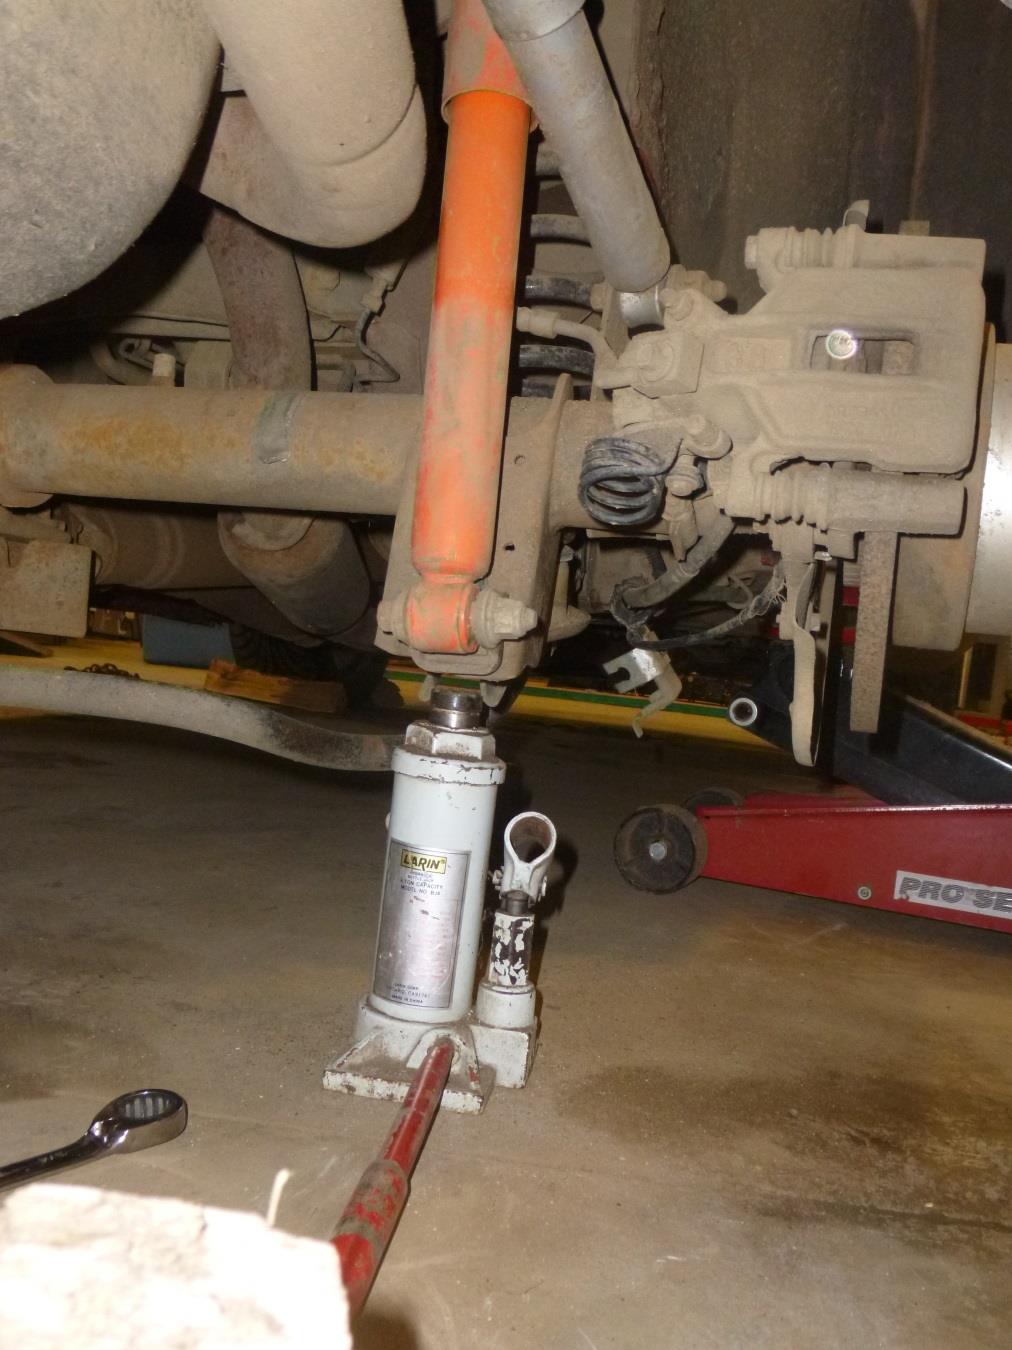
At this point you should have the sway bar removed from both sides. Use a jack stand to brace the axle near the shock mount, and use a bottle jack to lift the axle end of the lower control arm to take the tension off the bolt as shown in the picture below. Do not lift the control arm; just take the remaining spring tension off the bolt.
Remove the bolt from the axle end of the lower control arm using the 18mm wrench and 13/16” socket.
Open the release valve on the bottle jack to allow the lower control arm to swing down. Remove the jack, and swing the control arm down far enough to remove the spring. There is a plastic cup that goes between the control arm and the spring – be sure not to lose that.
Remove the bolt at the frame end of the lower control arm using the 18mm wrench and 13/16” socket, and remove the control arm.
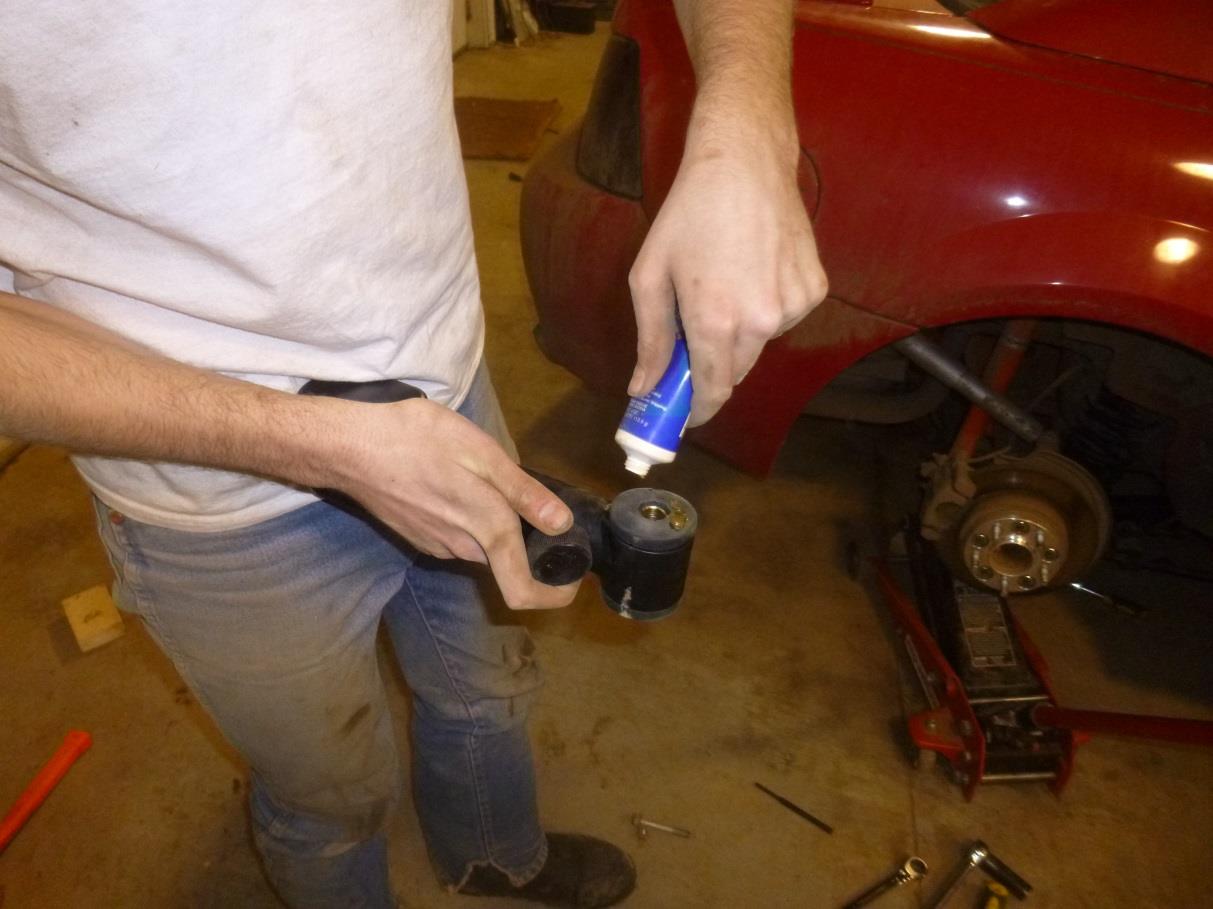
Put a thin film of silicone lubricant on the rubber bushings of the new lower control arm so that it can more easily slide into place in the bracket.
Connect the frame end of the new control arm with the 3⁄4”mm wrench and socket using the new bolts supplied with the kit. Be sure to use the longer bolts so that the nut will tighten all the way onto the threads.
Insert the spring and plastic cup between the control arm and the frame.
Using the bottle jack, slowly raise the axle end of the new lower control arm until the bolt holes
line up. You may need to use a pry bar and punches to line the holes up to insert the bolt.
If the bolt holes do not line up properly, check to see if the axle has rotated forward or back. Use
another bottle jack under the front or rear of the differential to tilt the axle as needed to align
the bolt holes. Tighten the bolt with the 3⁄4” wrench and socket.
Repeat steps 10 through 14 on the other side of the vehicle.
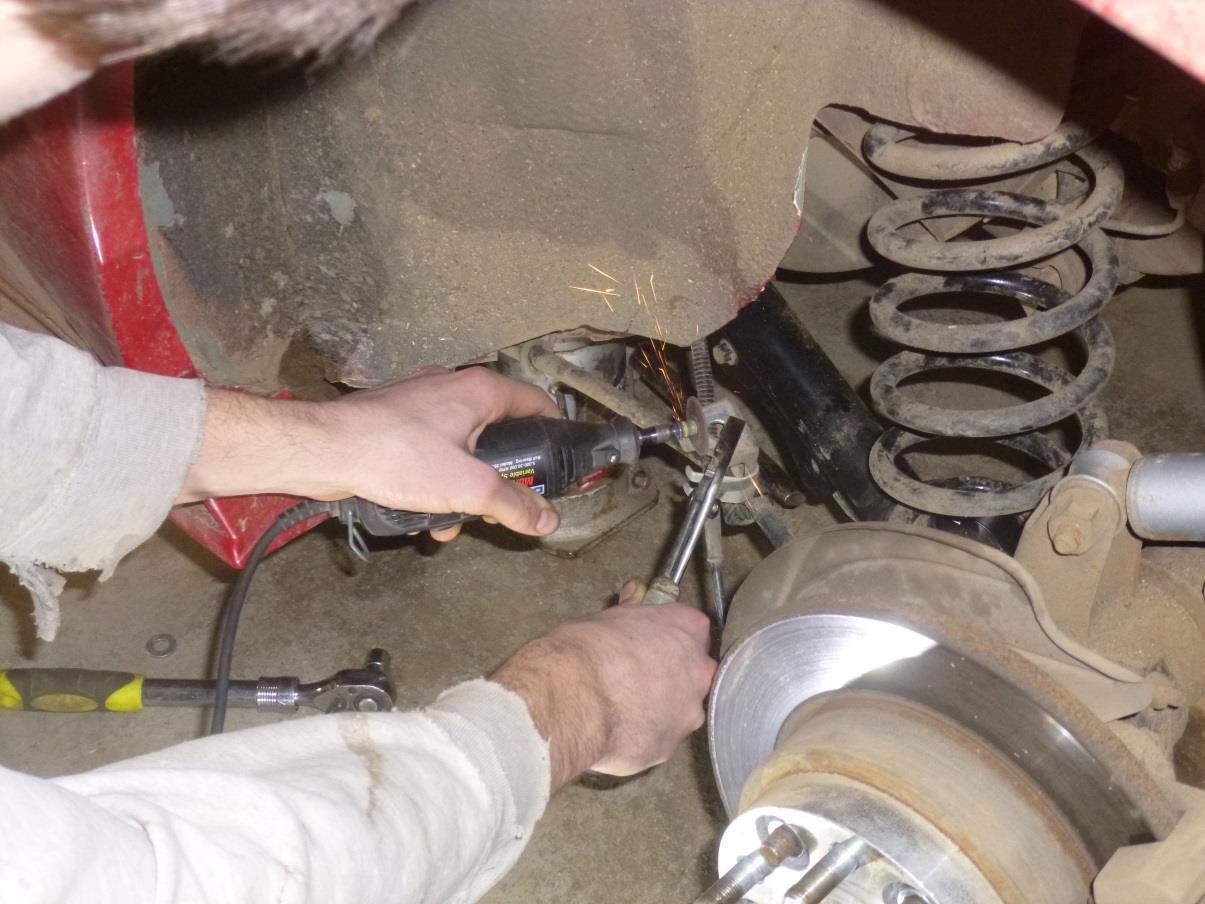
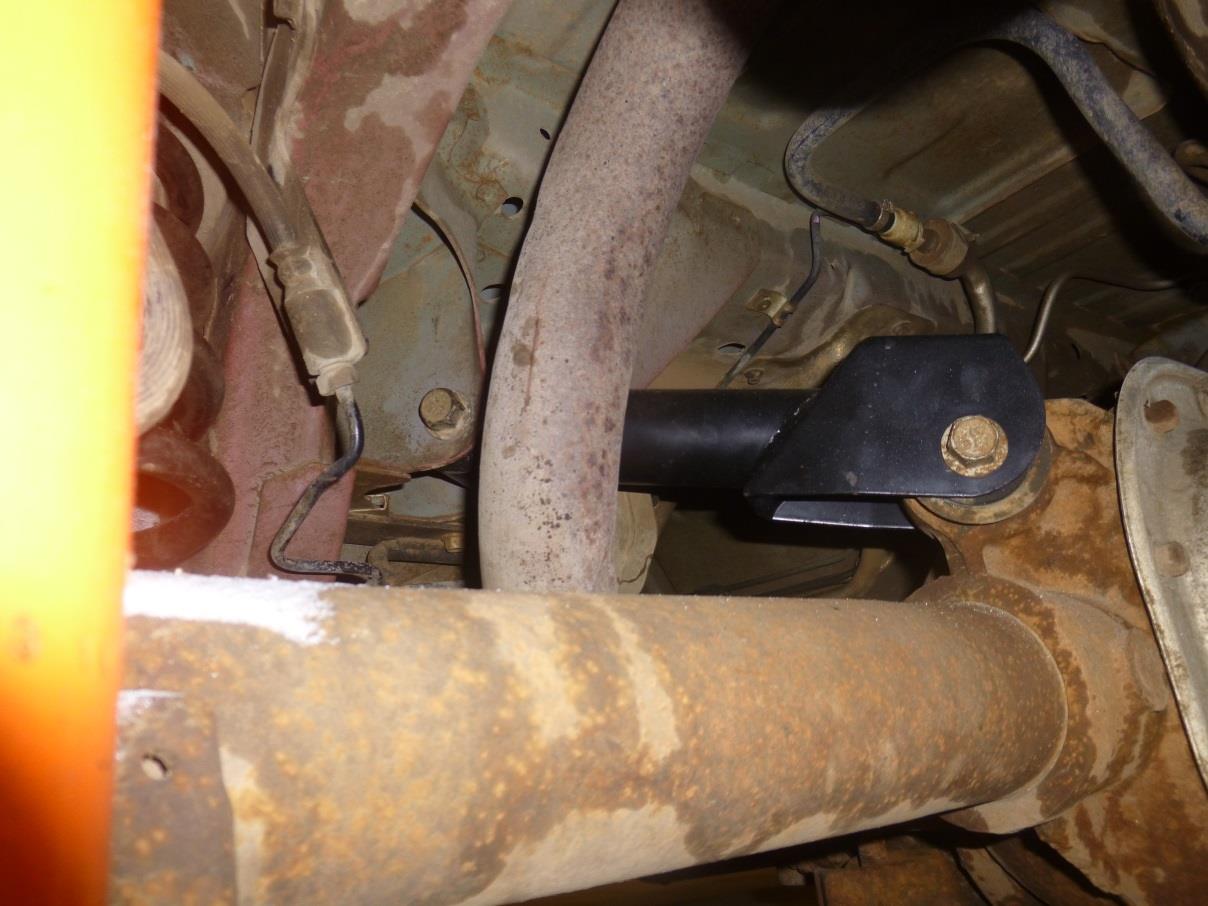
The tab on top of the brake line clip must be removed to fit on the new control arms. Use a cut-off wheel or grinder to score and snap off the tab as shown in the picture below. Whatever method you use, be sure not to damage the brake lines.
18. Attach the sway bar and brake clip to the control arm using the factory bolts and the 1⁄2” wrench and socket.
19. Reattach the brake line to the clip.
20. Repeat steps 2 through 4 on the other side of the vehicle. You have now completed the replacement of the lower control arms.
Upper Control Arm Replacement Procedure:
The upper control arms are much simpler to replace, although they are harder to get at. Remove the bolt at each end of the upper control arm using the 18mm wrench and socket. You may need to use a pry bar to get the bolt out of the hole.
Put some silicone lubricant on the rubber bushings on the new upper control arm.
Install the new upper control arm using the factory bolts if they are in good condition using the 18mm wrench and socket.
Repeat steps 6 through 8 on the other side of the vehicle.
Remount the wheels on both sides and lower the vehicle. Check the springs to make sure they remained properly seated in the control arm and frame.
Remove bricks or chocks from around the front tires.
Enjoy improved handling!
Installation Instructions written by AmericanMuscle customer Michael Johnson 1.10.16

