Talk to a Challenger Sales Tech
1-877-887-1105
M-F 8:30A-11P, Sat-Sun 8:30A-9P
$20K Sweeps! 10 Chances to Win! Enter Daily >

Injen Evolution Cold Air Intake with Dry Filter (11-23 5.7L HEMI Challenger)

Item CH1108
Verify parts fit and get product recommendations.
Challenger Sales Techs: Connect Now M-F 8:30A-11P, Sat-Sun 8:30A-9P
$0.00
Our Price

$369.95 (kit)

FREE Shipping Market Price $425.99 You Save 13% ($56.04) Up to 10% off for Military & First Responders! See Details

Will this fit your Vehicle?

Select a different vehicle Help?
Update or Change Vehicle
Ship to: Ashburn - 20149
Sorry, please enter a valid US or CA postal code
We're sorry, zip can't be updated at this time.
Recommended Install Shops
How It Works
Install Shops are available near Ashburn - 20149

Add Local Shop Installation

Total cost of service $175.00
    Create a list
    Add to New List

    Saved - View your saved items

    We're sorry. We couldn't save this product at this time.

    or use

      Product Videos

      Hey, guys, Adam here with americanmuscle.com. And today we're taking a closer look at and installing the Injen Evolution Cold Air Intake with the dry filter available for the 2011 and newer 5.7-liter HEMI equipped Challengers. Check this out for your own HEMI if you're looking to ditch the factory intake to pick up an aftermarket one that's not only going to boost your horsepower and torque numbers but give you a better throttle response and acceleration and really just an overall better performing and better breathing engine. Now, Injen claims a 19-horsepower, 21-foot-pound of torque gain with this intake and it's worth noting here, guys, this is without a tune. This is a no-tune required intake. Great for the guys not looking to pick up an additional handheld tuner to go through all of that process just to get this installed. It's a simple bolt-on, requires no modifications right out of the box. Now, what I like about this one is it is a little bit more on the premium side of things when it comes to the actual components of the kit. As you can see, it's got a completely closed off heat shield or airbox which is gonna help to keep the cold air in, block the hot engine bay heat out. And it has also got a clear window with the Injen name right across it, which I think looks really good under the hood but it's also gonna give you a small window into the filter so you can see its condition. The rest of the kit is a rotomolded polyethylene, hard plastic. The filter itself is a patented Super Nano-Web Dry Filter technology from Injen which I'll break down in just a little bit. This whole kit is coming in just over the $300 mark and again, no tune required. Install is gonna get one out of three wrenches on our difficulty meter, you can get it done with very, very simple hand tools in the driveway at home. As a matter of fact, it's one of the easiest things you can possibly do to your vehicle, let alone under the hood. I'm gonna take you through every step, let's get to it. Now, the tools used in this install include an impact gun, 3/8 ratchet, 8-millimeter, and 16-millimeter deep sockets, and a two and a half millimeter Allen key. Now, the first step here is to grab your engine cover straight off by pulling up and setting it aside. Next step is to unplug your air temperature sensor by just pinching and pulling straight back. Grab your breather line connected to your factory heat shield. You're gonna pull straight back on that as well to disconnect it. Next up grab your 8-millimeter socket, and we're going to remove the bolt holding your factory heat shield to the rad support. Use that same socket to loosen up the clamp holding the tubing to the throttle body.From there, you can loosen that up, pull straight back and remove the whole thing in one piece. Next up, we're actually just gonna remove this bracket. Now, this only holds on the sound tube connected to your factory intake which most aftermarkets do not come with. So, grab a 16-millimeter deep socket and we're just gonna work back this nut and remove it altogether since we don't need it anymore. You wanna make sure you're holding on to it just in case you ever wanna revert back to stock. So, we got our factory intake off of our 2013 RT behind me, we have it on the table next to our Injen option and I wanna take you through some of the similarities, but mainly the difference is between the two kits and there's going to be quite a few of them. Now, starting at the filter, you'll see the factory one. I took the lid off of the factory heat shield to expose that paper element filter. Now, this is a flat paper element filter which is commonly used among, you know, factories. They come right off the line. They're relatively reliable for the factory, but they're not washable, they're not reusable, and really, they're not gonna optimize all the cold air coming in. Using a conical filter like this one, you're getting 360-degree air coming in through a dry filter. Now, this is Injen's patented Super Nano-Web Dry Filter. Now, this uses superior filtration qualities that you won't get in some of the other aftermarket options. Definitely not something you're gonna get from the factory paper element. Switches over to the nanofiber filter rather than the paper element which is gonna do a hell of a lot better job filtering out particles you don't want and pulling in all the cold air you do want. Now as far as it being reusable, you definitely can and it's gonna require a lot less maintenance than an oil filter you'd get in the aftermarket.You can use pressurized air to just clean out the new filter whereas your factory one, you'd have to go out and pick up a new one every couple of thousand miles when routine maintenance comes around. Now, as far as everything else, you're getting rotomolded polyethylene construction, also known as just a really durable impact resistant plastic that's gonna do a really good job of heat dissipation. And your factory intake heat shield is gonna be one of the star players in the kit. This is very unique in the category. As you can see, it's a completely closed box around your filter, which is gonna do a great job keeping out that excess engine bay heat. Some of the other less premium options, more budget-friendly starter kits would have maybe a metal heat shield that you're just lining weatherstripping to the top of which is just going to trap in the cold air underneath your hood. That's not gonna do as good of a job as an entirely closed box like this would. The big key thing here that differentiates it is this clear window that you can see straight through to the filter to check on its condition. Now, there are some of the other kits out there with a meter to tell you how clean or dirty the filter is. And I actually think this is really cool. Not only does it give you something to look at under the hood, but it has a lot of functionality so you can see right through, just pop the filter out and clean it. The factory air box has a little air inlet at the bottom there and that's something that you are gonna see on your Injen option. So, you're retaining that, so you can pull cold air from the bottom of the engine bay, that's always gonna be really good and it also comes with new couplers and new clamps to make sure there's a leak-free finish. What we're gonna have to do, guys, is pop off our factory air temperature sensor, transfer it over to our new tubing and we'll get to assembling. So, let's do that first. Now, your air temperature sensor is gonna be right where it connects to the throttle body next to your sound tube. You're really just gonna twist to unlock it, pull straight back, set it aside. Now we can toss our factory stuff off the table. The first thing we're gonna do for the installation in the assembly here on the table is install our air temperature sensor. Now, it comes with this little rubber bracket to install that properly and make sure there's no air leaks. Now, that's gonna install into this pre-cut section right next to where your new tubing would install to the throttle body. Now, you wanna install this the proper way. On the bracket, there's an arrow pointing in a certain direction. You wanna make sure you're installing it so the arrow is pointing to the throttle body. That's where you want it to go, that's the direction of the airflow. You're gonna pop that into place here. There's already pre-drilled and pre-threaded holes. Take the 2.5-millimeter Allen key bolts or Allen screws, and you're gonna thread those in by hand, just a couple of threads to get them started.Now you can use a hex socket if you have the appropriate size. I'm gonna use a 2.5-millimeter Allen key to get the job done, just tighten these down. Perfect. Once that's tight, grab your sensor, slide it into place, you're basically gonna turn and lock it in. And when you lock it in, it should also be facing in that same direction, it really only goes on one way. All right, just next up, grab the only coupler in the kit. This is gonna be the one that connects the tubing to the throttle body. Have one clamp over the inlet side that's gonna connect to the tubing, set it into place. Once you get that seated, grab your 8-millimeter socket, and we're gonna tighten down that clamp in the proper position, you just wanna make sure it's seated around the edging there. Next up, grab your other clamp, same size, you're gonna put it over the outlet and you're just gonna get it a little snug just so it holds itself in place. We'll tighten it down once it's on the throttle body.Grab the 3/8 tubing, just this little chunk of tubing included in the kit. This is gonna adapt to the fitting included in the kit here, this clear fitting here, and that's gonna connect to your factory breather tube. Now, this portion is gonna slide over the pre-molded on extension, and it's not gonna need a clamp, it's gonna be tight enough for itself, it's really just a vacuum line. Once you have that on as far as you can get it, we can put this adapter on the other end. Now, we don't have to worry about the other end until we have this installed on the vehicle. Now, there are two pieces of weatherstripping included in the kit. one is a little shorter, one is a little longer. Longer one, we're gonna line around the curve at the bottom of our heat shield. It's going around the curve section, the flat portion is going around that straight line. So for here, I'm just gonna put this into place, pressing down on it and it snaps right in.Take the straight section and install it on the other side. Perfect. Now, the filter installs pretty neatly which is going to basically lock into place on your heat shield. It has little knobs molded into the little coupler on the end here, and it's gonna fit into the circle. So, really what you're gonna do is grab your filter, insert it in the heat shield and rotate it until you feel it seat properly. So, that just set and give it a twist and it locks itself in. All right, next grab your heat shield, we're gonna drop it into place. You wanna make note of that grommet on the inner wheel well. If under the hood you don't have this grommet, it might have stuck to your factory heat shield. You can pull it off of there and put it back into place. This little knob on your new heat shield is gonna go right in there, so drop this into place. Perfect. We're gonna take that factory 8-millimeter bolt, put it right through here and just thread it in by hand. You don't need to tighten it down just yet.Grab the large clamp included in the kit and just put it over the outlet of the filter. Grab your tubing, now we can drop it into place connecting it to the filter and to the throttle body. Put it into the filter first and then rotate it down toward the throttle body to connect it. All right, pop that on to the throttle body, now you can rotate the clamp up and start tightening them down. Grab your 8-millimeter socket and tighten down the clamps. Grab your sensor harness and reconnect the air temperature sensor making sure still it's pointing in the right direction. Finally, your last step, grab the breather tube that we connected the fitting to and just connect it to your factory tubing. Now you're good to go. The very last step, of course, don't forget your engine cover. You can drop this into place. Line up the oil cap into its cut-out as well as the dipstick. Snap it on and you're good to go. Well, guys, that's gonna wrap up my quick overview and install for the Injen Evolution Cold Air Intake available with the dry filter for all '11 and newer 5.7 Challengers. Check it out if you're looking to get one of the more premium options in the category and especially one of the more premium options from Injen. It's got the full enclosed heat shield, Super Nano-Web Dry Filter technology, one of the more premium options in the category. So, if you wanna get this one, you can pick it up right here at americanmuscle.com.

      Product Information

      Features, Description, Reviews, Q&A, Specs & Installation

      Features & Specs

      • Improved Power and Torque Gains
      • Quicker Throttle Response
      • Low Maintenance SuperNano-Web™ Dry Air Filter
      • Heavy-Duty Roto-Molded Polyethylene Construction
      • No Tuning Required
      • Limited Lifetime Structural and 4-Year Filter Warranty
      • Fits All 2011-2023 5.7L Dodge Challenger Models

      Description

      Improved Overall Power Gains. Give your Challenger a practical power boost with the Injen Evolution Cold Air Intake. This cold air intake features a cutting-edge design that maximizes airflow to your engine, improving horsepower and torque, and giving your Challenger a more aggressive throttle response. This intake also gives your Challenger a throaty, aggressive sound that will surely turn heads.

      No Tune Required. The Injen Evolution Cold Air Intake works with the factory tuning and gets all its performance numbers via its design. No ECU tuning is required, but future tuning can always benefit your Challenger's performance.

      Advanced Low-Maintenance Dry Air Filter. The Injen Evolution Cold Air Intake uses the exclusive SuperNano-Web™ Dry Air Filter. This dry air filter’s proprietary synthetic nano-fiber is incorporated into a coarser synthetic filter media providing efficient filtration while allowing increased airflow. This dry air filter is also low-maintenance and easy to clean with pressurized air.

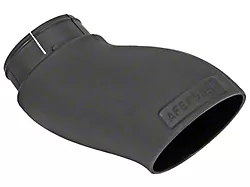
      Heavy-Duty Polyethylene Build. Both the air box and the inlet tube of the Injen Evolution Cold Air Intake are roto-molded from high-grade polyethylene into a seamless unit. The combination of roto-molding and heavy-duty polyethylene produces a unit that’s extremely durable without the weight. The patented twist-lock technology secures the filter to the housing in one easy motion. Lastly, the housing features the new Clear View badge, which gives the intake a clean look, as well as a means to monitor the air filter.

      Drop-In, Bolt-On Install. The Injen Evolution Cold Air Intake uses the location of your Challenger’s stock air system for an easy installation procedure. All hardware is included for convenience, and no modifications to your car are needed.

      Backed by a Limited Lifetime and 4-Year Limited Warranty. The Injen Evolution Cold Air Intake is backed by a limited lifetime structural warranty and a 4-year limited filter warranty covering manufacturer’s defects.

      Not CARB Certified. The Injen Evolution Cold Air Intake is not CARB certified, making its use illegal in California and other states that have adopted CARB certification.

      Application. The Injen Evolution Cold Air Intake fits all 2011-2023 5.7L Dodge Challenger models.

      Fitment:

      Details

      Injen EVO5100

      CA Residents: WARNING: Cancer and Reproductive Harm - www.P65Warnings.ca.gov

      Installation & What's in the Box

      Installation Info

      What's in the Box

      • (1) Air Box
      • (1) Inlet Tube
      • (1) Dry Filter
      • (1) Step Hose
      • (1) Tem Sensor Grommet
      • (2) Stainless Steel Clamps
      • (2) Bulb Rubber Trim
      • Installation Hardware
      4.8

      Customer Reviews (165)

        Questions & Answers

        10 More Questions

        Will It Fit My Challenger

        • R/T - 11, 12, 13, 14, 15, 16, 17, 18, 19, 20, 21, 22, 23
        • R/T Classic - 12
        • R/T Plus - 15, 16
        • R/T Plus Shaker - 16
        • R/T Shaker - 16
        • T/A - 17, 18