Talk to a Challenger Sales Tech
1-877-887-1105
M-F 8:30A-11P, Sat-Sun 8:30A-9P
$20K Sweeps! 10 Chances to Win! Enter Daily >

Pypes Race Pro Cat-Back Exhaust System with Polished Tips (09-14 5.7L HEMI Challenger)

Item CH2050
Verify parts fit and get product recommendations.
Challenger Sales Techs: Connect Now M-F 8:30A-11P, Sat-Sun 8:30A-9P
$0.00
Our Price

$772.75 (kit)

FREE Shipping Market Price $888.66 You Save 13% ($115.91) Up to 10% off for Military & First Responders! See Details

Will this fit your Vehicle?

Select a different vehicle Help?
Update or Change Vehicle
Ship to: Ashburn - 20149
Sorry, please enter a valid US or CA postal code
We're sorry, zip can't be updated at this time.
Recommended Install Shops
How It Works
Install Shops are available near Ashburn - 20149

Add Local Shop Installation

Total cost of service $299.00
    Create a list
    Add to New List

    Saved - View your saved items

    We're sorry. We couldn't save this product at this time.

    or use

      Product Videos

      Hey, guys. Adam here with americanmuscle.com and today, we're taking a closer look at, installing and, of course, listening to the Pypes Race Pro Cat-Back Exhaust for the '09 to '14 5.7 Challenger. You should be checking this out for your HEMI if you're looking to ditch the factory, boring, very restrictive and really not-so-loud stock exhaust for an upgraded one ready for race and street applications with a 3-inch mandrel bent 409 stainless steel tubing and a louder, more aggressive exhaust note.I think this is a pretty noticeable upgrade over the stock exhaust, but it's not too overwhelming. Now, as far as loudness, as you heard from our sound clips, I'm gonna give this one a four out of five on our loudness meter. It's not quite the five out of five, but it is still louder than a lot of the other options in the category.This one here is very suitable for the streets. It's loud enough that it wake up a neighbor or two, but it's not too bad. You can expect a little bit of drone inside the car, but not too bad at all. As you heard from our sound clips here, this does have a nice rumble at idle and at wide open throttle, it definitely has got a mean bark. It does come with the Race Pro mufflers which are chambered style mufflers which are a little bit more free-flowing than the Street Pro, meaning it's gonna make a little bit more power, it's got a little bit more sound and I'd actually say it might be a little bit more raspy. Because it's a little bit more of a straight pipe, it's got that more aggressive sound, but not by much. I would expect a couple of horsepower and torque gains as well as a nice throttle response increase, making this one perfect for race applications as well.Now, if you wanted to pick it up, it comes in right around 600 bucks, making it one of the more affordable options in the category. There are some more premium options out there around 1,400 bucks, which of course gets to be on the more expensive side of the spectrum if you're looking for 304 stainless steel, and some of the more options with technology built into the baffling on the inside of the mufflers. This one here, right around 600 bucks, a little bit more affordable while still giving you a nice upgrade in sound and quality.Now, the install I'm gonna give two out of three wrenches on our difficulty meter. It's pretty easy. Anyone can tackle it with some slight mechanical skills and the right hand tools. Have a ratchet and an impact gun on deck, a couple of sockets like a 13 and 15 deep socket. I also like to use a 13-millimeter swivel socket to make life a little bit easier. I'll show you guys some tips and tricks on how to get that factory one off and how to install this one with ease in about two hours, maybe three, if you're a little bit less experienced. Now I'm gonna show you guys every step of the process so stick with me. We're gonna start with taking the factory one off. Then we're gonna lay down that on the floor next to our Race Pro. I'll talk about some of the similarities and differences and then I'll show you guys how to install this one. So let's get to it.The tools used in this install include an impact gun or a ratchet, extension, 13 and 15-millimeter deep sockets, a 13-millimeter swivel socket is also recommended, hanger removal tool, PB B'laster or WD-40, and a mallet.Now, the first thing we're gonna start with for the uninstall is popping off our factory tips. Those are gonna be reinstalled later on with our new exhaust. So grab your 13-millimeter socket. You're just gonna loosen up this band clamp here. Of course you can grab some PB B'laster to loosen it up here.All right, we're gonna do the same thing for the other side. Use that 13 socket to loosen up that clamp. All right, now our other side was welded on. This one's broken loose, so it should be a little easier to get that tip out of place. Once that's off, pop that off. Set these aside to be reinstalled later.The next step here, we're back by our factory H-pipe. You wanna grab your 15-millimeter socket and we're gonna loosen up these clamps around that H-pipe as well. Once we get both sides loosened up, I'm gonna put a pole jack underneath that split H-pipe portion just to hold it up in the air while we work on the hangers on the rest of the exhaust. So, for now, grab that 15 and work these off.All right, so at this point, like I said, I'm gonna put this pole jack up into place just to hold this end in. if you guys are working on the ground, a hydraulic jack does the trick. Jack stands are also a good idea, whatever you can have just to hold this end up while you remove the other piece. At this point we can disconnect these clamps, loosen up the H-pipe and get that disconnected from the opposite end of our stock exhaust.The next step here, we're actually gonna use a hanger removal tool to pop our factory hangers out of the isolators on our frame. We're gonna do that right behind the factory resonators toward the rear end. There's a couple different hangers we're gonna have to do this on. So using this tool can definitely make a huge difference.If you struggle at all with these, you can use PB B'laster or WD-40, some kind of lubricant. Just spray them on a little bit. You don't need too much. And that should help pop these out of place.All right, now, instead of us removing the hanger from the isolator by the factory muffler, what we're gonna do is grab a 13-millimeter socket and an extension and actually just remove the bolt holding the whole bracket to the frame. That way it's easier. We can just remove it off car instead of struggling above our heads here, especially a little easier for you guys working on the ground.So grab that 13 socket. Remove that bolt. That hanger will drop down. Save this bolt to reinstall later. We have to do this one more time for the front of the muffler by the exhaust tip. Right, now we can do the same thing, like I said, right by the exhaust tip. Now, be careful, because this whole thing will start to drop down, so you wanna have one hand on it to make sure it doesn't drop right on you.All right, now, we're doing the same thing for the other side.All right, at this point, we can remove the whole exhaust in one piece. My buddy, Tony, is here to help me out because it can be a little awkward since it all is still connected. I'm gonna remove our H-pipe and Tony's gonna help me out guiding this down.Well, guys, we finally got our factory exhaust off of our 5.7 Challenger and on the ground next to our Pypes Race Pro Cat-Back. Night and day difference between the two, but there's a lot of things I really specifically wanna point out starting at the front end. Now, your factory exhaust has an H-pipe as your mid-pipe. It has a lot of kinks. It's pretty restrictive. And the H-pipe alone is just gonna restrict a little bit more power and sound. H-pipes are known to be a little bit deeper in tone, I will say, but mixed with that with your factory resonators and your factory mufflers, there's just not a lot happening with this exhaust. Your new Pypes transfers that over to an X-Pipe. The X-Pipe crosses over. There's no restrictive middle section that cuts off airflow. It's completely unrestricted and it produces a lot more power and a lot more sound and volume at that. The X-pipes are typically known to be a little bit raspier than H-pipes, simply because there is none of that restrictiveness. Sound isn't bouncing back and forth. Their airflow isn't bouncing back and forth. Rather that causes that deeper tone. It's a little bit louder, a little bit more power you can expect out of that because of the less restriction of the airflow.Moving along, you're gonna see your 3-inch mandrel bent tubing, a little bit bigger than your factory option here which is to say a lot for power, a lot for sound. Moving on to your mid-pipe mufflers. Now, these are a huge upgrade over your factory options. Note that you are deleting resonators. You don't have resonators in your new Race Pro. You're just gonna have your new Race Pro mufflers. Now the Race Pros are a little bit different than the Street Pros in the sense that they are less restrictive, again, just like your X-Pipe. They are gonna produce a lot more sound and they are meant for race applications. Your Street Pro is geared just as it sounds. It's geared for the street. It's a little bit more tamed. The Race Pro, as you heard, is just louder, it is more aggressive and it's got that one-chamber design, a little bit less baffling in the interior than your Street Pro. So the difference there between your Street and Race, this is made for a little bit more power, a lot more sound, a lot more volume. This is the more aggressive version of the two from Pypes.Moving on, you see that this has that mandrel bent steel throughout, giving you that streamlined airflow. No mufflers here. Get rid of this big, bulky, ugly, factory muffler that tucks into your bumper. Nobody's really a fan of that thing. You're going pretty much with a straight pipe back here to your 4 x 2 1/2 inch rectangular cutouts that are a dual squared tip. So instead of that factory one-piece, you now have a factory two-piece on each side which I think looks a little better and since they are a bit extended, as you can see this one is a lot longer than your factory option and it's gonna stick out a little bit more behind the rear end. Some guys might not love that. Other guys might be a big fan. I think it's a little bit more aggressive but, of course, it is personal preference. It does have Pypes name right across the top of each split tip just to give it a little bit of branding, a little bit more style to the back end here and I just think it looks pretty good.So I'm gonna show you guys how to install all of these, but the first thing we have to do, we're gonna transfer over the brackets with our factory hangers that we removed from our frame. Those two are gonna transfer over to this side here. And then we're gonna take off our factory isolators when we get to that portion of the install and we're gonna take them off the frame, put them onto these hangers and install those together.I'll explain this portion a little bit later on once we get to that, but for now let's pop these off and transfer them over. So to get these uninstalled what we're gonna do is use a little bit of PB B'laster. Having a rag underneath of it will catch some of that excess. We're just gonna lube up that factory hanger a little bit. Wipe off some of the excess. Grab your hanger tool and just pop this off.All right, do the same thing for the front one.All right, repeat for the other side and then we'll transfer them over.Transferring them over, you're just gonna slide this over the new hanger welded onto the side of the piping. If you need to, you can use PB B'laster to slide these on. Ours are pretty lubricated, so we're just gonna pop them off. Slides right over and just seat them right in the middle. Same thing for the other side.Perfect. Now, we can get to work installing this starting with our X-Pipe. First step of the install, grab your new X-Pipe from the Race Pro kit from Pypes. Make sure you have exhaust clamps over the end here. There is a metal plate welded to the center with the Pypes name and an arrow. You wanna make sure the arrow is pointing toward the front of the vehicle. So we're gonna go ahead and put that up into place. Slide it over your factory manifolds as far back as they go. Slide the clamps back down. All right, at this point, you wanna rotate your clamps up at the end so that you can see the bolt head and tighten them down.At this point, it's a good idea to get them nice and snug, but not too tight. Just leave a little bit of room for adjustment later on just in case you have to move things around. Next step is our muffler here and you wanna make sure that you're installing this appropriately on the right side. So, as you can see, the larger portion is gonna be facing our driver side with the outlet on the driver side as well. So you don't wanna have it rotated the opposite way. It'll go on just like this. Now, what we're gonna do is grab our 15-millimeter socket, tighten down this clamp and then do the same thing for the other muffler.All right, again, just leave a little bit of room for adjustment. Do the same thing on the other side.Now, we can tighten that clamp.Now, as I said, I like to remove this hanger from the frame here. I find it to be a little bit easier to install this on our tailpipe and then hook it back to the frame rather than trying to hook the tailpipe to this. So I'm gonna use my hanger removal tool to pop this off.We're gonna do the same thing on the other side as well.All right, now, we can install our tailpipe and, as you can see, I have that hanger reinstalled onto our tailpipe exhaust. We're gonna slide this onto the outlet of the muffler, swing up that isolator and lift the entire system up to reinstall that back onto the frame.You might wanna use some PB B'laster for this. That can be pretty helpful. All right, at this point, you can rotate that clamp bracket back upward, push the exhaust up and thread in the factory 13-millimeter bolt to the frame hole, tightening this down. You wanna make sure that all connects properly. We're gonna tighten this down with our 13 swivel socket. A straight steep socket also does the trick. I find swivel to be a little bit easier. Then we're gonna do the same thing for the other one.Do the same thing for the other hanger bracket.All right, now, we can start on our passenger side tailpipe tip.Repeat for the front one.All right, now, go back and tighten down all of your clamps and we'll finish up with the tips. All right, guys, for the tips, you wanna make sure you're putting one of your clamps into place. Put that tip up into the area and you're gonna finesse it just a little bit until it gets on. If you need to, grab a mallet, give it a couple of taps.There you go. Drag that clip over.When you're using a mallet, just make sure, guys, that you're not hitting too hard. You don't wanna dent at all. Don't use a metal hammer or ball-peen hammer and make sure you're using a rubber mallet. Grab a 15-millimeter socket and tighten down that clamp.Now, again, just get it nice and snug. You might have to, you know, make a couple of adjustments once you step back and take a look. Repeat this for the other side.Go back through all the clamps, tighten everything down, making adjustments if you need to, and you're good to go.Now, that's gonna wrap up my review, install and, of course, sound clip of the Race Pro Cat-Back Exhaust from Pypes, available for the 2009 to 2014 5.7 Liter HEMI equipped Challengers. If this is what you're looking for, you can check yours out right here at americanmuscle.com.

      Product Information

      Features, Description, Reviews, Q&A, Specs & Installation

      Features & Specs

      • Race Pro Cat-Back Exhaust
      • Aggressive Exhaust Note
      • Increases Horsepower and Torque
      • Straight-Through Design
      • Heavy-Duty, Mandrel Bent 409 Stainless Steel Tubing
      • Polished Tips
      • Lifetime Warranty
      • Fits 2009-2014 5.7L Dodge Challengers

      Description

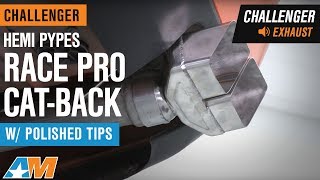
      Power Boost by Pypes. Upgrade your vehicle's performance with increased horsepower, torque and fuel economy with the high-performance Pypes Race Pro Cat-Back Exhaust with Polished Tips. These racing-inspired mufflers deliver an aggressive sound while helping to optimize exhaust flow using its heavy-duty 16 gauge stainless steel piping, straight-through design, and slip-fit connections.

      Non-Rolled Edge Style. This exhaust system comes in a cat-back style with a split rear exit location, polished finish, and a non-rolled edge tip edge style. It is sold as a kit.

      Warranty. A lifetime warranty comes with this product, which covers all defects in materials and workmanship. Issues that are the result of regular wear may not be covered, as well as discontinued products at the discretion of the manufacturer.

      Installation. Installing this cat-back exhaust takes no more than 2 hours, with a medium degree of complexity if you have light to moderate mechanical skills.

      Application. The Pypes Race Pro Cat-Back Exhaust with Polished Tips is designed for all 2009-2014 5.7L Dodge Challengers.

      Fitment:

      Details

      Pypes SMC20R

      CA Residents: WARNING: Cancer and Reproductive Harm - www.P65Warnings.ca.gov

      Installation & What's in the Box

      Installation Info

      What's in the Box

      • (1) Cat-Back Exhaust
      • Mounting Hardware
      • Instruction Manual
      4.3

      Customer Reviews (24)

        Questions & Answers

        10 More Questions

        Will It Fit My Challenger

        • R/T - 09, 10, 11, 12, 13, 14
        • R/T Classic - 12