Installation Time
(approx) 3 Hours
Difficulty Level:
Light to Moderate mechanical skill required.
FREE 2 or 3-Day Delivery on Orders $119+ Details
$404.60 (kit)
FREE Shipping Market Price $472.99 You Save 14% ($68.39)Add Local Shop Installation
Saved - View your saved items
We're sorry. We couldn't save this product at this time.
or use
Noah: I'm Noah with AmericanMuscle, and this is the PowerStop Z23 Evolution Sport Brake Rotor Pad and Caliper Kit for the rear of the '09 to '20 Challenger GT, R/T, and T/A and the 2011 to '20 Challenger SE and SXT with the dual piston front calibers. Now, this kit is going to be perfect for someone who's looking to upgrade their rear brakes to something that bites a little better, all while looking for a red caliper without having to break out the paint cans.We're looking at upgraded pads, rotors, and pre-painted rear calipers in this one kit. Now, this kit is designed to increase the stopping power of your Challenger, and this set is gonna work as a great addition to upgraded front brakes as well, whether you're doing 'em at the same time or they're already installed.Now, remember, these rear calipers are red already, so if you've got raw unpainted calibers upfront, it's not gonna look right, and you should grab the front kit as well if you haven't already. These rotors are drilled and slotted, which is gonna help keep them cool while braking hard to avoid warping. You also get these high-quality shims that come with, so your braking will be silent because nobody likes loud brakes. And then, finally, in those shims are gonna set some low-dust pads for some better bite.We're looking at one-piece rotors that are made from G3000 zinc-plated steel. These guys are balanced from the factory, so you won't need to worry about any vibration, brake noise, or any uneven wear. They're not gonna rust at the hub and look nasty either because they're finished in that zinc coating.Now, the brake pads have carbon fiber infused into the ceramic compound, which is gonna provide some serious stopping power and also help you resist brake fade. Now, your wheels won't get nasty either because ceramic pads barely make any brake dust at all compared to stock pads. And the calipers are made from cast iron and that red paint is actually a powder coat, which makes a thick and hard shell around the caliper that actually gets baked on to cure. All in all, everything you see here is quality-built.This kit costs around 450 bucks. Now, in terms of bang for your buck, this kit is gonna be hard to beat price-wise when you consider that new performance rotors and pads are both included, and you don't have to paint anything or mask stuff off. Now, this is a dropping kit with everything included. So, I'd say this is a really fantastic investment to make for your Challenger if you're looking for some stopping power.Now, the difference upgraded brakes make is huge, and typically, it's not much more expensive to upgrade rather than putting stock pads and rotors on and then paying for paint for the stock calipers. Installing this kit on your car really shouldn't be too much of a hassle for the average DIYer. This kit comes in at two out of three wrenches of difficulty, and it should take you about three hours to complete the full install. Now, speaking of install, let's head over to the install bay and get these on our Challenger.Man: The tools you'll need for this project are a 1/2-inch drive impact gun or a 1/2-inch drive ratchet, a short 1/2-inch drive extension, a 13-millimeter and an 18-millimeter socket, a brake hose clamp or a pair of vice grips with some rubber hose, a 10-millimeter wrench, some brake cleaner, and a clean cloth. Hi, everyone. Today we're installing a set of rear brakes on our Challenger.So, let's get started with the uninstalled part first. So, once you've got your vehicle properly and safely supported either on a lift or pair of jack stands, next thing you're gonna wanna do is use a pair of long nose vice grips with some rubber hose attached to the end of it, and we're gonna clamp off the brake hose itself to stop the brake fluid from coming out.Now, if you don't have this, you can always rent a brake hose clamp from your local parts store. And we're gonna clamp this down right here where it's the soft rubber part and that should prevent the brake fluid from running back down through the hose once we disconnect it from the caliper. Now we can go ahead and disconnect our brake hose from the caliper itself using our 13-millimeter socket.Now, before you disconnect that, it might be a good idea to go ahead and take out the cap that comes with the new calipers so that you can put it in place of the bolt once you take it out to prevent too much fluid from leaking out on the ground. And then you can just move your brake hose out of the way to give us access to the rest of the system.Now we can remove the two 18-millimeter bolts that hold the caliper mounting bracket to the rear axle using our 18-millimeter socket. Now, with those bolts removed, we can just slide our caliper off the rotor. Now with our caliper out of the way, we can go ahead and just slide our rotor off. Now, with the old system uninstalled, we can go ahead and check everything out, make sure we don't have any broken springs back here for our parking brake.Make sure the parking brakes themselves still had some pad left on it. And double check your hose, make sure that there's no cracks or leaks coming from your brake hose. So, we'll just go ahead and spray this down with some brake cleaner. And now we can go ahead and install our new system.Now, it's also a good idea to clean off your new rotor just to make sure that there's nothing from the manufacturing process, any oils or any rust or dirt from the shipping. So, we'll just go ahead and spray that down as well and then wipe it down with a clean rag. Now we'll go ahead and flip that around and do the front side.All right, now we can go ahead and install our anti-rattle clips and our brake pads. And when you install the brake pads, you want to use the supplied lubricant on the backside of the pads only. Make sure that you do not get that lubricant on the front side of the pads. All right, now, to install our anti-rattle clips, we're just gonna slip it inside here, and you can see where the grooves are at, and it's just gonna press into place like so. Make sure that it's seated, and then we'll do the same thing for the other side.Once they're seated and you've got the lube on the back side of your brake pads, we can go ahead and insert those into the caliper as well. All right. Now, with our pads installed, we can go ahead and mount our caliper back to our axle. Now, we'll slide our caliper over our rotor and we'll go ahead and secure it with the original hardware.Now we'll go ahead and tighten those down with our 18-millimeter socket. Now, before you reconnect your brake hose, you're gonna wanna pull out this banjo bolt here and make sure that these copper gaskets that are on there now are removed. You do not wanna reuse those copper gaskets.Now, you may need to use like a small flathead screwdriver if they're stuck to go ahead and pull those off. Once you've got 'em off, go ahead and put one on one side of the bolt, put the other one on the other side, then you can remove the cap, and go ahead and re-insert the bolt and tighten it down using your 13-millimeter socket.Once you've got that done, you can go ahead and take off your clamp off your hose. And now, you can repeat that whole process for the other side. Now, once you've got both sides installed, then it's gonna be time to actually bleed the air out of the system from installing the new lines.So, the easiest way to do this is to start from the farthest bleeder screw from the master cylinder. So, in our case, we would be starting on the passenger side rear and bleed that one first. Now, for demonstration purposes, we're just gonna show you on the driver's side here, but you would do this on the passenger side first, and then move to the driver's side. So, what you're gonna do is you're gonna have a buddy in the car sitting ready to go, and what you're gonna have them do is press down on the brake pedal three or four times and then hold it to the floor.Once they hold it to the floor, what you're gonna do is take your 10-millimeter wrench, put it on the bleeder screw, open it up, let the air come out, whatever fluid comes out as well, close it up, and then have them pump it again two or three times. Hold it down, open the bleeder again. And once you get to a point... And you're gonna continue to do this process until you get to the point where there is absolutely no air coming out of the line. Once you get no air coming out, go ahead and close it up and move to the next wheel.And that wraps up our review and install of the PowerStop Z23 Evolution Sport Brake Rotor Pad and Caliper Kit for the Rear for the '09 to '20 Challenger GT, R/T Rally Red Line, and SXT with dual-piston front calipers and vented rear rotors. It also fits the 2011 Challenger SE with dual-piston front calipers and vented rear rotors. Thanks for watching. And remember, for all things Challenger, keep it right here at americanmuscle.com.
Subscribe to our YouTube Channel
Features, Description, Reviews, Q&A, Specs & Installation
Brand | PowerStop |
Rotor Location | Rear |
Rotor Type | Drilled and Slotted |
Brake Pad Material | Carbon Ceramic |
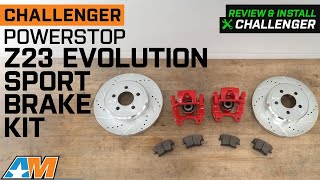
Powerful Daily Driving. If you’re a daily driver looking to add some boost on your stock braking system, look no further than the PowerStop Z23 Evolution Sport Brake Rotor, Pad, and Caliper Kit (Rear). This brake kit includes rotors, brake pads, calipers, and installation hardware – everything you need for a powerful braking upgrade you can only experience with this rotor, pad, and caliper kit.
Durable Construction. The rotors are made of G3000 castings and have been silver zinc plated for maximum protection from rust and corrosion. It’s also drilled and slotted to cool the rotors during harsh braking and also for safer and smoother braking. The calipers are made of cast-iron materials and powder-coated to protect them from corrosion. The shims are rubberized to allow noise-free braking while the carbon fiber-infused ceramic formula lessens the dust when braking.
Installation. This upgrade does not require any modifications to your vehicle and can be easily installed using its direct-bolt-on fitting method.
Warranty. A Limited 3-Year/36,000-Mile Warranty covers this product from defects in workmanship and materials.
Application. This PowerStop Z23 Evolution Sport Brake Rotor, Pad and Caliper Kit; Rear is designed to fit 2009-2020 Challenger GT, R/T, Rallye Redline and SXT with Dual Piston Front Calipers and Vented Rear Rotors; 2011 Challenger SE with Dual Piston Front Calipers and Vented Rear Rotors.
Information on PowerStop's proper Break-In Procedure can be found here: https://www.powerstop.com/brake-pad-break-in-procedure/
Fitment:
PowerStop KC1720
CA Residents: WARNING: Cancer and Reproductive Harm - www.P65Warnings.ca.gov
Installation Info
Installation Time
(approx) 3 Hours
Difficulty Level:
Light to Moderate mechanical skill required.
What's in the Box
10 More Questions