Talk to a Challenger Sales Tech
1-877-887-1105
M-F 8:30A-11P, Sat-Sun 8:30A-9P
$20K Sweeps! 10 Chances to Win! Enter Daily >

SR Performance Cold Air Intake (11-23 5.7L HEMI Challenger)

Item CH1044
Verify parts fit and get product recommendations.
Challenger Sales Techs: Connect Now M-F 8:30A-11P, Sat-Sun 8:30A-9P
$0.00
Our Price

$129.99

FREE Shipping Market Price $152.99 You Save 15% ($23.00) Up to 10% off for Military & First Responders! See Details

Will this fit your Vehicle?

Select a different vehicle Help?
Update or Change Vehicle
Ship to: Ashburn - 20149
Sorry, please enter a valid US or CA postal code
We're sorry, zip can't be updated at this time.
Recommended Install Shops
How It Works
Install Shops are available near Ashburn - 20149

Add Local Shop Installation

Total cost of service $175.00
    Create a list
    Add to New List

    Saved - View your saved items

    We're sorry. We couldn't save this product at this time.

      Product Videos

      Hey guys. Adam here with americanmuscle.com and today we're taking a closer look at and installing the SR Performance cold air intake for the '11 and newer 5.7 liter HEMI equipped Challengers. You should be checking this out if you're looking for the most budget-friendly cold air intake in the category, something to keep that cost down while still giving you an upgrade over your factory airbox. This comes with a very simple kit, not any of the bells and whistles you'd get from a $400 plus premium option but you're still getting a really decent package here. The big star of the show is going to be your filter. This is a big upgrade over your factory paper element filter. While it is a smaller conical filter than some of the ones in the category, it does have a washable and reusable quality to it. That's great for the guys not looking to have to pick up a new filter to replace their factory paper element one every time routine maintenance comes around. Pop this off, wash it, re-oil it, and throw it right back in. It is an oiled filter. Now in the category, there are oiled and there are dry filters. Now, they are within a 1% difference of performance between each other but I will say oiled filters are typically known to be able to filter out a little bit more of the dirt, dust, and particles that you don't want getting into your engine bay than a dry filter, but dry filters on the other hand are typically a better option for guys in dry weather climates seeing a lot more air pollution because oiled filters do get clogged up a little bit faster than dry. So it just requires a little bit more maintenance. When you pop it off, clean it up, you'll just re-oil it. It's as simple as that. It is a non-woven, synthetic filter here with a diamond wire mesh outer layer, making sure that it's trapping out some of those particles. This does come with that polished aluminum top, it does with a polished aluminum intake tubing as well. This is about as simple as it gets. But it does not have any kinks, it is a completely unrestrictive tubing. As you can see, straight through, like a straight pipe kind of exhaust here. No need to say mandrel bends because there is no bends to it. It's a straight pipe. This will connect to the elbow going to your throttle body and then the other end will have another coupler connecting to your filter. This does have a welded on nipple or hose fitting on the end here, so no need to install a separate fitting to connect to your new breather hose. That is going to be located here, replacing your factory one, and I'll talk about that a little bit later on when we get to installing it. Your heat shield is another billet aluminum black powder-coated heat shield. Black powder coating gives it a little bit more of a tougher look under the hood, blends it in a little bit more, and it is very durable. It's pre-bent, everything's taken care of for you, no need to make any modifications to it. The only thing that we will do is install our weatherstripping. The weatherstripping is going to seal that heat shield up under the hood and closing that filter, making sure it's trapping out all of the excess engine heat and focusing all its attention on the cold air. That's going to be a huge plus here. Now again, keep in mind, this system comes in right around a hundred bucks. It is the most affordable option in the category, which means that it does not have a completely closed airbox. It doesn't have the bells and whistles like I said earlier but it is very affordable. With I said, the install is going to get one out of three wrenches on our difficulty meter here. It's one of the easiest things you can do under the hood. With that said, what do you say we get started? Tools used in this install include an impact gun, a ratchet, 6 millimeter, 8 millimeter, 16 millimeter, and 17 millimeter deep sockets, and a 15 millimeter wrench. All right. Step number one for the uninstall, of course, just pop off your engine cover. Now of course, we're working with a 5.7. This may be a little bit different for the guys with a 6.1 but shouldn't vary too much. Just pop off that engine cover and just set it aside. Next up, we're going to do our sensor right on the side of the tubing that connects to the throttle body. It's really just a pinch and disconnect. From there, you actually want to remove the fitting for the sensor itself which you're just going to twist and pull straight back on. This is extremely sensitive, so set this aside and just make sure it's out of the way of any danger. Next up here, grab an 8 millimeter socket or a flathead screwdriver and we're just going to loosen up the clamp holding the intake tubing to the throttle body. From there, you should be able to just twist it up, pull this back. Before we can remove this, we have one more bolt to remove, as well as a hose, and then the whole thing will come off in one piece. All right. Next step is the bolt holding the factory heat shield to the front support. That's also an 8 millimeter. Just loosen that up and take that out. From here, we're going to disconnect the hose, the breather line on this end. Just going to wiggle it back and forth and pull it straight back. At this point, we should be able to disconnect this from the throttle body and pull it all up in one piece. All right. This will pull straight up, pull out of the throttle body. Can lift up on this end here, and we're just going to set all this aside. Now, this bracket was used to hold on that factory intake at the extension portion. So, we're just going to go ahead and remove it because we're not going to need it for our aftermarket intake. So, I'm going to take a 16 millimeter socket and just remove this bolt. At this point, you can grab a 15 millimeter wrench to hold the inside bolt. Grab your 16 socket again and just pop off the nut on the outside. This way, the bracket's out of the way but there isn't an open hole there. Just thread the bolt back in there and tighten up that nut. Well guys, we've finally got our factory airbox off of our '13 5.7 you see behind me sitting next to our SR Performance. And I know I gave you all the details of the new cold air intake kit, but I wanted to show you a side-by-side comparison just to give you a closer idea as to what's particularly changing. Your factory intake tubing is pretty kinked. As you can see, it has that flexible middle which can cause a pretty decent amount of air turbulence. Air turbulence is going to translate to robbed power. It's not going to provide you with as much power as it could with a straight tubing with no kinks and no air restrictions. That's going to be a huge replacement here. This is a larger diameter pulling in a lot more cold air and it's not going to restrict any of that air flow, streamlining it to your throttle body. The other thing I wanted to mention here is that factory airbox trapping in that flat paper element filter. While this does do a decent job blocking out excess engine heat, it's not going to maximize the space to pull in more cold air and invite more cold air in. It does go straight down into the inlet underneath but it's not very open for the air coming through the grille. That's not going to be the case here with your heat shield. It's going to be a little bit more inviting of that cold air while also blocking out some of that engine heat. So big upgrade there as well. We also have a velocity stack we're going to attach to our filter and we'll talk about that in just a little bit. For now, we're going to transfer our mass air flow sensor into the rubber grommet on our elbow. We're also going to assemble a few couplers on the ends of the tubing and then from there we'll talk about our heat shield. Step number one with assembling everything is to grab your factory mass air flow sensor and insert it into the rubber grommet on the elbow that will connect to your throttle body. If this grommet isn't all ready installed right out of the box, make sure you grab it from the kit and preinstall that before you get started on your mass air flow sensor. From here, insert your mass air flow sensor while holding the grommet from the inside as well. You're going to be twisting and pushing this through until it's in. Seat that right down to the O-ring and make sure it's facing the front toward your throttle body. Once that's secured in place, we can start moving on to attaching our couplers to our tubing. You want to grab the tubing and the elbow. You do have the option to install your elbow to the throttle body first and then the tubing in the vehicle. I actually like to do it on the table here though. Make sure you have a clamp over the end here. You can actually just slide it right onto the tubing itself and then connect the elbow and the tubing. You want to make sure that the hose fitting and the coupler are facing the same way. Slide that clamp into position, grab an 8 millimeter socket or a flathead screwdriver and tighten it down. Now for the other end going into the throttle body, connect that rubber adapter to the inside. It's going to help it take shape and have a leak-free seal on the throttle body. This end is also going to receive one of those clamps. We're going to loosely install it now. On the opposite end, you're going to have another coupler going into your filter. So before you install that, have another clamp on deck, slide that into place, and then your coupler. You want to make sure that it's only about half way in. You don't want to have it too far in so that you don't have enough room for the filter to attach. Once you have this in place, again, grab your socket or your flathead and tighten it down. On that other end, again, is going to be another clamp but we're going to loosely install that for now. The next step here is going to be with your heat shield. Now, there are two strips of weatherstripping, there's a smaller one and a longer one. The longer one is going to go right across the top here, smaller one across the bottom and this curve here. Now start at the top and just feed that across. They'll snap right into place. At this point, you can take the shorter weatherstripping and attach it to the side here where all these curves are on the heat shield. Now, what do you say we drop this into place? All right. First step under the hood is to grab the adapter that's going to go into the rubber grommet on the inside of your wheel well. Just going to push that down into place. Grab your heat shield and drop that in next. We're gonna drop it in from the inside here, connecting that to the factory mounting location and the bracket down low to that grommet we just installed. Take the 17 millimeter bolt provided in the kit and thread it onto that grommet. I'm going to thread it down all the way by hand just to make life a little easier. And then up top here is going to be that factory 8 millimeter bolt with that washer. Thread that down by hand. Grab a 17 millimeter socket and ratchet and tighten down that bolt on the inside of your wheel well. This is going to keep the heat shield secure. Grab an 8 millimeter socket and tighten down the top one. Next step is to drop your tubing into place and to ensure that it connects properly to the throttle body it might be easier to take the adapter out and actually put that around the throttle body, drop this into place and connect that. Drop that down and face it toward your heat shield. Grab an 8 millimeter socket or a flathead and tighten down the clamp around the throttle body. The next step is your filter and the velocity stack. Now, this is going to go in first. You want to make sure that this is oriented closer to the rad. That's going to go through the opening on the heat shield and connect to the coupler on the end of your tubing. From here, slide that clamp down to the end and tighten it down with your socket. All right. And now you can attach your filter to the other end and tighten that down as well. All right. There's only a few steps left but the next step is our breather hose. Step one for our breather hose is to completely remove the factory one. Just pull straight back and twist and that will detach. Set that aside, it will not be reinstalled. On this end here, you want to take one of the smaller hose clamps, put that over the edge, and pop that on over the factory fitting. Hose clamp on the other end, twist off the red cap on the welded on fitting on our tubing and put the hose into place there. Now, these are 6 millimeter clamps, so grab a 6 millimeter socket or a flathead and tighten them down. Last step of the process before we throw our engine cover back on is to grab your sensor harness, just clip that back in. Once that's taken care of and all your clamps are tightened down, put the engine cover back on. It might be a good idea to wash off or wipe off the polished tubing just to get some fingerprints off of it, get it looking nice and bright. So now, we're going to throw the cover back on. Once you snap that back in place, you're good to go. Well guys, that's going to wrap up my review and install for the SR Performance cold air intake. You can get your SR Performance intake right here at americanmuscle.com.

      Product Information

      Features, Description, Reviews, Q&A, Specs & Installation
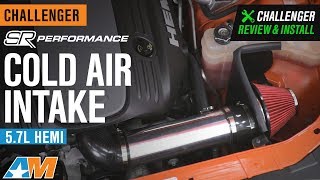
      Features & Specs

      • Improves Airflow for More Power
      • Increases Throttle Response and Performance
      • Polished Aluminum Intake Tube
      • Reusable High Flow Air Filter
      • Simple Bolt-On Installation
      • No Computer Re-Tune Required
      • Not CARB Certified
      • Fits 2011-2023 5.7L V8 Dodge Challenger Models

      Description

      Better Flow for More Power. A simple way to increase the power and performance of your 2011-2023 5.7L Hemi V8 Challenger is by installing a SR Performance Cold Air Intake. By replacing your Challenger's restrictive stock factory intake with a high flow filter assembly you will see and feel a noticeable increase in rear wheel horsepower and torque. This SR Performance Intake not only improves airflow for an increase in power, but it will also add a show winning appearance to the engine bay with its brightly polished aluminum intake tube.

      No Tune Required. SR Performance engineered their Cold Air Intake to improve the performance of your V8 Challenger without the need of reprogramming your computer. By utilizing flow dynamics, this Intake will increase power using the original factory tune. Even though a re-tune is not required for operation, AmericanMuscle recommends a custom tune to reprogram the vehicles computer (ECU) to get the best possible performance from this Cold Air Intake.

      Reusable Air Filter. The included high flow air filter effectively filters out power robbing particles with its multi layer design. The specially treated media creates a sticky surface to capture microscopic contaminants before they can enter your Challenger's engine and do harm. Seeing that the filter is reusable there is no need to buy a new filter every few thousand miles. You can just clean the filter, re-oil it, and reinstall - saving yourself money in the long haul.

      Simple Bolt-on Installation. SR Performance designed their Cold Air Intake kit to be a direct bolt-on replacement. With no special tools or extra modifications required installation can be completed in under an hour. All parts and detailed instructions are included.

      Not CARB Certified. This SR Performance Cold Air Intake is not CARB certified, therefore it is not legal for use in California or other states adopting California emission standards. Not legal for use on pollution controlled motor vehicles; intended for off road use only.

      Application. This SR Performance Polished Cold Air Intake System is specifically designed to fit the 2011-2023 Dodge Challengers equipped with the 5.7L Hemi V8 engine.


      SR Performance

      Fitment:

      Details

      SR Performance CH1044

      CA Residents: WARNING: Cancer and Reproductive Harm - www.P65Warnings.ca.gov

      Installation & What's in the Box

      Installation Info

      What's in the Box

      • (1) Intake Tube
      • (1) Heat Shield
      • (1) Air Filter
      • (1) 6-inch Hose Clamp
      • (1) 4-inch Offset Velocity Stack Adapter
      • (1) 4-inch Flex Coupler
      • (1) 90 Degree Coupler
      • (2) Rubber Seals
      • (1) 5/8-inch Breather Hose
      • (1) 1/2-inch ID Grommet
      • (1) 3.5-inch Hose Clamp
      • (3) 4-inch Hose Clamp
      • (2) #8 Mini Clamps
      • (1) 3/8-inch Bolt
      • (1) Rubber Insert
      • (1) 3/8-inch Washer
      4.4

      Customer Reviews (500+)

        Questions & Answers

        10 More Questions

        Will It Fit My Challenger

        • R/T - 11, 12, 13, 14, 15, 16, 17, 18, 19, 20, 21, 22, 23
        • R/T Classic - 12
        • R/T Plus - 15, 16
        • R/T Plus Shaker - 16
        • R/T Shaker - 16
        • T/A - 17, 18