FREE 2 or 3-Day Delivery on 10,000+ Items. Details

Talk to a Mustang Enthusiast
1-877-887-1105
M-F 8:30A-11P, Sat-Sun 8:30A-9P
$12k Summer Sweepstakes! Enter Daily >

Borla ATAK Cat-Back Exhaust with Black Chrome Tips (18-23 Mustang GT Fastback w/ Active Exhaust)

Item 405124
Call a Mustang Enthusiast at 1-877-887-1105
M-F 8:30A-11P, Sat-Sun 8:30A-9P
$0.00
Our Price

$2,448.99 (each)

FREE Shipping Market Price $2,864.99 You Save 15% ($416.00)

Will this fit your Vehicle?

Select a different vehicle Help?
Update or Change Vehicle
Ship to: Ashburn - 20149
Sorry, please enter a valid US or CA postal code
We're sorry, zip can't be updated at this time.
    Create a list
    Add to New List

    Saved - View your saved items

    We're sorry. We couldn't save this product at this time.

    or use

      Video Review & Installation

      Hey, guys. Adam here with americanmuscle.com. Today we're taking a closer look at, listening to, and of course installing our Borla ATAK cat-back exhaust with black chrome tips available for the 2018 and newer Mustang GT with active exhaust. And before we jump into things, guys, if you do not have an active exhaust-equipped S550, this one's not gonna be for you, but there are a ton of options in the category to fit your needs. If you do have an active exhaust-equipped S550, check this one out. Now, as you just heard from our sound clips, I'm giving this one the full five out of five on our loudness meter. The ATAK is known to be one of the loudest options in the category. And given that it does have an active exhaust, track mode is absolutely no joke. Now, let's start at quiet mode. As you heard there from those sound clips, it's pretty tamed. I'd say quiet mode on the Borla ATAK sounds more like the regular exhaust in normal mode. Now, that does say a lot. Now, I will say it might not wake your neighbors, but it's definitely gonna be louder than your typical exhaust. Normal and sport mode, I'll say, are pretty similar. They don't have too much of a difference, although sport mode of course just has one little bit higher of a frequency there, and then track mode is just all out bark at both idle and wide open throttle. If you start your car and put it right in track mode, pulling out the driveway in the morning, expect to wake all the neighbors. It's got a loud bark, deep, throaty, aggressive tone, and quite a bit of backfire. Backfire also happens in a lot of the modes with the exception of quiet. Now, all of this is coming through the ATAK mufflers, the Acoustically-Tuned Applied Kinetics mufflers, which I'll jump into that technology a little bit later on comparing it to our stock one. Now, the whole system here is 304 stainless steel, 3-inch mandrel bent tubing, so, highest quality on the market, 3 inch is definitely a little bit bigger than your factory one, giving you a better airflow. And it also has an X-pipe to replace that factory resonator for horsepower and torque gains with a little bit better of an airflow, less restriction. The whole kit does come in right around the $2,000 mark, a little under the $2,000 mark to be honest. And, guys, you know, that's a pretty tough price tag, but, it comes with all of the quality. The active exhaust do cost a little bit more than the non-active. And Borla, again, being a more premium brand, it's what you'd expect. But you get a lot of sound with this. The four different modes giving you pretty decent and pretty various tones to go with. So, there is a lot packed into that price tag. And the fact that it has the stealthy black chrome tips, I think looks really good on the 2018 and newers. Now, install, I'm giving two out of three wrenches on our difficulty meter. Anybody can tackle it in the driveway at home with very simple hand tools. I give it two out of three just because it is a little bit more involved than, say, a simple cold air intake, or a simple decal. I'll walk you through every step of the process. Now, it takes about two, maybe three hours from start to finish. What do you say we get started? The tools used in this install include an impact gun, an extension, a ratchet, 10, 13, and 15-millimeter deep sockets, 10-millimeter wrench, a mallet, and PB'Blaster, or WD-40. So the first step of our install here is actually pretty simple. We're gonna start at the complete back-end of our 2018. We're actually gonna disconnect the active exhaust valve actuators right on the top side of our exhaust tips. So really, from here, we're gonna stick our hand straight up. The plug is right up here. You just pull back on the locking tab, pinch, and release. Now we can do the same thing on the other side. This is our plug. I'm gonna push back on the locking tab, pinch, and pull straight back. The next step here is to grab a 15-millimeter socket and head back by your factory resonators connecting to essentially what are your stock manifolds. Now, what we're gonna do is loosen up these two clamps. There's two bolts each. And from there, we'll be able to remove the hangers from the back-end. But for now, let's loosen these up. Next step, we're gonna go under our subframe right behind the diff, and we're gonna remove the brackets that connect our factory hangers to the frame itself. Now, I find this easier to just unbolt it from the 13-millimeter bolts, rather than trying to slip the hangers out of the isolators, then we can just transfer them over to our new pipes later on. So I'm gonna grab an extension and a 13-millimeter socket. I'm gonna go right on over our rear sway bar, and I'm gonna pop these bolts off. Now, what I like to do, once the bolts are removed, is to lift up and pop the bracket off of the subframe and just rotate them down. At this point, we have everything disconnected. What we're gonna do is bring in a helping hand. My buddy, Joe, is gonna help me get this exhaust off the car all in one piece. I'm gonna start by disconnecting the couplers back here by the headers or the factory manifolds, then we're gonna slide them out of the hangers, and we're gonna set it all aside. So we got our factory exhaust off of our 2018 GT sitting on the ground next to our Borla ATAK. I want to take you guys through some of the similarities, but mainly the differences between the two kits, and we're gonna start up front. Now, looking at the factory exhaust, we have that resonator right after our factory manifolds or your headers. That resonator there is gonna help minimize some of that sound. It's gonna reduce some of the power output that you would otherwise get with an aftermarket exhaust. So, switching over to the aftermarket X-pipe is gonna do wonders for the power and sound potential from your 5.0. That X-pipe having the welded center together has that streamlined airflow capability, which can increase that power there. And, with the entire kit having that 3-inch diameter and having three or four stainless steel with mandrel bent tubing is definitely gonna help increase that and reduce some of the kinks you would find in your factory exhaust, which would slow down that airflow. Now, moving on, you would go straight down, you see pretty much the exact same positioning, all the way down to your hangers. The hangers are in the exact same positioning. We will have to transfer over those brackets to our new pipes, but, we'll tackle that in just a little bit. Before we get to our mufflers, you'll notice this little section here that has four individual tubes all welded together, those are the polyphonic harmonizers. Now, that's built into the Borla exhaust, it's a patented technology from Borla there to help you get that quality tone that you would expect with a Borla system. This is one of their more advanced technologies being built into the newer models that they're releasing. The polyphonic harmonizers essentially use different size tubing to produce different tones at different RPM. Now, this is a pretty new technology, so we'll see more advancements from Borla in the coming gens with their exhaust, but this one here, it's gonna help produce that tone throughout the RPM band. And with different sizes, you can expect different results. Now, the Borla ATAK muffler are a huge, huge change from the factory option with a ton of baffling. This here is the ATAK. Now, the ATAK is responsible for exactly what you heard in our sound clips. Now, the Acoustically-Tuned Applied Kinetics exhaust or the ATAK muffler here, the whole goal is to give you the most volume and quality of sound without distorting at the higher volumes. So, typically, when you have those five out of five on the loudest speeder options like this one here, you start to lose some of the quality of the sound once you hit higher decibel readings at the higher end of the RPM band. But that's not really the case with the ATAK. They're focusing on quality throughout the RPMs, even at wide open throttle. So, Acoustically-Tuned Applied Kinetics, a patent technology from Borla, and the quality of that really shows in our sound clips. Now, at the end here is something that's gonna be more noticeable coming out the rear end, is your twin black tips. Now, you get two 4-inch black tips on each side. They look amazing, they're gloss black, huge upgrade from the really skinny, really unattractive slash cut tips from the factory. You're retaining that quad functionality, so it looks great coming out of that quad tip rear valance, but give you that stealthier appearance. Now, I want to show you guys how this whole thing gets installed. And I'm gonna kick things off by transferring over the brackets from our hangers to our new Borla exhaust. And then before we get to the install of our X-pipe, we'll reinstall the factory clamps to our manifolds on the car. All right, to transfer over these brackets, all you need is a hanger removal tool to make life easier. You can do it by hand. I just think this makes life easier. So you're gonna put this right on, pop them right off, simple enough, and just swap them over. Now, when you reinstall these to your new exhaust hangers, make sure this little tab here is facing the front of the vehicle. All right, now we do have to transfer over our actuators from the factory exhaust right above our tips. This is what's gonna control that butterfly valve relaying the active exhaust mode. So grab a 10-millimeter socket and a ratchet and pop these off. You're gonna reuse these little nuts, so keep them handy. Now, when you take this entire thing off, there's a spring directly under it. You wanna make sure that you're keeping the spring in exactly the same position when you take it off. You don't want that to move, so pull straight back, keeping that spring on because it does come off, and transfer over exactly like it is here. Now, this is gonna seat this little hump inside of that there. There are two little notches, one on each side, that's gonna hug the top of the spring. Now, if it doesn't line up, you can adjust that seat to go in the same direction. I can see down in this little opening here that the spring sat in that little notch. You wanna grab your 10-millimeter nuts and tighten them down to the studs while that spring is still seated. Now, for these, you wanna grab a 10-millimeter wrench as well to hold the bottom of that stud and tighten them down. Perfect. Now, repeat this for the other side. Step number one, we're gonna take our factory band clamps off of our factory cat-back and put them over the ends of our stock manifolds. And you wanna make sure you're keeping this retainer pin in line with that bolt welded to the side. So we're gonna just slide this into place until they match up. Do the same thing for the other one. Next step, take your X-pipe, making sure you have the adapters, put it into the 3-inch inlets, and you have a clamp on each end. Insert this over the band clamps you just put back on your factory manifolds. Grab your 15-millimeter socket and tighten down the clamps. At this point, you can rotate these clamps upward and do the same thing to them. Next step, take your passenger side pipe and insert that into the X-pipe we just installed, making sure you have a clamp on the end. Seat that as far back as you can. Grab your 15 socket and tighten down this clamp. Now, what I'd recommend doing is making sure you're not over-tightening them. You wanna get it nice and snug so it holds itself in place, but you want to leave a little bit of room for adjustment in case you need to move it around later on. All right, we're gonna do the same thing for our driver side. Next step here, rotate these brackets upward and hang them back on our subframe. Now we can grab the factory 13-millimeter bolts and put them back in place. Grab your 13-millimeter socket and extension and tighten down the bolts. Next step is our tips. We're gonna start on our passenger side. Slide our hanger in first, then line up our pipe. All right. Now we can worry about making adjustments in just a little bit, just get your pipe lined up. If you need to, you could slide the pipes forward to get them to come out a little bit further. All right. From here, we can tighten down that clamp. Repeat for the other side. Last two steps, just plug in both actuators. So, grab your factory harness, find the plug receiver. Once you have that, push it in place, drop down the locking tab, and repeat for the other side. Well, guys, that's gonna wrap up my quick overview, install, and sound clip for the Borla ATAK cat-back exhaust with the black chrome tips for the '18 and newer Mustang GT with active exhaust. You can pick this one up for around 2 grand right here at americanmuscle.com.

      Product Information

      Features, Description, Reviews, Q&A, Specs & Installation

      Features

      • Hardcore ATAK Cat-Back Exhaust
      • Rowdy, Aggressive ATAK Tone
      • Dramatically Increases HP and Torque
      • 3 inch Stainless Steel Tubing
      • Four 4 inch Black Chrome Tips
      • Direct Bolt-On Installation
      • Million Mile Limited Warranty
      • Fits 2018-2023 Ford GT Mustang Fastbacks with Active Exhaust

      Description

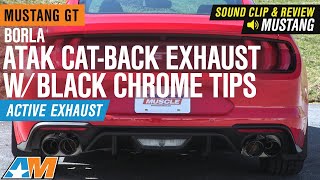
      Impressive Sound. Instead of settling for your 2018-2023 Ford Mustang GT's subpar stock sound, put yourself above the rest and give your Pony the noise it deserves by installing Borla's ATAK Cat-Back Exhaust with Black Chrome Tips. By creating a rowdy, aggressive sound with an ATAK design, this exhaust ensures your Pony sounds just as muscular as it looks so you turn heads wherever you go.

      Powerful Performance. Not only does this ATAK Cat-Back Exhaust ensure your Mustang attracts attention with its rumble, but it also provides the impressive performance boost you need to stay at the front of the pack around every turn. Improving both your horsepower and torque, the exhaust manages to give your Mustang the upgrade it needs to truly maximize its superior performance potential.

      Maximum Durability. To prevent serious and expensive damage to your exhaust, this part is constructed from 3 inch stainless steel tubing that is guaranteed to resist rust and corrosion. Its durability even extends to its four 4 inch black chrome tips that add serious style to the rear of your Mustang for an eye-catching look.

      Installation. This exhaust bolts directly to your Mustang for a straightforward installation. Those with moderate mechanical skills will be able to secure it in just 2 hours.

      Warranty. Backed by a million mile limited warranty, this exhaust is protected from defects. Some limitations apply, so see the full warranty for details.

      Application. Borla's ATAK Cat-Back Exhaust with Black Chrome Tips is made to perfectly fit all 2018-2023 Ford Mustang GT Fastback models equipped with Active Valve Exhaust.

      Fitment:

      Details

      Borla 140743BC

      CA Residents: WARNING: Cancer and Reproductive Harm - www.P65Warnings.ca.gov

      Installation & What's in the Box

      Installation Info

      What's in the Box

      • (1) Cat-Back Exhaust
      • Exhaust Tips
      4.9

      Customer Reviews (500+)

        Questions & Answers

        10 More Questions

        Will It Fit My Mustang

        • Bullitt - 19, 20
        • EcoBoost - 23
        • GT - 18, 19, 20, 21, 22, 23
        • Mach 1 - 21, 22, 23

            Related Mustang Categories